
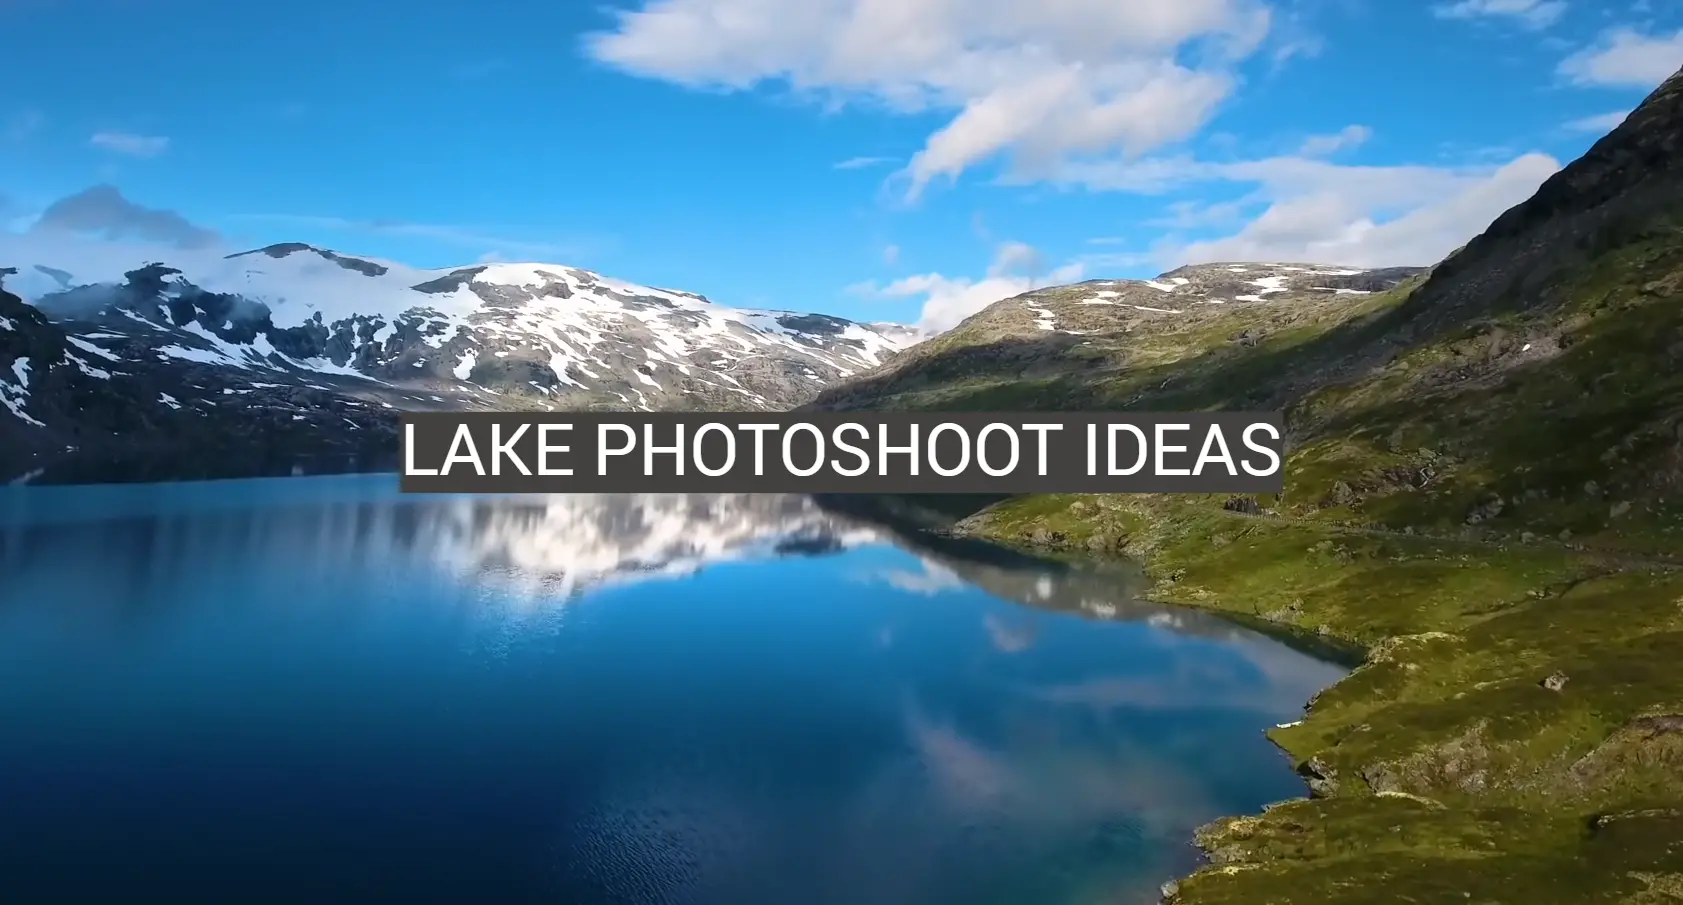
Capturing the beauty of a lake in a photoshoot is a fantastic way to blend nature’s splendor with artistic expression. Whether you’re a professional photographer seeking inspiration or an amateur looking to explore your creative side, lake photoshoots offer an abundance of opportunities to capture breathtaking images.
From serene sunrises to vibrant sunsets, mirror-like reflections to dramatic landscapes, lakes provide a captivating backdrop that can elevate your photography to new heights. In this article, we will delve into a diverse range of lake photoshoot ideas, exploring different themes, styles, and techniques to help you create stunning compositions. We will discuss the importance of planning and scouting locations, ensuring you find the perfect lake that suits your vision.
Furthermore, we will explore various aspects of lake photography, including working with natural light, incorporating props and subjects, and utilizing different perspectives to add depth and interest to your shots. Whether you’re aiming for a romantic couple’s shoot, a serene nature-inspired session, or an adventurous concept, we will provide you with a plethora of ideas to spark your creativity.
How To Prepare For A Lake Photoshoot:
Rent A Location With Lake Access For Your Photoshoot
This will make it easier to capture the lake in all its natural beauty and will save you time on set-up and break down. Also, consider the season when selecting your location as some areas may be too cold or hot during certain times of the year.
Choose Your Best Equipment For The Shoot
Your equipment is an essential factor when executing any photoshoot; this should especially be taken into account for a lake shoot. Make sure that you bring your best camera and lenses that are up to par with the environment, including water-resistant gear if necessary. You’ll also need plenty of storage space, either onsite or offsite, to make sure you don’t miss out on any great shots.
Plan Your Lighting Setup
Lighting can drastically change the look and feel of your photos. If you’re shooting during the day, plan for a lot of natural light to capture beautiful shadows and colors in the lake. If you’re using artificial lighting, take into account how it will interact with the environment around you as well as how it will affect the subjects in your photos [1].
Consider Early Morning/Late Evening Photoshoot Sessions
Early morning and late evening are some of the best times to capture stunning shots at the lake. The sun is low in the sky and creates a golden, soft light that makes for beautiful photos. However, keep in mind that if you’re shooting during these times, you may have to factor in more time for set-up and breakdown as it gets darker earlier.
Be Prepared For Different Weather Conditions
As with any outdoor shoot, weather conditions can change quickly and often unexpectedly.
Prepare Waterproof Cases For Your Gear and Lighting
If you’re shooting near the lake, make sure that your is well-protected from potential water damage. Invest in waterproof cases and covers for all of your gear and lighting, just in case an unexpected wave comes crashing onto the shore. This will help keep your equipment safe if something unexpected happens during the shoot.
Beautiful Lake Photoshoot Ideas:
Sitting on the Dock Staring Out at the Water
Start your photoshoot with a simple yet captivating concept. Have your subject sit on a dock, gazing pensively at the water. This serene and contemplative pose can evoke a sense of tranquility and introspection.
Floating Air Mattress on the Lake
For a whimsical and dreamy photoshoot, capture the floating beauty of an air mattress on the lake. Experiment with different angles and perspectives to highlight the tranquility and sense of adventure this scene can offer.
Take Photos Near Sunrise and/or Sunset
The golden hours of sunrise and sunset provide magical lighting conditions that can transform a lake into a captivating canvas. The warm hues, soft light, and long shadows during these times create a dreamlike atmosphere, perfect for capturing breathtaking images.
Mid-Air Jumping into the Water Photos
Inject energy and excitement into your lake photoshoot by capturing mid-air jumps into the water. Freeze the moment when your subject is suspended in the air, creating a dynamic and exhilarating shot that embodies the joy of being by the lake.
Take Photos During Different Kinds of Weather
Don’t let the weather limit your photoshoot opportunities. Embrace the ever-changing moods of the lake by capturing images in different weather conditions. From misty mornings to dramatic stormy skies, each weather element adds a unique touch to your compositions.
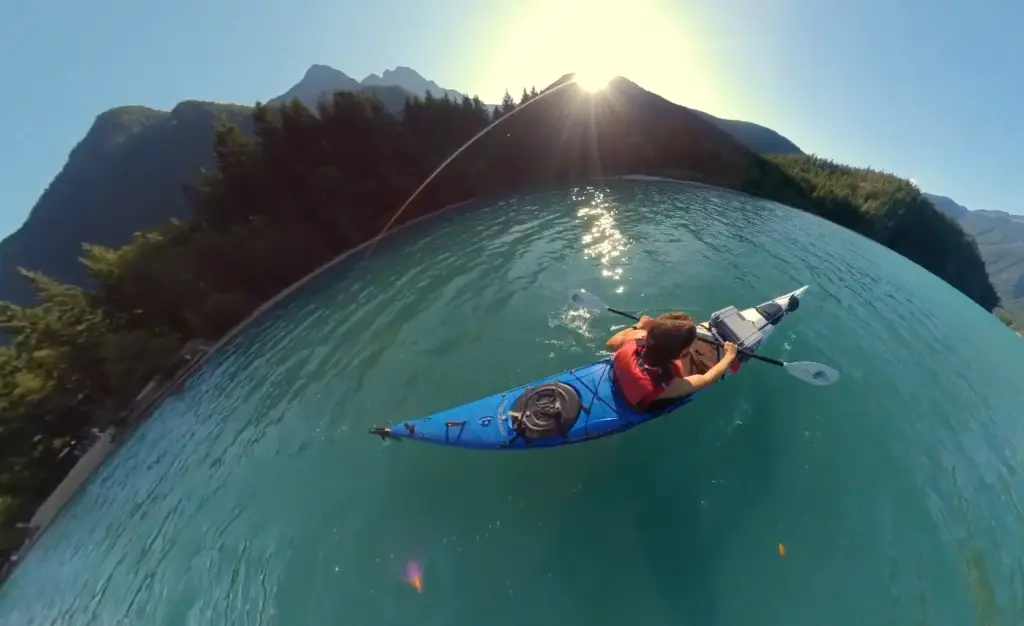
Get Out on the Water and Take Photos
To capture a fresh perspective, consider getting out on the water itself. Rent a boat, kayak, or canoe and explore the lake from a different vantage point. This allows you to photograph the shoreline, distant vistas, and even capture reflections on the water’s surface.
Water Activities Photos
Highlight the fun and adventurous side of lake life by photographing various water activities. Whether it’s swimming, paddleboarding, or sailing, capturing people engaged in these activities adds dynamism and excitement to your shots.
Focus on Lake Wildlife
Lakes are often teeming with wildlife, providing ample opportunities for nature photography. Capture the elegance of swans gliding across the water, the graceful flight of birds, or the curious gaze of a deer coming to the water’s edge. Patience and a telephoto lens can help you capture these beautiful creatures up close.
Mermaid of the Lake Photoshoot
Tap into the realm of fantasy by organizing a mermaid-themed photoshoot. Choose a beautiful lakeside location and dress your model in a mermaid tail. Play with light, water reflections, and flowing fabrics to create a magical and enchanting atmosphere.
Candid Fishing Photoshoot
If you’re looking to capture authentic moments, try a candid fishing photoshoot. Photograph a person casting a line or patiently waiting for a bite. Candid shots can reveal the serenity and peacefulness of the lake, as well as the joy of a successful catch.
Water Drop Photography
Add an artistic twist to your lake photoshoot by focusing on water drop photography. Experiment with capturing water droplets falling into the lake or ripples forming on the water’s surface. This technique can result in abstract and visually striking images.
Long-Exposure Landscapes
Utilize long-exposure techniques to capture ethereal landscapes. By using a slow shutter speed, you can create silky smooth water surfaces, blurring the motion of waves and creating a sense of calm and stillness. Combine this with the beautiful scenery of the lake, such as mountains or trees in the background, to create a captivating and serene composition.
Freezing Objects
Take advantage of the lake’s reflective surface to experiment with freezing objects in motion. Capture splashes, drops, or even skipping stones as they interact with the water. The juxtaposition of frozen moments against the fluidity of the lake can create visually striking and dynamic images.
Rain on the Lake
Don’t let a rainy day deter you from your photoshoot. Embrace the beauty of raindrops on the lake’s surface and capture the unique atmosphere it creates. Experiment with reflections, umbrellas, and rain-soaked landscapes to add a touch of drama and mystique to your images.
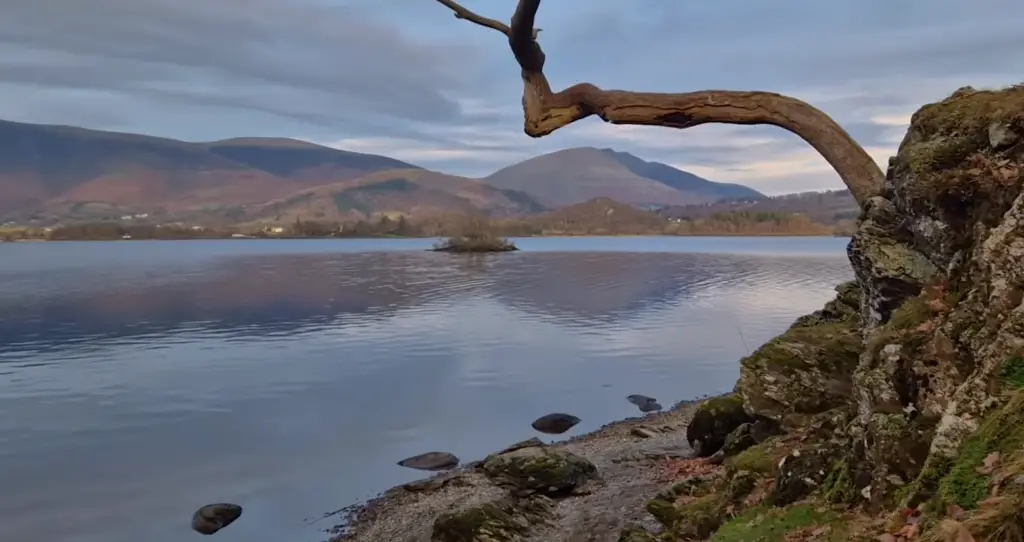
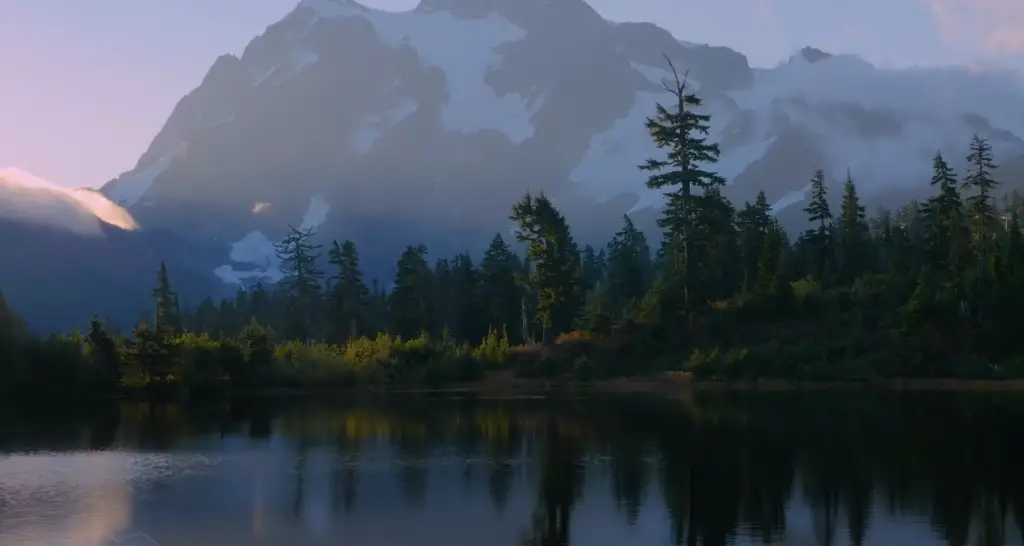
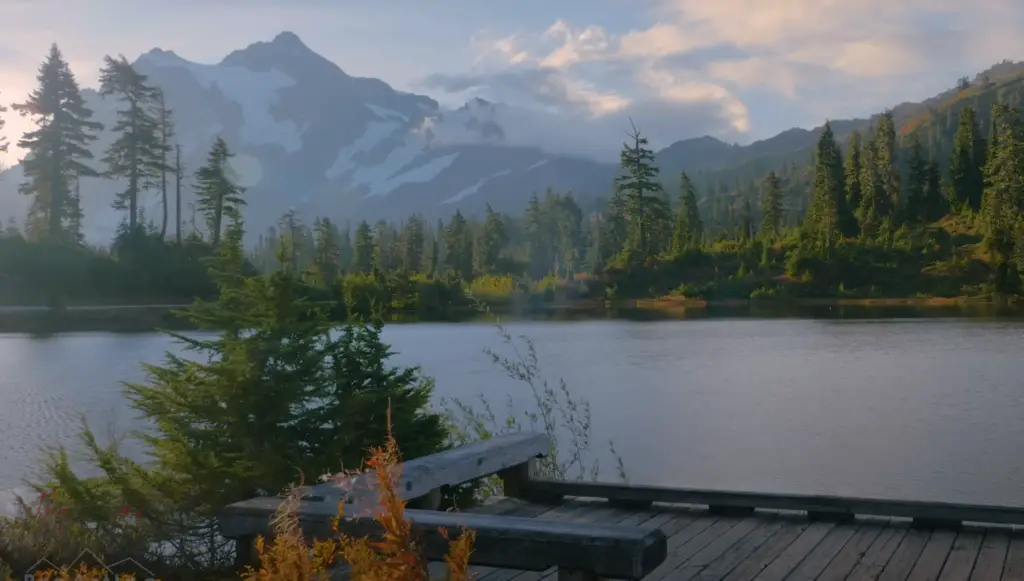
Catch Those Reflections
Utilize the lake’s mirror-like surface to capture stunning reflections. Look for interesting elements such as trees, mountains, or clouds that can be mirrored in the water. Reflections can add depth and visual interest to your compositions, creating a sense of symmetry and harmony [2].
Underwater Shoot
Take your lake photoshoot beneath the surface by exploring underwater photography.
From aquatic plants to fish swimming gracefully, the underwater realm of the lake offers a unique and captivating perspective.
Splash Photography
For a dynamic and playful photoshoot, focus on capturing splashes in the lake. You can photograph people jumping, skipping stones, or throwing objects into the water to create captivating moments frozen in time. Experiment with different shutter speeds to capture the perfect splash.
How To Photograph Portraits & Water:
In The Water
One of the most popular ways to capture stunning lake photography is by shooting portraits in the water. This creates an ethereal and dreamy effect, with light reflecting off of the surface and refracting through the waves. When taking photos in a body of water, it’s important to consider the lighting and composition as you would for any other portrait photo. Avoid harsh shadows and flares from direct sunlight, opt for a diffuser or reflector if needed, and watch out for reflections when placing your subject in the water. Don’t be afraid to experiment with different angles – shots taken from above or below can be particularly eye-catching.
Around The Water
In addition to shooting directly in the lake or sea, don’t forget to take some photos around the water’s edge. Here, you can make use of natural elements like rocks, vegetation, and wildlife to add depth and interest to your photos. If you’re using a DSLR camera with a zoom lens, try shooting from further away for unique perspectives that show the size of the lake in relation to its surroundings. Taking advantage of landscape photography techniques is also helpful here – consider long exposure shots for beautiful silky water or panoramic views for a grand sweeping vista.
Document By The Sea
Although a lake photoshoot may be designed to celebrate a special occasion or milestone, don’t forget to document the everyday moments that make up your time spent by the water. Whether it’s fishing off the pier or playing with sticks on the beach, capturing these minor details will make your photos even more memorable and meaningful. For an extra personal touch, add in handwritten notes or captions documenting who was present and what they were doing.
Get Creative
Finally, get creative with your lake photoshoot ideas! If you’re feeling brave, why not try underwater photography or a session on a boat? Or if you’re more of an artist than a photographer, consider incorporating props like colorful umbrellas or boats and making the lakeside your own personal canvas. The possibilities are – so don’t be afraid to experiment and create something unique [3]!
Dramatic Water
Nothing quite compares to the drama of a lake photoshoot. With stunning landscapes and reflections, you can capture stunning photos that will last a lifetime. Whether you’re shooting portraits in the water or around its edges, don’t forget to document the everyday moments too – they make up some of your most treasured memories! And finally, get creative with your ideas and make the lake your own personal canvas if you feel inspired. With careful planning and a bit of luck, you can create something truly amazing!
How To Photograph Water & Landscapes: Tips
Freeze Wave Action
To capture the dynamic and powerful nature of waves, use a fast shutter speed to freeze the action. This technique allows you to capture the details and textures of crashing waves, creating dramatic and energetic photographs. Experiment with different angles and perspectives to find the most compelling composition.
Shoot Abstract Water Images
Water can create mesmerizing abstract patterns and textures. Look for areas with swirling currents, ripples, or bubbles to capture these unique and artistic images. Use a longer exposure time to blur the water and create a dreamy and ethereal effect.
Get In the Water
For a fresh perspective, consider getting in the water yourself. Use waterproof equipment or housings to capture images from within the water, creating a unique vantage point. This allows you to capture the water’s movement and its interaction with the surrounding landscape.
Search for Spinning Foam along Rivers
Rivers and streams often create spinning foam as water cascades over rocks and obstacles. These swirling patterns can be captivating subjects for photographs. Look for areas where the foam gathers and experiment with different angles and focal lengths to capture the intricate details.
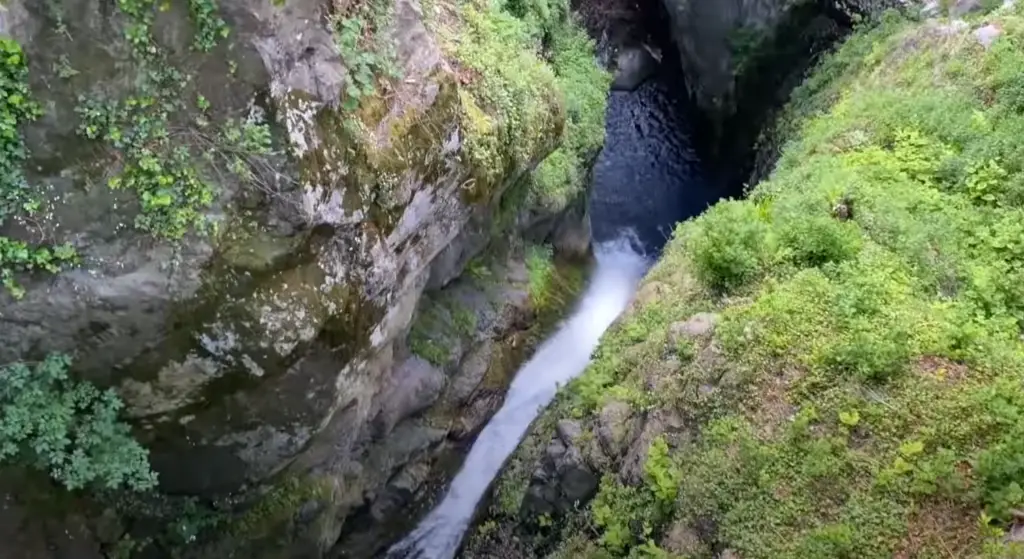
Use Water Movement to Create Leading Lines
Water can naturally create leading lines that draw the viewer’s eye into the frame. Look for waterfalls, rivers, or even flowing streams that can guide the viewer’s gaze through your photograph. Utilize these leading lines to create depth and visual interest in your compositions.
Shoot Reflections
Reflections on water surfaces can add a sense of tranquility and symmetry to your photographs. Look for calm bodies of water that reflect the surrounding landscape, such as mountains or trees. Experiment with different angles, compositions, and focal lengths to capture stunning reflections.
Use ND Filters to Control Exposure Time
Neutral density (ND) filters are essential tools for controlling exposure time in water and landscape photography. These filters reduce the amount of light entering the lens, allowing you to use longer exposure times even in bright conditions. This is particularly useful when photographing waterfalls or rivers, creating a silky smooth effect in the flowing water.
Select the Right Exposure Time
Choosing the appropriate exposure time is crucial in water and landscape photography. A shorter exposure time freezes motion, capturing details in fast-flowing water or capturing the textures of rocks and vegetation. On the other hand, a longer exposure time creates a sense of movement and smoothness in water, resulting in a more ethereal and dreamy effect.
Plan Around “Golden” Hour
Golden hour, the period shortly after sunrise or before sunset, provides soft and warm light that enhances the beauty of water and landscapes.
Experiment with Different Perspectives
Don’t be afraid to experiment with different perspectives to capture unique and compelling images. Get low to the ground, climb a nearby hill, or use a drone to shoot from above. Changing your viewpoint can transform a mundane scene into a visually captivating composition.
Capture the Details
Water and landscapes are filled with intricate details that often go unnoticed. Look closely at rocks, pebbles, and vegetation near water sources. Capture the textures, patterns, and vibrant colors that can add visual interest and a sense of intimacy to your photographs.
Pay Attention to the Foreground
The foreground plays a crucial role in creating depth and adding visual interest to your water and landscape photographs. Look for interesting elements such as rocks, flowers, or fallen branches that can serve as a foreground anchor. Including these elements in your composition adds a sense of scale and draws the viewer’s eye into the image [4].
Use a Tripod
A sturdy tripod is an essential tool for water and landscape photography. It helps ensure sharp and steady images, especially when using longer exposure times. Additionally, using a tripod allows you to carefully compose your shots and make precise adjustments without worrying about camera shake.
Capture Intimate Landscapes
While grand vistas are impressive, don’t overlook the beauty of intimate landscapes. Focus on smaller scenes within the larger landscape, such as a close-up of a flower or a single rock surrounded by water. These intimate compositions can reveal hidden beauty and tell a unique story.
Experiment with White Balance
Water and landscapes can be greatly affected by the color temperature of light. Experimenting with different white balance settings can dramatically change the mood and atmosphere of your photographs. Try adjusting the white balance to warmer tones for a golden and serene effect, or cooler tones for a more tranquil and icy feel.
Incorporate People or Wildlife
Adding human or wildlife elements to your water and landscape photographs can create a sense of scale and narrative. A person exploring the shoreline or wildlife interacting with the water can bring a dynamic and relatable element to your images. Be patient and observant to capture these moments as they unfold naturally.
Post-Processing
Post-processing is an essential step in enhancing your water and landscape photographs. Adjusting exposure, contrast, and color balance can bring out the best in your images. Be mindful of not over-editing, and strive to maintain the natural beauty of the scene you captured.
Be Prepared and Patient
Water and landscapes are constantly changing, influenced by factors such as tides, weather, and light conditions. Being prepared and patient is key to capturing that perfect shot. Visit the location beforehand, research the best times for optimal lighting, and be prepared to wait for the ideal moment when all the elements align.
FAQ
1. How to make the water look misty in photographs?
To create a misty effect in water photography, you can use a longer exposure time. Set your camera on a tripod to keep it steady, and choose a slower shutter speed. This allows the moving water to blur, creating a soft and ethereal look. You can also enhance the misty effect by shooting during foggy or misty weather conditions.
2. How to get the silky water effect in water photography?
To achieve the silky water effect, you need to use a longer exposure time. Again, using a tripod is essential to keep the camera steady. Select a slower shutter speed, typically ranging from a few seconds to several minutes, depending on the desired effect and the speed of the water. The longer exposure smoothes out the water’s motion, creating a silky and smooth appearance.
3. How to capture flowing water?
To capture the flow of water, it’s best to use a slower shutter speed. This allows you to emphasize the movement and convey the sense of motion in your photographs. Experiment with different exposure times to achieve the desired effect. Additionally, composing your shot to include leading lines created by the flow of the water can further enhance the sense of movement.
4. What is the perfect shutter speed for photographing waterfalls?
The perfect shutter speed for photographing waterfalls depends on the desired effect. Generally, a slower shutter speed, such as around 1/4 to 2 seconds, is ideal for capturing the smooth and flowing effect of the water [5]. However, this can vary depending on the speed of the waterfall and the amount of water cascading down. Experiment with different shutter speeds to find the perfect balance.
5. How do you take good pictures of a lake?
To take good pictures of a lake, consider the composition and lighting. Look for interesting elements such as reflections, wildlife, or unique features of the lake’s surroundings. Pay attention to the placement of the horizon and use leading lines to create depth in your composition. Additionally, shooting during the golden hour (shortly after sunrise or before sunset) can provide beautiful soft light and warm tones.
6. What do you wear to a lake photoshoot?
The choice of attire for a lake photoshoot depends on the desired style and the overall theme you want to convey. Opt for comfortable clothing that suits the setting, such as casual outfits, summer dresses, or swimsuits if you plan to go in the water. Choose colors that complement the natural surroundings and consider bringing layers or accessories to add visual interest to your photos.
7. What is the best color for lake photos?
The best color for lake photos depends on personal preference and the overall mood you want to convey. Soft and natural tones, such as blues, greens, and earthy hues, often work well to complement the serene and tranquil ambiance of a lake.
8. Why is water photography good?
Water photography offers a unique and diverse subject matter that can evoke a range of emotions. Water is an essential element of life, and capturing it in different forms, such as waves, waterfalls, or reflections, can create visually striking and captivating images. Water photography allows you to explore the interplay of light, motion, and textures, offering endless opportunities for creative expression.
9. What is the best camera depth for a lake?
The best camera depth for a lake depends on the desired perspective and composition. Shooting at eye level or slightly above the water’s surface can provide a natural and immersive view. However, you can also experiment with different heights and angles to capture unique perspectives, such as shooting from a low vantage point to emphasize foreground elements or from a higher position to showcase the vastness of the lake.
10. What types of images are formed in a lake?
A lake can present a variety of photographic opportunities. Some common types of images formed in a lake include:
- Reflections: Lakes provide calm and still surfaces that can create stunning reflections of the surrounding landscape, such as mountains, trees, or clouds. These reflections add depth and visual interest to your photographs;
- Wildlife: Lakes are often home to a diverse range of wildlife, including birds, fish, and other aquatic creatures. Capturing images of these animals in their natural habitat can result in captivating and storytelling photographs;
- Water activities: Lakes are popular destinations for water activities such as boating, kayaking, or swimming. Photographing people engaged in these activities can capture the joy, energy, and sense of adventure associated with the lake;
- Sunrises and sunsets: The tranquil setting of a lake combined with the warm hues of a sunrise or sunset can create breathtaking images. The soft light, vibrant colors, and atmospheric conditions during these times can add a touch of magic to your photographs;
- Landscapes: Lakes are often surrounded by scenic landscapes, such as mountains, forests, or meadows. These landscapes provide a picturesque backdrop that can be the focal point of your images or serve as a supporting element in your compositions;
11. What is the best setting for water photography?
The best settings for water photography may vary depending on the specific conditions and desired effect. However, here are some general guidelines to consider [6]:
- Use a low ISO setting (e.g., ISO 100 or 200) to maintain image quality and minimize noise.
- Select a smaller aperture (higher f-number) to ensure a larger depth of field and keep both the foreground and background in focus.
- Adjust the white balance to match the lighting conditions or experiment with different white balance settings to create different moods and color tones.
- Use a tripod to keep the camera steady, especially when using slower shutter speeds.
- Experiment with different shutter speeds to capture the desired effect, whether it’s freezing motion, creating silky water, or emphasizing the flow of water.
12. How do you make the water look milky in pictures?
To make the water look milky in pictures, you need to use a longer exposure time. This can be achieved by setting a slower shutter speed, typically ranging from a few seconds to several seconds or even minutes. The exact duration depends on the speed of the water and the desired effect. By using a tripod to keep the camera steady, the longer exposure blurs the movement of the water, creating a smooth and milky appearance.
13. How can I look naturally photogenic?
To look naturally photogenic, focus on being comfortable and relaxed in front of the camera. Here are a few tips:
- Be confident: Embrace your unique features and let your personality shine through. Confidence can make a significant difference in your appearance;
- Find your best angles: Experiment with different poses and angles to determine which ones flatter you the most. Practice in front of a mirror to discover your most flattering facial expressions and body positions;
- Smile genuinely: A genuine smile can instantly make you look more approachable and photogenic. Relax your face, think of something positive, and let your smile reach your eyes;
- Posture and body language: Pay attention to your posture and body language. Stand tall, elongate your neck, and avoid slouching. Good posture can enhance your overall appearance and convey confidence;
- Relax and have fun: Enjoy the process of being photographed. When you are relaxed and having fun, it reflects in your photos and makes you look more natural and photogenic;
14. What color stands out most in a lake?
The color that stands out most in a lake can vary depending on factors such as the time of day, weather conditions, and the lake’s surroundings. However, a few colors often stand out in lake photography:
- Blue: Blue is a common color associated with water, and it can stand out beautifully in lake photos. The shades of blue can range from deep and vibrant to soft and tranquil, depending on the lighting and water clarity;
- Green: If the lake is surrounded by lush vegetation or if there are algae or submerged plants in the water, the green color can stand out. It adds a natural and vibrant element to the scene;
- Orange and pink: During sunrise or sunset, the warm hues of orange and pink can cast a stunning glow over the lake. These colors create a striking contrast against the water and the surrounding landscape, making them stand out;
- Reflections: The color that stands out most in a lake can also be influenced by the reflections. If there are colorful elements in the surrounding environment, such as trees, mountains, or the sky, these colors can be reflected on the water’s surface, creating a captivating visual effect;
15. What is the 500 rule for night lake photography?
It helps strike a balance between capturing enough light and avoiding the blur caused by the Earth’s rotation during long exposures.
The rule states that you should divide the number 500 by the focal length of your lens to calculate the maximum shutter speed in seconds. For example, if you’re using a 24mm lens, the calculation would be 500 ÷ 24 = 20.8 seconds [7]. This means you should use a shutter speed of 20 seconds or less to capture sharp stars without noticeable trailing.
However, it’s important to note that the 500 rule is a general guideline and may vary depending on factors such as the camera sensor size, lens type, and personal preference for star trail length. In some cases, you may need to adjust the shutter speed accordingly.
Useful Video: Mountain Lake Photoshoot Behind The Scenes
Final thoughts
In conclusion, a lake provides a picturesque setting for capturing stunning photographs. Whether you’re a professional photographer or an enthusiast, the opportunities for creativity and expression are endless. From capturing reflections and wildlife to exploring different weather conditions and water activities, a lake offers a diverse range of photo shoot ideas. By incorporating elements such as misty water, silky water effects, flowing water, and long exposures, you can add a touch of magic to your lake photography.
References
- https://www.peerspace.com/resources/lake-photoshoot-ideas/
- https://donnamphotography.com/fun-couples-photoshoot-at-mirror-lake-alaska/
- https://rebeccacarpenterphotography.com/lake-engagement-photoshoot-ideas/
- https://www.flytographer.com/blog/outdoor-family-photo-ideas/
- https://www.nfi.edu/water-photography/
- https://iphonephotographyschool.com/photography-of-water/
- https://amateurphotographer.com/technique/expert_advice/top-tips-for-photographing-water/