
If you’re lucky enough to live near a sand dune or are planning a trip somewhere with sandy beaches, why not try your hand at taking some photos in the dunes? Photoshoots in sand dunes can be tricky due to their ever-changing landscape. But with some planning and preparation, you can capture beautiful photos.
You have to remember – sand dunes are ever-changing and therefore don’t stay still like other types of landscapes. This means that you should plan your photoshoot to take advantage of the momentary look of the dune at any given time.
First, pick an ideal spot for your shoot. Consider factors such as the height of the sand dunes, shadows from trees or buildings nearby, and if there is grass or vegetation growing in between them. Also, make sure you have a great background for your photos – consider what would be interesting when looking through the lens [1].
Second, come prepared with all the necessary equipment – a tripod, reflectors, light stands, and even a sand rake! You may need to set up lighting stands around the sand dunes to make sure that the light is just right for your photoshoot. A sand rake is also a great tool as it can help you create interesting patterns in the sand.
Third, keep an eye out for any unexpected guests like birds or animals. Depending on where you are, these may add some interesting elements to your photos – be sure to capture them if they show up!
Also, in the article below you will find out:
- What camera settings to use for sand dune photography;
- How to find the best angles at a sand dune;
- Tips and tricks to ensure you get terrific photos;
It can be daunting if you’ve never tried it before, but with our handy guide, you’ll be able to get some great shots in no time. Keep reading to find out how.
Considering the Weather At The Sand Dunes
The weather at the sand dunes can vary greatly depending on the time of year and the location. During the winter, temperatures can drop to freezing levels, so it’s important to dress in layers and be prepared for cold winds. Summers are often hot, dry, and windy with temperatures reaching well into the 90s. In the spring, you may experience both cool mornings and warm afternoons.
Even during milder months, you should also be aware that sand can get extremely hot during direct sunlight – so wearing light-colored clothing is a must! And don’t forget your sunglasses – they’ll come in handy when the sun is out. Lastly, watch out for sandstorms, common during dry months, and always bring a scarf to cover your nose and mouth if you get caught in one.
When to Plan Your Shoot?
The best time to plan your shoot is during the milder months of spring or autumn when temperatures are more manageable and sand storms are less likely. If you’re looking for that perfect golden hour light many photographers seek, then sunsets in the summer months are particularly stunning at the sand dunes. Just make sure you have a good headlamp handy – it can get dark quickly out there [2]!
Whether you’re planning an engagement session, family portraits, or an adventurous couples shoot, the sand dunes provide an amazing backdrop and opportunity to capture unique photos with beautiful natural elements.
What To Bring & How To Prepare For A Photoshoot in Sand Dunes?
When preparing for a photo shoot in the sand dunes, it is important to bring the right materials and clothing. Photography equipment such as tripods, camera lenses, and filters will be needed to capture the best shots of the area. In addition, protective clothing and sunscreen are also necessary to protect against harsh sunlight and heat.
In order to get the best shots possible in the sand dunes, special care should be taken when setting up for the photoshoot. It is important to find a spot with minimal wind and plenty of shade. When scouting locations, look for areas that provide a variety of different angles and lighting conditions. Additionally, it is important to stay aware of any animals or insects that may disturb your photoshoot.
In addition to photography equipment and appropriate clothing, here are some other materials that you may want to consider bringing for your sand dunes photoshoot [3]:
- Water and snacks: Sand dunes can be hot and tiring, so it’s important to stay hydrated and bring snacks to keep your energy up;
- Sun protection: The sun can be intense in the desert, so bring a hat, sunscreen, and sunglasses to protect your skin and eyes;
- Portable reflectors: These can be useful to bounce light back onto your subject and create interesting shadows and highlights;
- Props: Depending on the type of photo shoot you are planning, you may want to bring props such as a chair, umbrella, or other items to add interest to your photos;
Remember to also respect the environment and leave no trace when you are done with your photoshoot. Leave the sand dunes as you found them so that they can be enjoyed by others for years to come.
What To Wear?
When it comes to what to wear for a sand dunes photoshoot, there are a few things to consider:
- Comfort: You’ll be walking on sand, so wear comfortable shoes that you can easily walk in. Additionally, make sure your clothing is comfortable and allows you to move around freely;
- Clothing color: Since you’ll be in a sandy environment, consider wearing clothing that will contrast with the sand, such as bright or bold colors. Avoid wearing colors that will blend in too much with the sand;
- Scarf or bandana: The wind can kick up a lot of sand in the air, so bring a scarf or bandana to cover your face and protect your camera equipment;
- Dress for the weather: Sand dunes can be hot during the day and cooler at night, so dress accordingly. Bring a light jacket or sweater if you plan to stay until sunset;
- Avoid accessories: Sand can easily get into jewelry or accessories, so it’s best to avoid wearing them during the shoot [4];
Appropriate clothing should be worn so that you remain comfortable while taking pictures. Long-sleeved shirts and pants are recommended to help protect yourself from sunburn or windburn while shooting.
In terms of accessories and props, neutral colors generally work well with desert landscapes like sand dunes, so bringing some items that won’t detract too much from the environment is a great idea. A few pieces of fabric can add texture to your images or provide movement in an otherwise static shot. Additionally, bringing a hat, sunscreen, and plenty of water will help keep you hydrated and comfortable throughout the shoot.
Things to Consider When Shooting Sand Dunes
Lighting & Timing
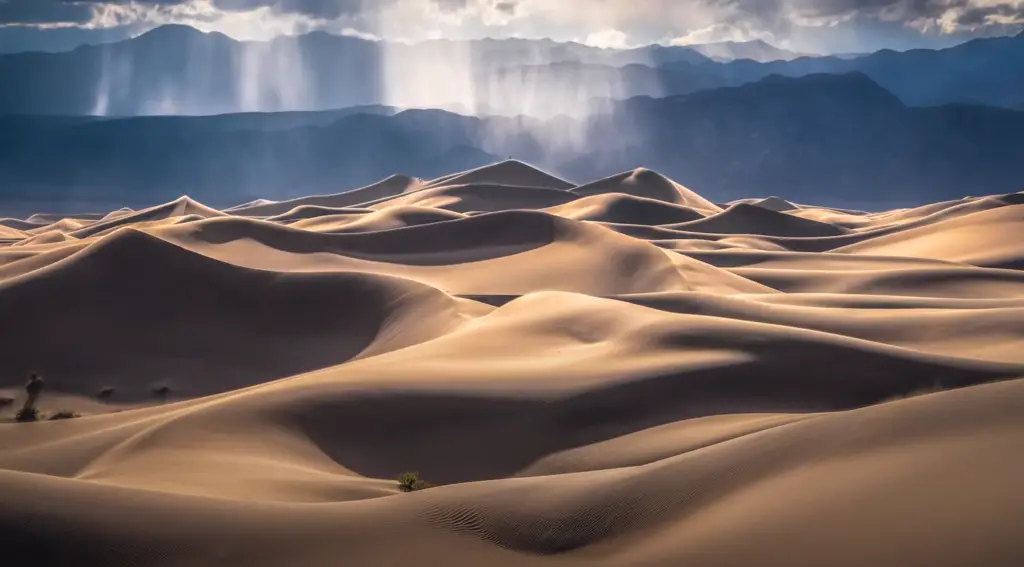
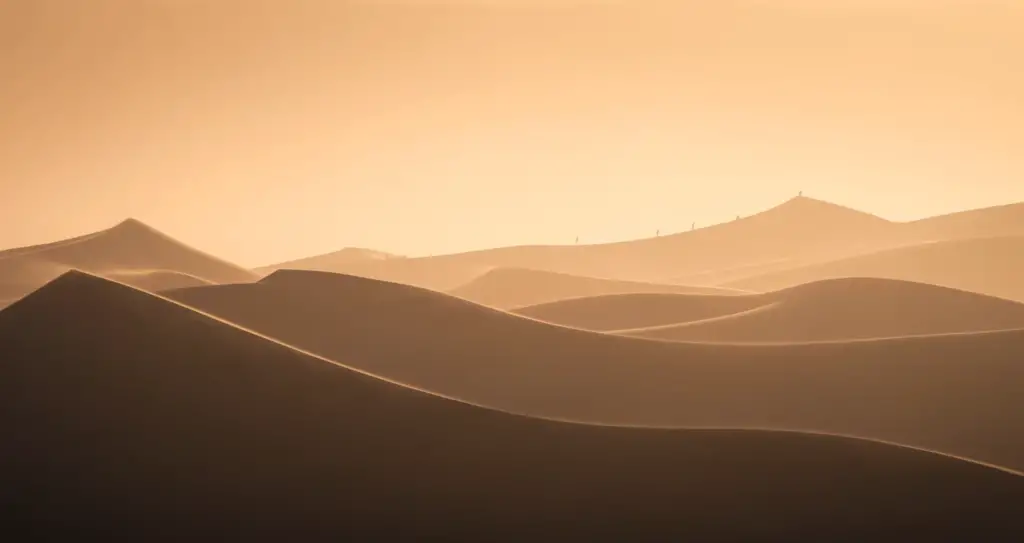
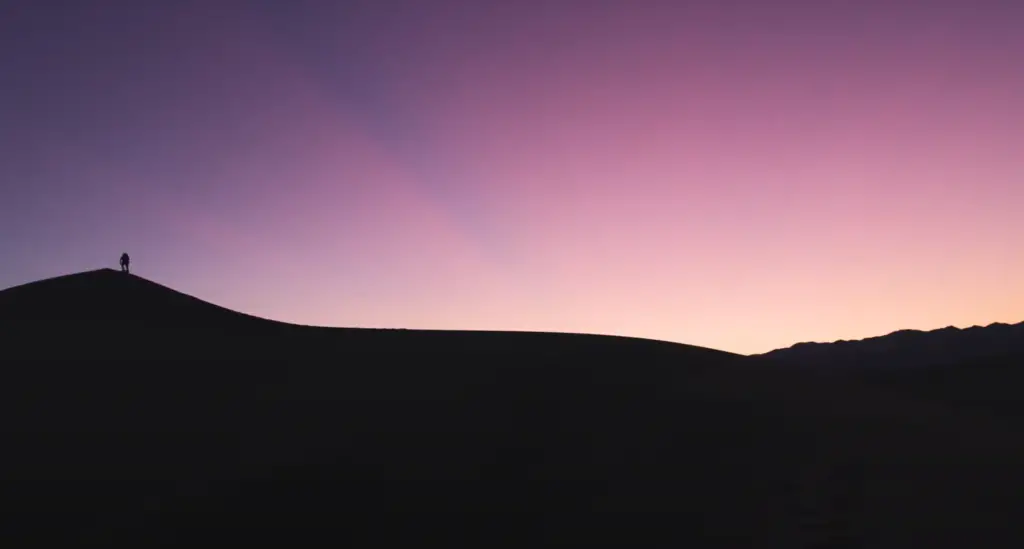
The best time to shoot sand dunes is when the light is soft and golden. This helps create a dreamy atmosphere while still allowing contrast in the shadows. The ideal conditions are typical during early morning or late evening when the sun is low enough that it’s less likely to cause harsh shadows on the sand.
Composition
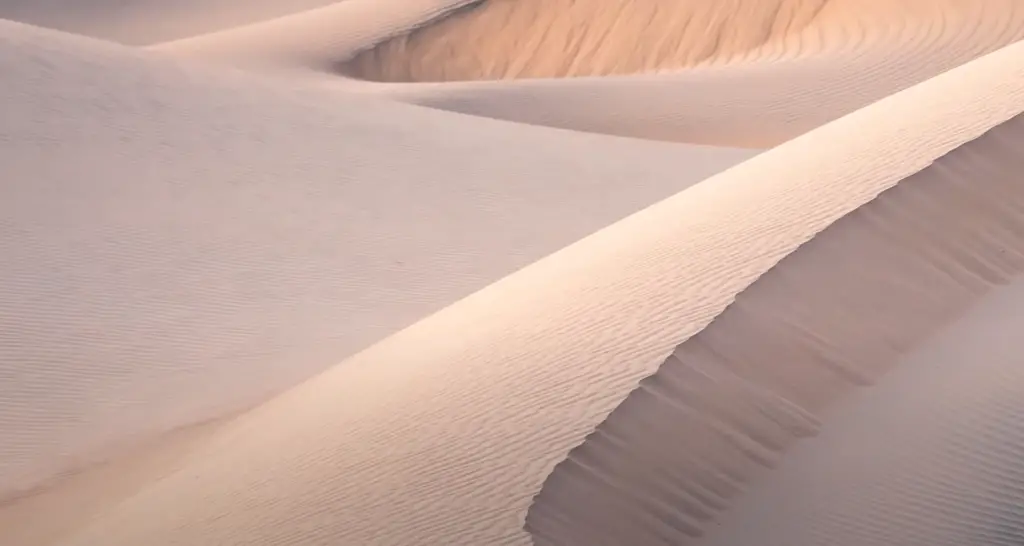
When shooting sand dunes, the composition can be key. Try to find interesting shapes within the landscape, like curved lines on the hills or ridges, and frame them in such a way that they draw people into your shot. You can also try playing with symmetrical compositions of repeating patterns of ripples or curves running through the dune field to create an abstract landscape.
Tripod & Exposure
Due to the low light and long exposures necessary for sand dune photography, it’s essential to use a tripod. A tripod will allow you to avoid shaky shots and ensure your images are sharp from corner to corner. Additionally, if your camera has an exposure lock feature, be sure to use this when shooting sand dunes so that all of your frames have the same exposure settings.
Filters
If you want to add some dramatic flare or capture smoother motion in water/clouds, consider using neutral density filters to slow down your shutter speed. This can give your pictures a painterly quality with soft lines and rich colors. Also, a circular polarizer can be useful for reducing glare and reflections off of the sand.
Color Harmony
Choosing a color palette that harmonizes with the sand can also help to create powerful images. Look for colors in the sky or surrounding landscape that will provide contrast and draw attention to the sand itself. Additionally, think about incorporating bolder colors like oranges and blues into your composition to create visual interest.
Post-Processing
Finally, always remember to post-process your images in order to create your own unique style. Experiment with different color palettes, contrast levels, and local adjustments until you get an image that you’re satisfied with. With a little practice, you’ll be able to capture stunning photos of sand dunes like never before!
Sand Dunes Photography Tips
Make Your Equipment Sand-Proof
If you’re planning on taking pictures in a sandy environment, it’s important to make sure your equipment is sand-proof. Make sure all your camera lenses are covered with some kind of filter and that all other mechanical parts (like buttons and dials) have some kind of protective cover. You should also consider buying a dust-proof lens hood to keep the sand from getting into any tiny crevices on your lens.
Choose the Right Lens
The right lens can make or break a shot, so be sure to choose carefully when you’re photographing sand dunes. A wide-angle lens will help capture the sweeping landscape while using a telephoto lens will allow you to zoom in for more intimate shots. It’s a good idea to bring multiple lenses so you have the option of switching them out depending on the scene.
Stabilize Your Camera
Wind and sand can make it difficult to take sharp, steady shots. To help counteract this, use a tripod with a sandbag or other weight on top. You should also consider using a shutter-release cable or remote trigger for longer exposures in order to reduce the camera shake from pressing the shutter button itself.
Weatherproofing Your Other Gear
Sand storms, strong winds, and heavy rain can all affect the other gear you bring with you. Make sure to pack your bags in waterproof covers or plastic bins and that your camera bag is made of durable material.
When photographing sand dunes, it’s important to be prepared for quick changes in weather. Have extra clothes and towels on hand so you can dry off any equipment that does get wet from rain or wind-blown sand. Sand storms can suddenly blow up without warning, so make sure you’re aware of your surroundings and always be prepared to quickly break down your gear and move to a safer location.
Shoot in RAW Format
When shooting in sandy environments it is important to shoot in RAW format rather than JPEG. This will give you more control over the tones, colors, and exposure when editing your photos afterward. In addition, shooting in RAW allows for greater flexibility if any dust or debris appears on the camera sensor when photographing sand dunes [5].
Experiment with Long Exposures at Night
If you’re looking for something a bit different, try experimenting with long-exposure shots at night. Shooting in the dark will reveal unique patterns created by stars and passing clouds that make for some truly breathtaking photos. Just be sure to bring a tripod and any other necessary equipment when shooting at night.
Use A Clear Filter
Using a clear filter is the best way to protect your lens from sand and dust. It will also help minimize any flares or reflections caused by bright sunlight during the day. When shooting in sandy environments, be sure to bring along several filters so you can switch them out if one gets too dirty. Using a filter will help keep your images free of distractions and preserve the true beauty of the landscape [6].
The Creative Side Of Sand Dunes Photography
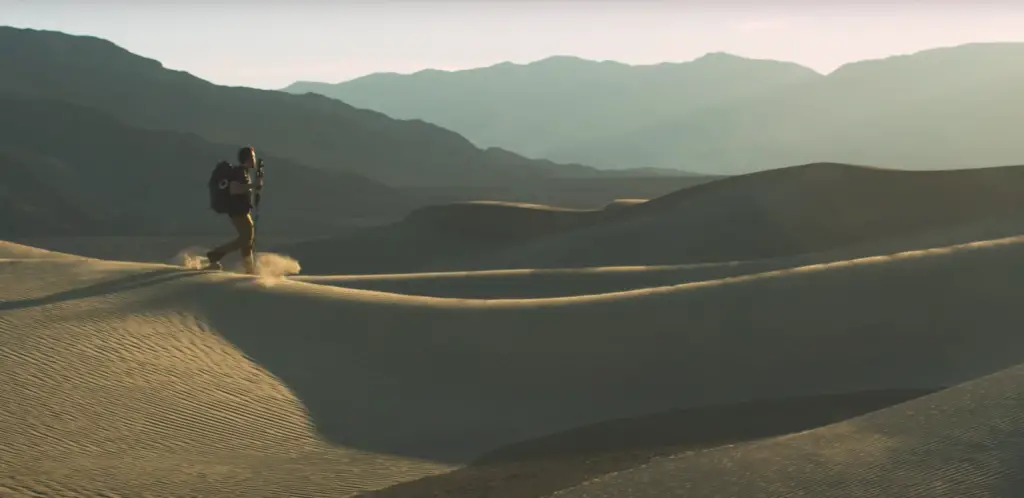
One of the most important tips for taking great sand dune photos is to look for unique perspectives. Try different angles, shoot up close, and get creative with your shots! Taking pictures from lower positions can create interesting foregrounds that draw attention to small details like patterns in the sand. Taking advantage of the shadows and highlights created by the sun can also make for some stunning shots [7].
Photographing sand dunes is a great way to get creative and explore the desert in all its beauty. With these tips, you’ll be sure to capture amazing photos of the sweeping landscapes beyond!
FAQ
How do you take pictures in the sand?
Taking pictures in the sand can be challenging, but there are a few tips to keep in mind. Firstly, use a low aperture setting on your camera to help reduce any potential blurring of the image caused by wind or other elements. Secondly, try and get close to the sand so that you can capture more details. Finally, keep an eye out for interesting patterns in the sand – these will make great foreground elements for your images!
How do you create a sand dune?
Creating a sand dune is relatively simple and requires just a few steps. Firstly, find an area of sand that is suitable for forming a dune – this could be next to the beach or in the desert. Next, use a shovel to dig out the shape you want your dune to take. Finally, begin adding more sand layer by layer until you’ve achieved your desired effect. You can also add vegetation or other features to enhance the look of the dune!
What type of camera should I use for taking pictures in the sand?
Any digital camera will work for taking pictures in the sand, but if possible try and use one with manual settings so that you can adjust the aperture and shutter speed in order to get the best results. Additionally, using a lens with a wide angle will help capture more of the scene. Make sure to also bring along some accessories such as filters and a tripod so that you can take advantage of all the features your camera has to offer!
What type of settings should I use for taking pictures in the sand?
For taking pictures in the sand, it’s best to use lower aperture settings (f/8 or f/11) and faster shutter speeds (1/500th or 1/1000th). This will ensure that your images are clear and detailed while capturing any motion or movement in the sand. Additionally, you may want to adjust your white balance settings if it looks too blue or yellow in the sand.
Do I need any special equipment for taking pictures in the sand?
For taking pictures in the sand, you will need some additional equipment beyond your camera and lens. A sturdy tripod is essential for keeping your camera steady during long exposures, while filters such as neutral density or polarizing can help reduce glare and bring out more color and details in the image. Additionally, having a set of lenses with different focal lengths will give you more flexibility when composing shots. Finally, consider bringing along other accessories such as reflectors or diffusers to add more depth and dimension to your photos.
What is the best time of day for taking pictures in the sand?
The best time of day to take pictures in the sand will depend on the type of image you’re trying to capture. For landscape shots, early morning or late evening with golden light can give you beautiful results. Alternatively, midday when the sun is high can be great for capturing more dynamic images with shadows and highlights.
What are the 3 types of sand dunes?
Sand dunes are divided into three major categories: barchans, transverse, and longitudinal dunes.
Barchan dunes are crescent-shaped mounds that form in windy desert regions. They are the most common type of sand dune found in dry climates, as they require little moisture to grow. The winds that shape these formations come from two directions, which helps them maintain their curved shape.
Transverse dunes form perpendicular to the wind direction and resemble large waves or even ripples on the surface of a body of water. These formations can reach lengths of up to 3 miles and heights of up to 500 feet tall.
Longitudinal dunes have ridges that run parallel to the prevailing wind direction. These are the most linear of all dune formations, and they can range in size from a few feet to several miles in length. As with transverse dunes, longitudinal dunes may reach heights of up to 500 feet tall.
All three types of sand dunes are influenced by wind patterns, soil type, and moisture levels in their environment. They create unique landscapes that are often used for recreation or even scientific research. In some areas, sand dunes have been transformed into tourist attractions with boardwalks and interpretive centers that allow visitors to learn about the formation of these natural wonders.
How do you make sand portraits?
Making a sand portrait is an art form that requires patience, skill, and creativity. This type of artwork involves arranging colored sand into designs or patterns to create a three-dimensional image.
The first step in making a sand portrait is choosing the colors you want to use for your design. Depending on your level of experience, you might opt for just one color or several different colors. Once you have chosen the colors you want to use, gather all the materials necessary for creating your portrait: colored sand, glue, cardboard, tweezers, or small tools for manipulating the sand and shaping it into the desired pattern.
Next, begin pouring out your different colored sands onto a flat surface like cardboard or glass so that they are spread out in thin layers. You can use different-sized containers to dispense the sand and then move it around with a tool or tweezers. Once you have created your desired pattern, begin gluing down the sand particles to create depth and texture. This is an important step as it helps to set the shape of your design and add details.
What is ISO best for the desert?
This will allow you to capture details in bright sunlight without overexposing the image. In the desert, you may be shooting toward the sun or from lower angles which can cause harsh shadows and intense highlights.
An ISO of 100-400 will help reduce these issues while still capturing a good amount of detail in your scenes. It’s also important to remember that when shooting in a sunny climate, it’s necessary to use faster shutter speeds as well to avoid motion blur on moving elements like vehicles or people.
Finally, if you want more of a vintage look, then try increasing your ISO up to 1600 or even 3200 – this will give you more of a washed-out look that is often associated with desert photography.
What filters are best for desert photography?
Many filters can be used to improve your desert photography.
Depending on the type of shot you’re looking for, different filters may be more suitable than others:
- A neutral density (ND) filter is useful for creating smooth water effects and capturing motion blur in clouds or sand dunes;
- A circular polarizing filter works well for reducing glare from reflected light on sand and increasing saturation in blue skies;
- Graduated ND filters are great for balancing exposure between bright skies and darker terrain, as well as creating a soft transition between light and dark areas of an image;
- Lastly, an infrared filter will give photos a unique effect, often producing surreal-looking images with vibrant colors;
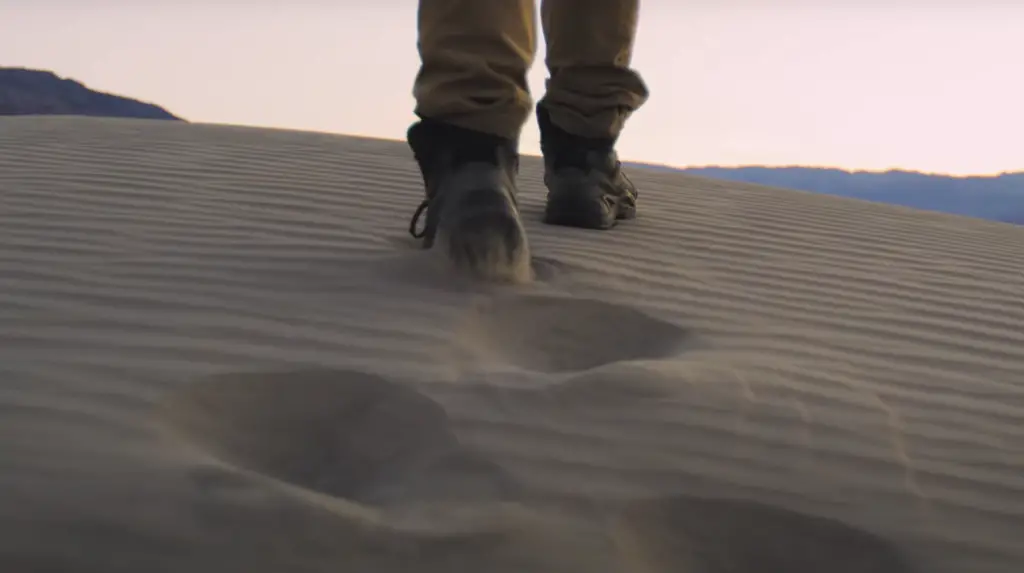
What shoes should I wear for sand dunes?
When it comes to choosing the right footwear for sand dunes, you’ll want to look for shoes or boots that provide good grip and traction. Shoes with a rubber sole are ideal, as they will provide the most grip when trekking on uneven surfaces such as sand dunes. If possible, choose a shoe with an extra layer of cushioning in the midsole – this will help protect your feet from any sharp objects that may be hidden beneath the sand.
Sandals can be worn, but they don’t usually provide enough protection and can make the terrain more difficult to navigate. If you do decide to wear sandals, make sure they have a secure heel strap so they won’t slip off while you’re climbing the dunes. Finally, consider packing a pair of lightweight water shoes or aqua socks in case you need to cross any shallow streams. These will provide extra grip and protection from sharp rocks or shells that may be hiding below the surface.
What colors look good for beach photos?
When it comes to beach photos, bright colors tend to stand out the most.
Opt for bold, vibrant hues like bright pink, reds, oranges, yellows, and blues. These colors will pop against the sand and sea backdrop and make your photos really stand out. Neutral tones such as whites and beiges can work too – just make sure the shades are complementary so you don’t end up with a bland-looking photo.
If you want something more subtle but still eye-catching, try mixing in some pastels and muted tones – these work great when paired with brighter colors or neutrals. Finally, patterns also look great in beach photos – think stripes or floral prints that will add an extra dimension to your photos. Just remember to keep the colors bright and in complementary shades to really make your beach photos stand out!
How do you make a sand effect in Photoshop?
For creating a realistic sand effect in Photoshop, there are several steps you can take:
- The first step is to create a new layer and fill it with the color of sand that you want. Then, use the Smudge Tool to blur the edges of the layer and make it look more natural;
- Next, add some noise by using the Add Noise filter (found under Filter > Noise). This will give your image texture and make it look more like real sand;
- Finally, adjust the contrast and brightness of your layer until it looks just right – this will help bring out any details in your sand effect;
Once you’re happy with how it looks, use a soft brush to blend all the edges together so they appear seamless.
What is the golden rule in photography?
The golden rule of photography is to always strive for the best possible image – no matter what type of subject you are photographing. This means taking your time to get the perfect shot and not settling for anything less than perfection. It also involves understanding light, composition, and exposure in order to create stunning images that capture moments in time.
Additionally, it’s important to remember the basics of photography such as keeping your camera steady when shooting, focusing on a specific area within the frame, and keeping any distractions out of your photos.
What is the 600 rule in photography?
The 600 rule in photography is an easy way to determine the correct shutter speed for capturing sharp images of the night sky without any star trails. The formula is simple: divide 600 by the focal length of your lens (in millimeters). This will give you the minimum shutter speed that you need to shoot at in order to avoid star trails or the streaking of stars across a single photo due to long exposures.
For example, if you are shooting with a 24mm lens, then you would need a shutter speed of at least 25 seconds (600 divided by 24) in order to freeze the stars and capture them sharply.
Useful Video: HOW I shoot Sand Dunes | Landscape Photography
Final thoughts
Though a photo shoot in the sand dunes may sound like a fun and easy endeavor, there are many things that can go wrong. The ever-changing landscape of the dunes makes it difficult to get an idea of what your photos will look like ahead of time, and the wind can quickly ruin any set-up you might have. If you’re determined to take photos in the sand dunes, be sure to plan ahead as much as possible and be prepared for anything that might come your way. With a few key tips and the right equipment, you can capture some truly stunning images in the sand dunes. Good luck!
References
- https://actionphototours.com/tips-and-tricks-to-successful-sand-dune-photography/
- https://www.bethanywolfphotography.com/resources/sand-dunes-photoshoot
- https://photographylife.com/landscapes/sand-dunes-photography-tips
- https://www.photocascadia.com/how-to-photograph-sand-dunes/
- https://www.bethanywolfphotography.com/resources/sand-dunes-photoshoot
- https://www.photocascadia.com/how-to-photograph-sand-dunes/
- https://photographylife.com/landscapes/sand-dunes-photography-tips