Setting up an IP camera with a DVR can seem like a daunting task, but it doesn’t have to be! With this easy-to-follow guide, you’ll be able to securely and successfully connect your IP camera and DVR and enjoy the benefits of increased security. Best of all, it’s quick and easy so you won’t spend hours trying to figure out how to get your IP camera and DVR working together. Once connected, you’ll be able to take advantage of surveillance capabilities that allow you to monitor any activity in or around your home or business quickly and efficiently. So, don’t wait any longer – follow this guide for setting up an IP camera with a DVR today!
What is an IP Camera?
An IP camera, short for Internet Protocol camera, is a type of digital video camera that transmits its images over the internet. It employs network connectivity to enable users to remotely monitor their homes or businesses from any location using a computer, smartphone, or tablet.
There are different IP cameras available on the market, each with its own advantages and features. Depending on your needs, you can find a camera that offers wireless capabilities, night vision, motion detection alerts, two-way audio communication, as well as other options. These features allow you to monitor what’s happening in your home or business and have the added benefit of providing a sense of security.
With the ability to capture high-quality video footage, IP cameras have become increasingly popular for various applications, such as home security, surveillance systems, and other scenarios where visual monitoring is required. Whether you want to keep an eye on your property while you’re away or ensure the safety of your loved ones, IP cameras provide a reliable and convenient solution.
Most common types of IP cameras
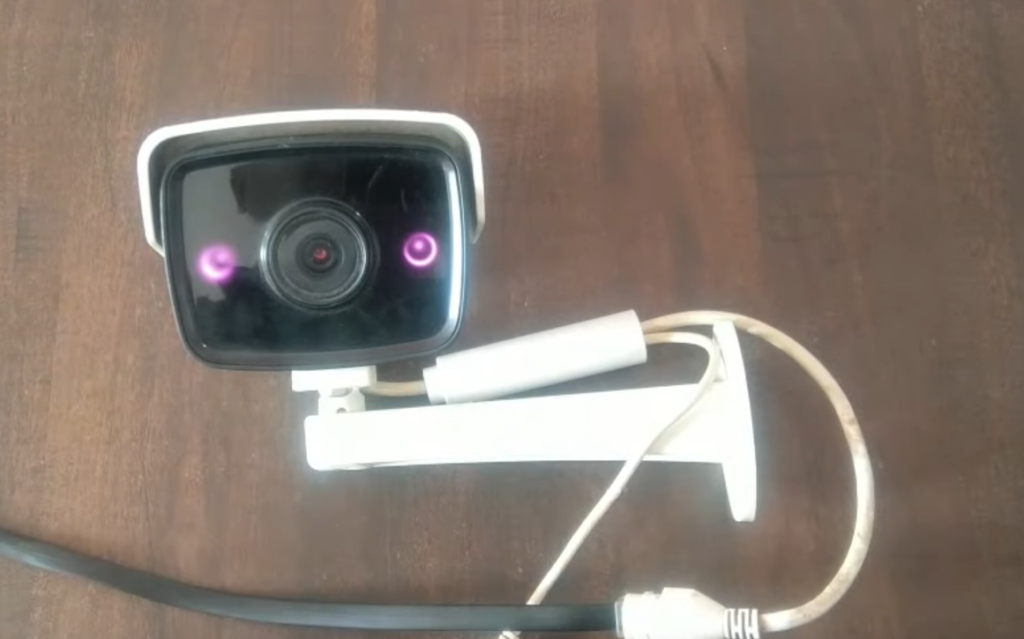
Bullet cameras
Bullet security cameras are widely favored for their exceptional performance and versatility. With their sleek cylindrical design, they seamlessly blend into any indoor or outdoor environment. These cameras are not only easy to install, typically mounted on walls or ceilings, but also offer impressive viewing angles, ensuring optimal coverage of a wide area. Moreover, some bullet IP cameras are equipped with advanced night vision capabilities, enabling them to capture crystal-clear images even in challenging low-light conditions. Embrace the power of bullet security cameras to enhance your surveillance and protect what matters most to you.
Box cameras
Box cameras are another popular type of IP camera, with a larger size that makes them ideal for outdoor installation. They typically offer better image quality than bullet cameras and are often used for surveillance purposes. Box IP cameras can also be equipped with night vision capabilities and have adjustable focus and zoom capabilities, allowing you to adjust the camera angle and capture live footage in high resolution. With box cameras, you can easily expand your surveillance system with additional cameras to monitor different areas of your property or business.
PTZ Cameras
If you’re looking for a versatile IP camera that offers greater flexibility and control, then PTZ (Pan-Tilt-Zoom) cameras are perfect for you. With the ability to pan, tilt, and zoom, these cameras provide exceptional coverage of wide areas without compromising image quality. You can easily control these cameras remotely with your smartphone or computer, and adjust the angle to get a better view of hard-to-reach areas such as warehouses or parking lots. PTZ cameras also come with night vision capability, enabling you to monitor your premises even after dark. With PTZ cameras, you can keep an eye on every corner of your property and stay in control at all times.
Dome cameras
Ideal for indoor installation, dome IP cameras are designed for discreet surveillance. They feature a low-profile design that blends into any environment, such as restaurants, retail stores or office buildings. Dome cameras are available in a variety of sizes and resolutions, making it easy to find one that fits your needs. Additionally, these cameras can be adjusted vertically and horizontally to get the perfect angle for the area you want to monitor. With their impressive low-light performance and wide field of view, dome IP cameras are a reliable and effective way to boost your security system.
Wireless IP Cameras
Wireless IP cameras are an ideal solution for monitoring areas that don’t have easy access to a power source or Ethernet port. These cameras utilize Wi-Fi or cellular networks to transmit data wirelessly, allowing you to install them anywhere with a strong signal. Despite their compact size, wireless IP cameras offer excellent image quality and night vision capabilities for reliable surveillance day and night. Wi-Fi cameras also feature motion detection technology, allowing you to set triggers that will capture images or videos when movement is detected in the area being monitored. This makes them perfect for remote locations such as parks or vacation homes [2].
What is DVR?
A Digital Video Recorder (DVR) is a sophisticated electronic device that is designed to capture, record, and store high-quality video footage from IP cameras. By utilizing advanced compression algorithms and large storage capacities, DVRs enable users to effortlessly retain and access extensive amounts of video data, ensuring that no crucial moment is missed.
One of the key advantages of using a DVR is the flexibility it offers in terms of video playback. Users can conveniently review and analyze recorded footage at their own convenience, allowing them to extract valuable insights or evidence whenever required. Moreover, DVRs often come equipped with intuitive user interfaces, providing seamless navigation through the recorded content and enhancing the overall user experience.
In addition to their recording capabilities, DVRs are engineered with a multitude of features to enhance surveillance functionality. One such feature is motion detection, which intelligently detects any movement within the camera’s field of view. This powerful capability not only conserves storage space by only recording when activity is detected but also ensures that users are promptly notified whenever something significant happens in the monitored area.
With their robust recording capabilities, versatile video playback options, and intelligent features, DVRs have become an indispensable tool in various industries, including security, law enforcement, and retail. By leveraging the cutting-edge technology of DVRs, users can achieve enhanced surveillance and peace of mind knowing that their valuable assets and premises are effectively monitored and protected [3].
How to add IP cameras to a Security DVR
Prerequisites
Before you begin setting up your IP camera, please make sure that you have the following items and information handy:
- The IP address of your router
- Internet connection with a dynamic DNS service
- Your security DVR’s login credentials (username and password)
- Access to the internet either through an Ethernet cable or Wi-Fi
Step 1. Connect IP cameras to PoE Switch
To get started, begin by connecting your IP cameras to a Power over Ethernet (PoE) switch. Ensure that the PoE switch is on the same network as your security DVR. It is important to refer to the manual of your IP camera to verify its default settings and ensure proper configuration. By following these steps, you can seamlessly integrate your IP cameras into your security system for enhanced surveillance capabilities.
Step 2. Configure DVR to your network
Once you have successfully established a secure and reliable connection between your cameras and the Power over Ethernet (PoE) switch, it is time to proceed with configuring the security Digital Video Recorder (DVR) device. To ensure a seamless viewing and monitoring experience, connect the DVR to a high-definition monitor or TV using an HDMI cable. This will enable you to have a clear and detailed display of the surveillance footage.
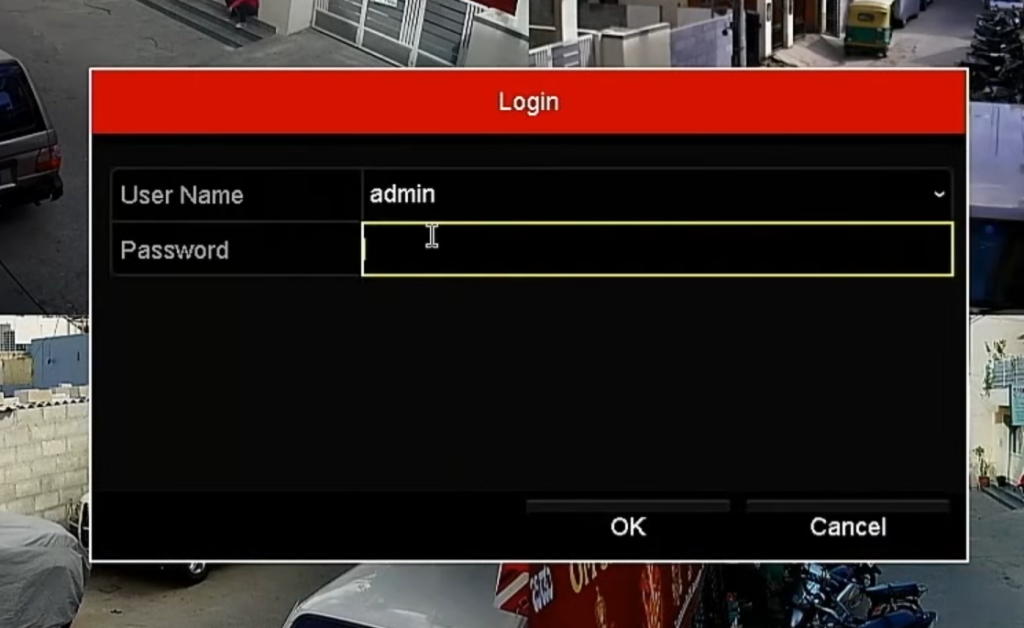
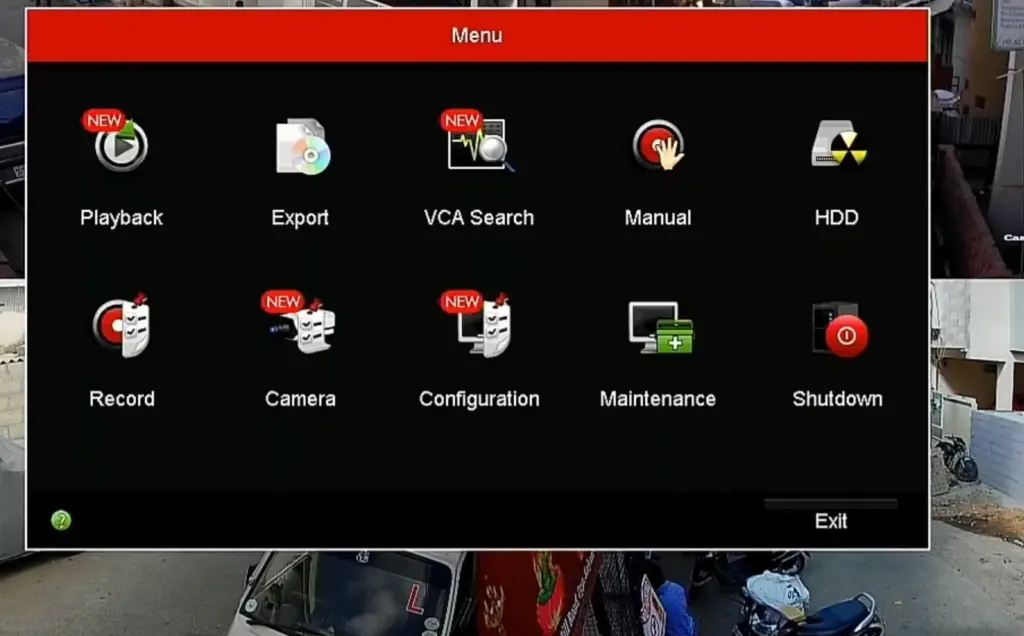
To access the settings menu of your security DVR, you can conveniently use either your mouse or the remote control provided. Simply navigate through the user-friendly interface to find the settings section. Once there, you will be prompted to enter your login credentials, including your username and password. This authentication process ensures that only authorized individuals have access to the DVR’s settings and recorded footage.
Step 3. Configure IP cameras to your network
Next, you will need to configure your IP cameras to connect them to the security DVR device. To do so, access the settings menu of your camera using its web-based user interface. You can locate this by entering the IP address of the camera into a web browser on any device connected to the same network.
Once you are in the settings menu, you need to connect the camera to your security DVR. Enter the IP address of the DVR into the appropriate field and select ‘OK’. You can also enter a port number if necessary. This will allow your cameras to communicate with your security DVR device for smooth surveillance operations.
Step 4. Add cameras to the XVR using its menu interface
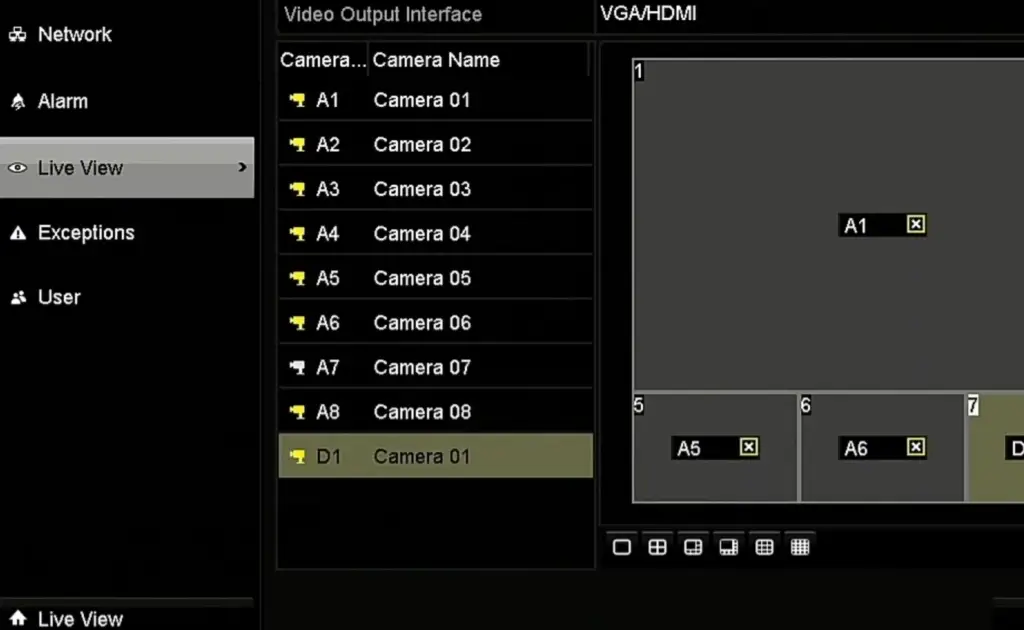
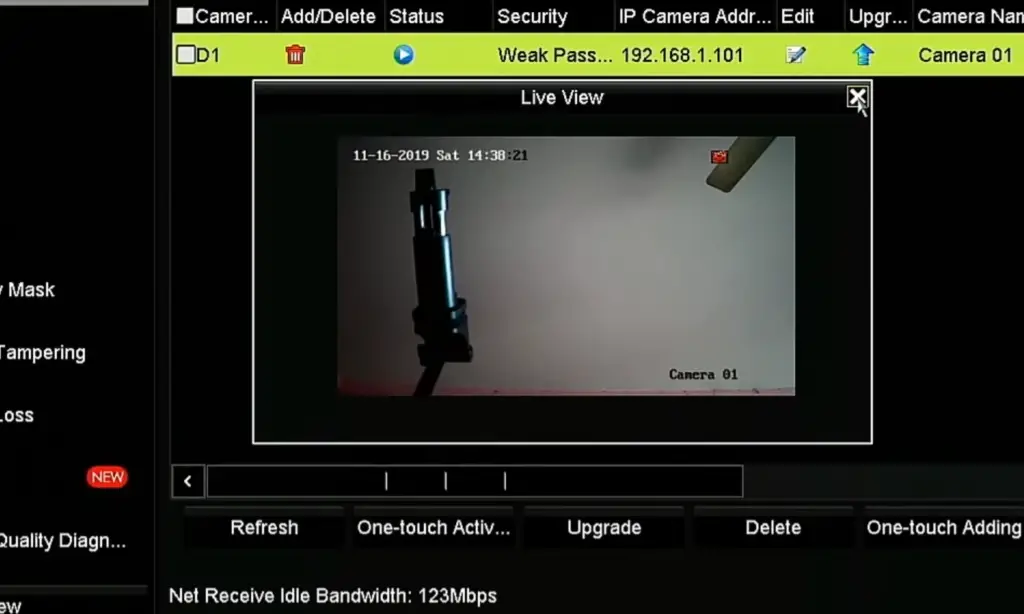
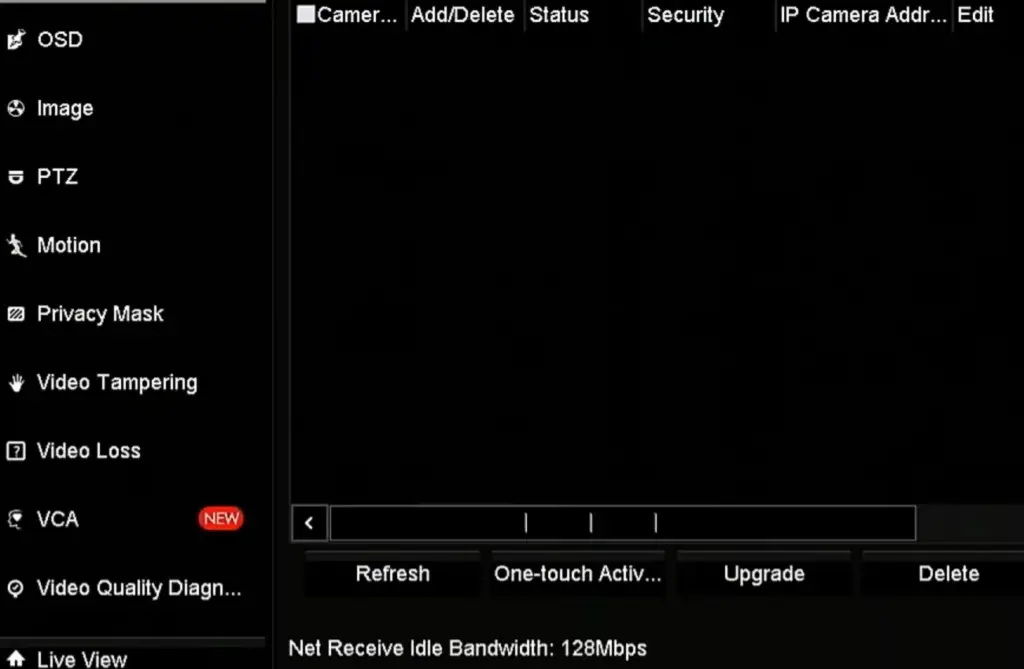
Once the cameras are connected to the DVR, open the menu interface of the Digital Video Recorder. This is usually done using a mouse or remote control connected to your HD monitor. Select ‘add camera’ from the settings menu and input all necessary information including IP address, port number, username and password.
After that, select ‘AddIP cameras’ from the list and enter all necessary information. This includes your camera’s IP address, port number, username and password. Once you have completed this step successfully, you can close the menu interface and start viewing live footage of your security camera system right away.
Step 4b. How to add ONVIF cameras to the XVR using its menu interface
If you have an ONVIF camera, the same steps can be applied to add it to your security DVR’s menu interface. However, keep in mind that extra configurations may be necessary depending on your specific model. Make sure to reference the manual of your camera for more detailed guidelines on how to set up an ONVIF connection with your XVR.
You have now successfully set up and connected your IP cameras to the security DVR device. By following these instructions, you can now reap the benefits of enhanced and reliable surveillance capabilities at home or in a business setting with minimal effort.
Enjoy the power of having access to real-time footage safeguarding your property from potential threats. Make sure to regularly monitor your security camera system and update the settings when necessary to ensure maximum protection for you and your belongings.
Step 5. View Live Footage
You are now ready to view live footage! Simply open the viewing app of your security DVR on any device connected to the same network. You will be able to view all the cameras that you have added in a single dashboard. You can also set up multiple monitors for simultaneous multi-viewing, allowing you to monitor multiple locations at once.
FAQ
Can I connect an IP camera with a DVR?
Yes, you can. Nowadays, many IP cameras come with a Digital Video Recorder (DVR) that offers advanced recording and playback capabilities. With a built-in DVR, you can easily store and review footage, ensuring that you never miss any important moments. Whether it’s for home security or monitoring your business, these enhanced features provide added convenience and peace of mind.
What do I need to set up an IP camera?
To install an IP camera, you will need a network cable, power adapter, router/switch, and access to the camera’s web interface. Additionally, depending on your desired application, you may need additional equipment such as a computer or monitor. With the proper hardware in place, setup is usually quite straightforward and should only take a few minutes.
What’s the difference between wired and wireless IP cameras?
A wired IP camera uses an ethernet cable to connect directly to your router or switch, providing maximum performance and reliability. By contrast, a wireless IP camera communicates with your router via Wi-Fi, allowing for more flexibility in placement. However, since wireless connections can be prone to interference and signal degradation, wired cameras are generally recommended for mission-critical applications.
Can I use an IP camera outdoors?
Yes, you can. Many IP cameras are designed to be used both indoors and outdoors, offering protection from the elements and making them suitable for a variety of applications. When installing an outdoor IP camera, make sure that it is properly sealed and rated for outdoor use. Additionally, you may need to purchase additional weatherproofing accessories such as enclosures or sun shields.
What features should I look for when choosing an IP camera?
When selecting an IP camera, several features can help you decide which one is right for you. Consider factors such as resolution, frame rate, storage capacity, night vision capabilities, motion detection, and audio recording. You should also make sure that the camera is compatible with your existing network infrastructure or any additional hardware that may be required. Ultimately, the right IP camera for you will depend on your specific needs and budget.
How to connect a camera to a DVR?
Connecting a camera to a DVR is simple. First, you will need to connect the camera to your network using an ethernet cable. Then, on the DVR, select “Add Camera” from the “Camera Management” menu. Finally, enter the camera’s IP address and other associated information such as user name and password. Once the camera is connected, you can configure it to record and playback footage from your DVR. You can also use the DVR’s remote monitoring capabilities to view live video from the camera on any compatible device such as a smartphone or tablet.
What type of security protocols should I choose for my IP cameras?
When setting up an IP camera system, it is important to use strong security protocols such as WPA2-PSK or WPA3-PSK. These protocols will help protect your system from hackers and ensure that your camera data remains secure. Additionally, you should enable HTTPS for remote access and disable any unnecessary ports or services. By taking these steps, you can enjoy peace of mind knowing that your IP cameras are safe and secure.
What are the benefits of using an IP camera system?
IP camera systems offer several advantages over traditional security systems. These include convenience, scalability, remote access, motion detection, and more. Additionally, many IP cameras have advanced features such as night vision and HD video quality that can provide you with crystal-clear images and recordings. With so many benefits, IP camera systems are an ideal choice for home security and business monitoring.
Can I use multiple cameras with one system?
Yes, you can. Many IP camera systems support up to 32 cameras, allowing you to monitor multiple areas of your home or business at once. Additionally, some systems offer the ability to group multiple cameras into separate zones, making it easier to customize your surveillance setup. With the right system in place, you can ensure that all of your cameras are connected and working properly.
How do I add an IP camera to my Hikvision DVR?
Adding an IP camera to your Hikvision DVR is easy. First, connect the camera to your network using an ethernet cable and make sure that it’s powered on. Then, on the DVR, select “Add Camera” from the “Camera Management” menu. Finally, enter the camera’s IP address and other associated information such as user name and password. Once the camera is connected, you can configure it to record and playback footage from your DVR. You can also use the DVR’s remote monitoring capabilities to view live video from the camera on any compatible device such as a smartphone or tablet.
Do I need a computer to set up an IP camera?
No, you don’t. Many IP cameras come with a built-in web interface that you can use to configure the camera without needing a computer. However, if you want to access advanced features or use the camera with third-party software, then a computer may be necessary. Additionally, some cameras require special hardware such as a power adapter or USB cable for setup.
What’s the best way to secure an IP camera?
One of the most effective measures to enhance the security of an IP camera is by implementing robust passwords that are difficult to crack. Additionally, enabling HTTPS for remote access ensures encrypted communication, safeguarding against unauthorized interception of data. Moreover, it is crucial to disable any unnecessary ports or services, limiting potential vulnerabilities. Regularly updating the firmware of your device is also vital, as it ensures you have the latest security patches and bug fixes. Lastly, fortify your network’s defenses by deploying a firewall and reliable anti-virus software to fend off malicious attacks. By diligently following these comprehensive steps, you can significantly bolster the security of your IP camera system and protect your valuable data from potential threats.
How do I connect my IP camera to my NVR?
Connecting an IP camera to your NVR is straightforward. First, you will need to connect the camera to your network using an ethernet cable. Then, on the NVR, select “Add Camera” from the “Camera Management” menu. Finally, enter the camera’s IP address and other associated information such as user name and password.
Once the camera is connected, you will then be able to configure it to record and playback footage from your NVR. You can also use the NVR’s remote monitoring capabilities to view live video from the camera on any compatible device such as a smartphone or tablet. Additionally, many IP cameras come with additional features such as motion detection, night vision, audio recording, and two-way audio, allowing you to keep an eye on your property from anywhere in the world. With these capabilities, IP cameras provide an ideal solution for monitoring and protecting your home or business.
Useful Video: Adding IP Cameras to a DVR Locally
Conclusion Paragraph
If you want to connect an IP camera to a DVR, you should follow the simple steps outlined in this article. First, you need to connect the camera directly to your router and configure it with a static IP address. Once that is done, you can connect the DVR to the same network and gain access to the camera’s interface through the local LAN. Finally, use a software program like Blue Iris or iSpy for video streaming and recording. Using an IP camera is a great way to keep your home or business secure. With the right setup, you can remotely monitor and record activity in any room on your property at all times. It’s a good idea to do some research on available cameras before purchasing so that you have the best product for your needs.
References
- https://info.verkada.com/security-cameras/ip-camera/
- https://community.fs.com/blog/what-is-ip-camera-and-how-does-it-work.html
- https://senstar.com/senstarpedia/what-is-dvr/
- https://www.a1securitycameras.com/blog/how-to-manually-add-an-ip-camera-to-your-security-system/




Leave a Reply