Are you looking for a guide on how to stretch a photo? You’ve come to the right place! In this article, we will answer the most frequent questions about stretching photos. We’ll also provide some tips on how to get the best results. So whether you’re a beginner or an experienced photographer, you’ll find something useful in this guide!
How to Stretch a Photo
Stretching a photo can be an effective way to make use of the extra space on your wall. It’s also an interesting way to give a classic photo new life by altering its size and shape.
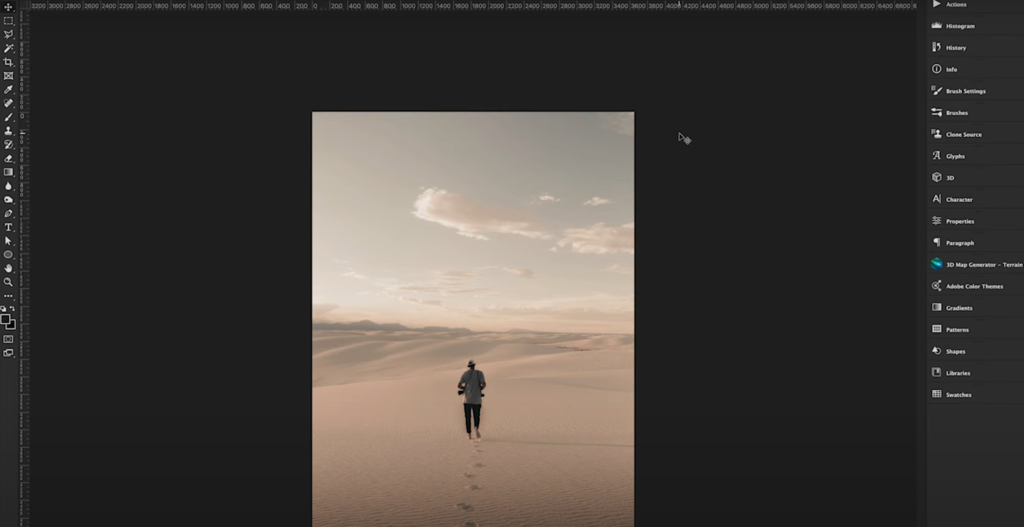
The basic steps for stretching a photo are fairly simple:
- Measure the area you want to stretch it in, so you know what size your image needs to be.
- Print out the digital copy of your image onto high quality paper that is thicker than regular printer paper, such as photographic or canvas paper.
- Trim the printed version of your original picture down to size with scissors or a craft knife. Make sure to leave at least 1/4 inch (6 millimeters) of space around the edges.
- Once trimmed, apply a layer of glue to the backside of the image and press it into place on your choice of canvas material. You can also use an adhesive spray if desired.
- Gently pull and stretch the photo so that it covers the entire canvas surface evenly. Be sure to smooth out any bubbles or wrinkles in order to get a perfect finish.
- Allow the glue to dry for about 24 hours before hanging up your stretched photo masterpiece!
Using Paint in Windows
Windows Paint, the basic photo and graphics editor included with Windows since 1985, can also be used to stretch photos. Here’s how it works:
- Open the image you want to resize in Paint, and then select “Resize” from the “Image” menu.
- When the “Resize and Skew” window pops up, select the option to “Stretch/Skew” your image.
- Enter a value in one of the fields (height or width) to stretch your photo horizontally or vertically. The other field will automatically adjust proportionally so that your photo maintains its original aspect ratio.
- Click OK!
Using Preview in Mac
You can use it to quickly and easily stretch images without having to install any additional software. Here’s how:
- Open your image in Preview and select “Transform” from the “Tools” menu.
- Select either “Scale Proportionally” or “Stretch To Fit”.
- Enter the desired size in one of the fields to stretch the photo.
- Click “Apply” to save your changes and then print the new version of your stretched photo!
Tips for Stretching Photos
Using Photoshop
If you have access to Adobe Photoshop, it’s the most comprehensive software for stretching photos and gives you the greatest range of options. Here’s how it works:
- Open your image in Photoshop and select “Image Size” from the “Image” menu at the top of the window.
- Select either “Pixels” or “Percentage” depending on how you want to change your image size. If using pixels, enter new width and height dimensions into the boxes provided; if using percentage, set both values to 100%. This will ensure that your photo is stretched evenly across all four sides without skewing or distorting its original proportions.
- Under the “Resample” option, select “Nearest Neighbor” to keep your photo from becoming blurry or distorted when stretched.
- After you’ve entered the desired dimensions, press “OK,” and your image will automatically adjust to be those size.
Using a Free Mobile App
If you’d rather not go through the hassle of installing additional software, there are plenty of free mobile apps available that can help you stretch photos quickly and easily. Most of these are easy to use and come with step-by-step instructions on how to resize your images.
Once you’ve downloaded and opened the app, simply select the “Stretch” option and follow the directions provided.
Once you’ve entered in the new dimensions, click “OK” and your image will be automatically resized to fit its new boundaries. [1]
How to Stretch Photos Without Distortion
Here’s a quick guide to stretching your photos without distorting the image.
Expand the Canvas
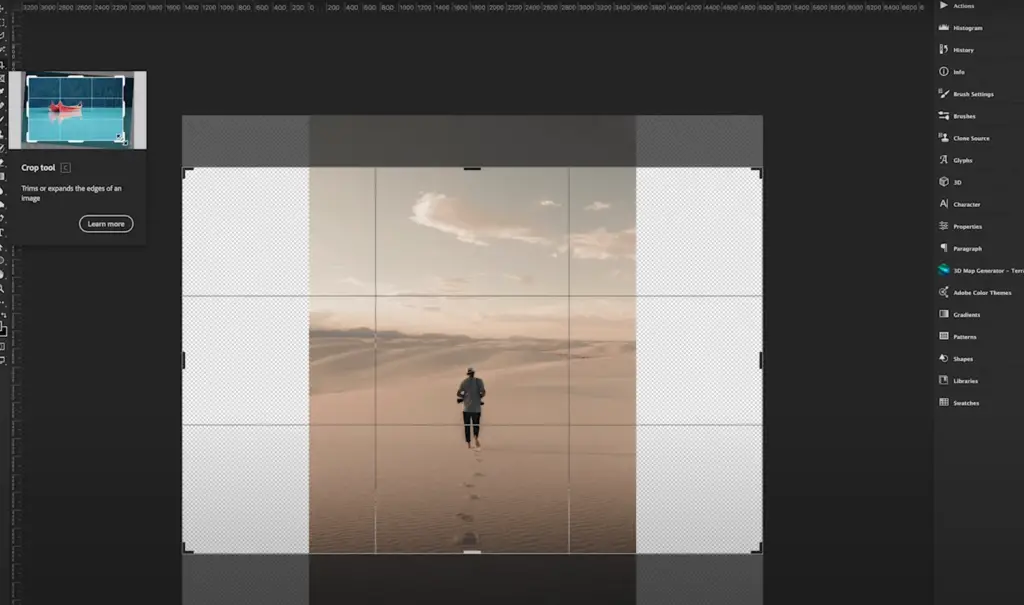
The first step is to expand the canvas around the photo. Go to “Image” and select “Canvas Size.” You can then increase the width and height of the canvas. This will allow you extra space to stretch your photo without distortion.
Stretch Using Content Aware Scale
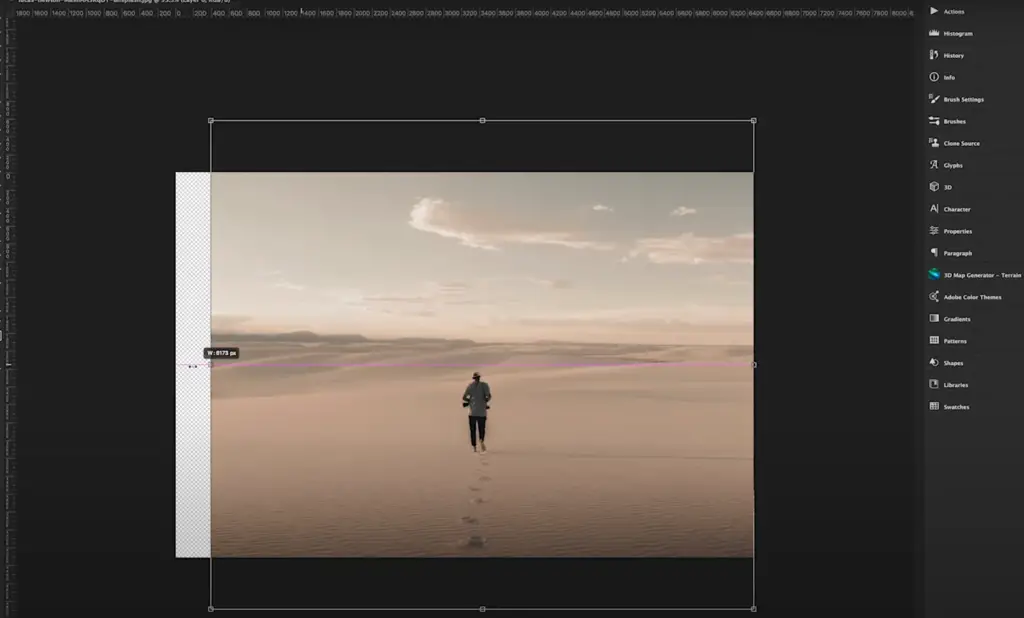
Next, select “Edit” and then “Content Aware Scale.” You can now start to stretch the image by clicking and dragging the corner of the photo. Content aware scale will automatically fill in any gaps in the picture as you stretch it.
Clean up
If you’re still not happy with the results, there are a few simple techniques that you can use to clean up your image. One trick is to select the “Smudge Tool” from the toolbar on the left and start smudging out any unwanted pixels or lines in your photo. Alternatively, you can paint over these areas with black or white to blend them in more seamlessly.
Share with the World
Finally, once you’re happy with your stretched photo, it’s time to share it! You can send the image by email, upload it to social media or even print out a copy. [2]
Useful Tips
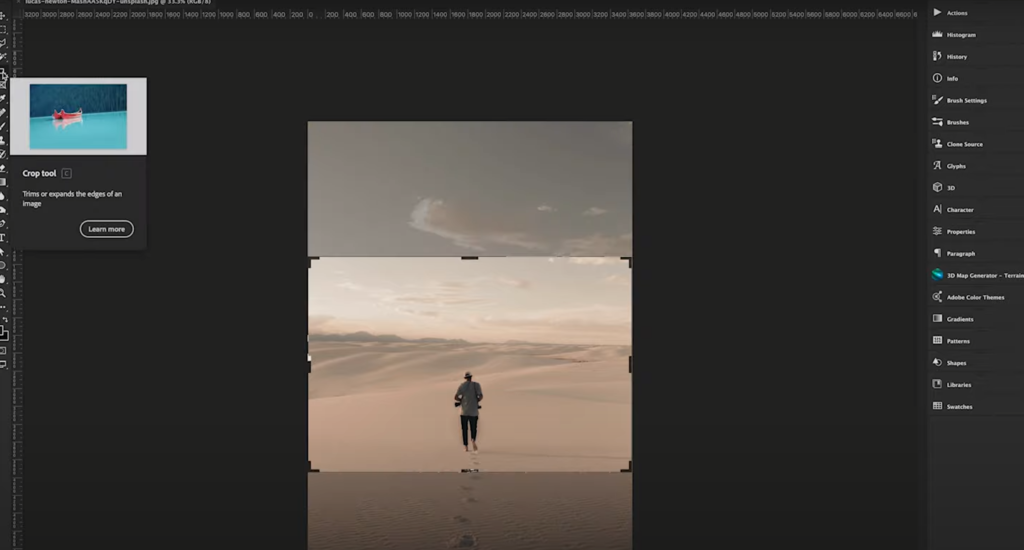
- Start by cropping the photo to remove excess background space. This will reduce the amount of area you’ll need to stretch out, and make it easier to adjust the image without any distortion issues.
- Use software like Photoshop or GIMP for precise stretching adjustments. You can manually drag each corner of the image until it is stretched out evenly in all directions, allowing you to achieve a perfect result.
- Make sure that you are working with an original high-resolution file if possible, as this will give you more flexibility when making changes without affecting the quality of your final output.
- If necessary, use resampling techniques to fill in any gaps or smooth over any rough spots. This will help you to achieve a seamless and professional-looking end result.
- Finally, use the “Save As” feature to save your stretched image in the format that best suits your needs (such as JPEG, PNG, or TIFF).
By following these simple steps, you can easily stretch out any photo and create an eye-catching composition with minimal effort!
FAQ
How can you resize and stretch a picture?
There are a few different ways you can resize and stretch a picture.
You can also use online photo editors like Pixlr or Fotor to quickly edit images with just a few clicks.
Once you have adjusted the size of your image, you may want to add some extra elements to make it more visually appealing. This could include adding borders or background colors, adding text overlays, or even more advanced techniques such as changing its perspective or blurring parts of the image. It really all depends on what type of effect you’re looking for. [3]
How do I stretch an image without distorting it?
One of the best ways to stretch an image without distorting it is to use a free online photo editing tool. These tools allow you to adjust the dimensions, but they also have options for “resizing” an image so that it won’t be distorted.
It’s important to note that resizing an image means changing its physical size, while stretching an image refers to playing with the proportions within the frame. You can stretch an image in two directions (horizontal and vertical) or just one direction (either horizontal or vertical).
Another great way to stretch an image without distorting it is by using Photoshop. With Photoshop, you can easily adjust the width and height of your images and still maintain the original aspect ratio. This means that you can easily get the image stretched, while still keeping it looking sharp and clear.
Finally, when stretching an image, it’s important to consider the quality of your file. JPEG files are usually compressed, which means they may become distorted after being stretched. If you want to avoid this issue, then try using a PNG or TIFF file instead. These files will be much better suited for stretching without ruining the overall look of the photo. [4]
With these tips in mind, you should now have everything you need to stretch any image without distorting it! So go ahead and start experimenting with different sizes and shapes – the possibilities are endless!
What app can I use to stretch a photo?
There are many apps and programs that you can use to stretch a photo. Some of the more popular ones include Photoshop, GIMP, Pixlr, Fotor, and Photopea.
Using each program is slightly different but all have the same basic steps to follow. For example: in Photoshop select ‘edit’ then select ‘transform’ or simply press Ctrl+T; next drag one corner outward while holding down the Shift key to keep it proportional; when satisfied with your new size click enter on your keyboard.
In GIMP when you open up an image click on ‘scale tool’ which will activate two handles at the corners of the photo that you can drag to stretch it. You can also use the scale box on the right side of the screen to manually enter the exact size you’d like your photo stretched.
Fotor and Photopea both have an intuitive user interface that makes stretching a photo easy. Simply open up your image, click on ‘edit’ then select ‘resize’ and drag one corner outward to get the desired effect.
Pixlr is great for those looking for more control over their image as it has more editing features than other programs such as lassoing and cropping tools. To stretch with Pixlr open up your photo, click on ‘edit’, go to ‘transform toolbox’ and select the ‘stretch’ option. This will activate two handles at the corners of your photo that you can drag to stretch it.
Whichever app or program you choose, they all have helpful tutorials and guides online that can help walk you through the steps if needed.
Can you stretch a photo on an iPhone?
Yes, you can stretch a photo on an iPhone. You can do this with the default Photos app or by downloading a third-party app from the App Store. To start stretching your photo with the default Photos app:
- Open the Photo app and select the image you want to stretch
- Tap Edit in the top right corner of your screen
- Tap Aspect at the bottom of your screen
- Select Stretch and adjust it as desired
- When you’re satisfied, tap Done in the upper right corner of your screen to save your changes
If you prefer to download a third-party app for more editing options, there are many available in the App Store. Some popular ones include Adobe Photoshop Express, Fotor Photo Editor, and Pixlr. All of them provide easy-to-use editing tools and allow you to stretch your photos with just a few taps. [5]
Regardless of which app you use, it’s important to remember that stretching an image can cause distortion or pixelation. So make sure you only stretch the photo as much as necessary for the desired effect! If you’re not sure how far to stretch it, start small and gradually increase the amount until you get the result you want.
Useful Video: How to Stretch An Image Using Photoshop
Conclusion
Stretching a photo can be a great way to add some creativity and flair to your photos. With the right tools, stretching can be done easily and with minimal effort. And when you’re finished, there’s no doubt that you’ll have created something unique and wonderful! Just make sure to take the time to understand each step fully so that your end result looks just like you want it to.
Remember: practice makes perfect, so don’t get discouraged if your first few attempts don’t turn out perfectly. With enough patience and effort, anyone can master this skill! So get creative, have fun, and show off the amazing photos you create by stretching them! Thanks for reading our guide!
References
- https://www.wikihow.com/Stretch-a-Photo
- https://www.andrewoptics.com/blog//how-to-stretch-your-images-to-fit-instagrams-crop
- https://www.techsmith.com/blog/how-to-resize-an-image-correctly/
- https://www.websitebuilderinsider.com/how-do-i-stretch-an-image-in-photoshop-without-distorting-it/
- https://www.businessinsider.com/guides/tech/how-to-resize-an-image-on-iphone




Leave a Reply