
Would you like to know how to make a picture appear blurry? It’s actually quite easy! In this blog post, we will show you how to do it using two different methods. We will also discuss the benefits of blurring photos and when it is appropriate to use this effect. So, whether you are a photographer looking to add some creativity to your images or just want to know how to make a photo blurry for fun, keep reading for instructions on how to do it!
Why Blurring a Photo?
It can also be used to create visual interest or draw attention to the subject of the photo. Blurring a photo can also easily help create a sense of motion and make an otherwise dull photo look more interesting and dynamic.
Regardless of why you decide to blur your images, knowing how to do it properly will help ensure that your photos look their best. So, let’s take a look at some simple ways you can blur your photos and get great results! [1]
How Do You Blur a Photo?
There are several ways to blur digital photos, including using editing software such as Photoshop or GIMP. You can also blur a photo directly within your web browser with free online tools like Pixlr X or Fotor Photo Blur.
In this article we will explore how to make a photo blurry in each of these applications and discuss why one might want to use blurring techniques in their photos.
Using Editing Software
Photoshop and GIMP are industry-standard software for manipulating digital images. Both offer powerful tools for selecting, blurring, sharpening and resizing features that let you blur entire sections or specific objects in your image.
Using Online Tools
Free online tools like Pixlr X and Fotor Photo Blur are great alternatives to complicated editing software. Both offer easy-to-use blur effects that can be quickly applied to any photo. To use these services, simply upload the photo you want to blur and select the Blur tool from the menu. From there you can adjust levels of opacity and blur size for creative results. [2]
How Do You Blur Part of a Photo?
Blurring or softening part of a photo can be done in several ways. In many image editing programs, you have the option to use either a Gaussian Blur or Motion Blur effect.
Gaussian blur is a simple and straightforward way to blur an area of an image while still allowing some detail to show through. To apply a Gaussian blur, select the area that you want to soften and adjust the intensity. If you’re not sure what level of blurring looks best, start by adjusting the intensity until it looks right for your needs.
Motion blur is more complex than Gaussian blur in that it adds movement and directionality to the blurred areas of an image. This type of blurring is often used to achieve a blurred background effect with an area of focus in the foreground. To apply motion blur, choose your desired direction and speed and then adjust the intensity until you get the desired amount of blurring.
In addition to these two types of blurring effects, you may also be able to use tools such as masks or layers to gradually soften areas within an image. When using masks or layers, you can create a soft transition from focused to blurred by applying different levels of opacity at each layer’s edges.
How Do You Blur the Background of a Photo?
Blurring the background of a photo can be an effective way of focusing attention on the main subject. It’s also how many professional photographers add depth and dimension to their images. To achieve this effect, you’ll need some kind of image-editing software such as Photoshop or Gimp. Here are the steps:
- Open up your photo in your chosen software program.
- Select the “Gaussian blur” filter – this is typically found under the “Filter” option in your toolbar.
- Use the mouse cursor to click and drag across the areas you want to blur – these will usually be elements that are either peripheral or behind your primary focus point.
- Adjust the blur’s strength and radius as desired. A smaller radius will produce a more defined blur, while a larger one will make it look more natural.
- Once you’re happy with the effect, save your image and admire your handiwork!
Creating a blurry background in photos is an easy way to draw attention to the subject of the photo and add creative flair. With just a few clicks, you can turn any ordinary photo into something special that oozes with style. [3]
How Do You Blur Faces in a Photo?
If you want to blur a face in a photo, there are several options available.
- You can use image editing software such as Photoshop or Gimp. This option allows you to manually adjust the level of blur on the face or other areas of the photo.
- You can also use a blurring filter or brush in your chosen software. This is ideal if you want to quickly and easily apply a subtle blur effect over a particular area of the photo, such as someone’s face.
- Another popular method for blurring faces in photos is using a Gaussian Blur filter. This type of blur effect adds an overall softening effect to the picture, with more emphasis around the edges. This can be used to blur out faces or other details in the image.
- If you don’t want to use software, you can also use a dedicated blur face app such as Face Blur or Blur Faces. These apps allow you to select an area of the photo and apply a preset level of blur to it. This is great for quickly blurring out faces without having to spend time adjusting settings manually.
No matter which method you choose, blurring faces in photos can help keep your images private, professional and aesthetically pleasing at the same time. Try out each option and find the one that best suits your needs!
Where Can You Blur Photos Online?
If you’re looking for an easy way to blur photos online, there are a few great tools available. Adobe Photoshop and Pixlr Editor both offer powerful control over photo blurring, while BeFunky and BlurImage allow anyone to easily create a blurred effect in just a few clicks.
Adobe Photoshop is one of the most popular professional image editing programs available. With its intuitive interface and powerful features, it’s perfect for creating unique and artistic effects like blurring portions of your images. To use Photoshop for blurring photos, first open your image in the editor. Then, select the “Filter” menu from the top menu bar and choose “Blur” > “Gaussian Blur”. Adjust the “Radius” to your desired level of blurriness and click OK.
Pixlr Editor is a powerful online image editor that’s perfect for creating subtle blurs on photos. To start, open your photo in Pixlr and select the “Filter” menu from the top toolbar. Then choose “Blur” > “Gaussian Blur”. From here, you can adjust the Radius slider to create your desired blur effect.
BeFunky and BlurImage are two free online tools designed specifically for blurring images quickly and easily. With BeFunky, simply upload your image and select “Edit” > “Effects” > “Blur & Glow” from the menu. Then choose “Blur” and drag the slider to your desired level of blur. BlurImage is an even simpler tool, allowing you to easily select a blur value (from 1 to 10) and quickly apply it to any image. [4]
Where Can You Blur Photos on Your Phone?
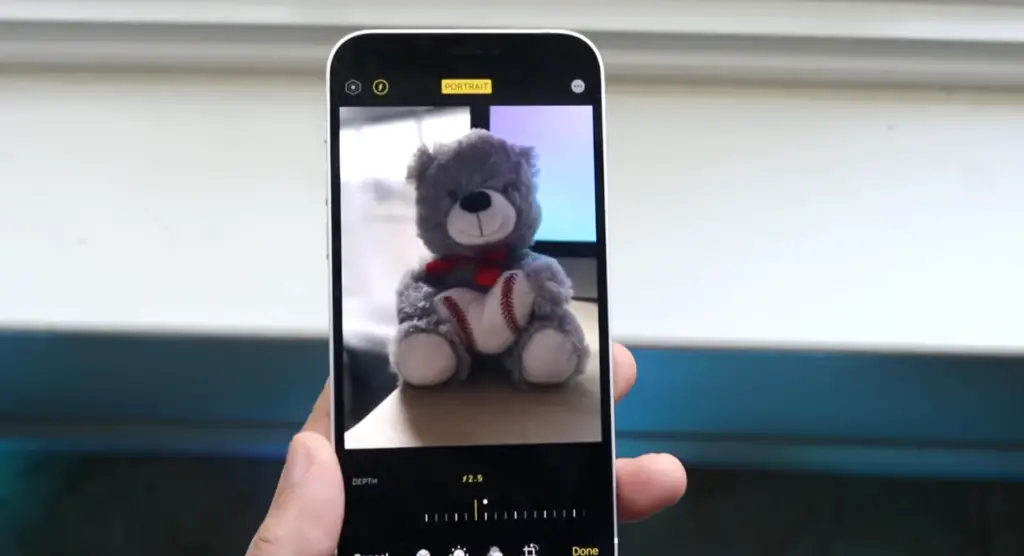
If you want to blur a photo quickly, most stock camera apps have an “Effects” menu which includes options for blurring the image. Simply open up your camera app, snap a picture, then choose the “Effects” option from the bottom menu. There should be several blur effects available such as: Vignette Blur, Motion Blur, Lens Blur and Tilt-Shift Blur. Tap one of these options and adjust it until you get the desired effect! [5]
Use Bokeh Effects To Add Blurry Lights To Photos
One of the best ways to make a photo blurry is by using bokeh effects. Bokeh, or blurred lights in photography, can add a beautiful and creative element to your photos. The most popular way to create this effect is with specialized lenses, but there are also other methods that you can use to achieve the same look.
To create bokeh in photos, you will need something like Christmas lights or an LED light source—something bright enough so that it will be visible even when out of focus. Position the light source as far away from your camera as possible while still keeping it visible in your frame. Then adjust your camera settings accordingly: use a wide aperture (f/2.8 or wider), set your shutter speed to a slow setting (1/15 or slower), and use manual focus to blur out the background.
The final step is to take multiple shots of the same scene, but each time shift the light source in different directions. This will create unique patterns that can be used to add texture and depth to an image. Once you’ve taken all of your photos, you can edit them together in post-processing software like Photoshop, Lightroom, or GIMP. Here you can adjust settings such as exposure and color balance to get just the right look for your photo.
With a little practice, it’s easy to create beautiful bokeh effects in your photos! Try experimenting with different light sources and camera settings to find the perfect combination for your photos. You may be surprised with how much creativity you can add to your images with just a few simple adjustments.
Create an Artsy Image by Blurring It with Orton Effect
It’s named after Michael Orton, an American photographer who developed this special style of photography. The technique involves merging out-of-focus images with sharper ones and has become increasingly popular for digital photography. Here’s how you can create the Orton effect on your own photos:
- Start by selecting the photo that you want to blur and open it in your photo editing software.
- Create two copies of the original layer; name one “blur” and the other “background”.
- Select the “blur” layer and adjust the blur setting until you get a desirable result. Experiment with different blur values and find one that suits your image best.
- Now select the “background” layer, reduce its opacity to around 50%, and then change its blending mode to “screen” or “lighten”.
- Adjust the shadow, midtones and highlight sliders on the background layer until you get the look that you are after.
- Finally, flatten all of the layers together and save your photo as a JPEG file.
By using these simple steps you can easily create an artistic blurred effect with the Orton technique! You can also use this effect on other types of photos, such as portraits of landscapes.
How to Deblur Image In Photoshop
Photoshop is one of the most powerful editing programs out there and its ability to deblur an image makes it especially useful for fixing blurry photos. If you have a photo that’s too blurry or out of focus, you can use Photoshop’s deblurring tools to try and restore the photo to its original clarity. Here’s how:
- Step 1: Open your image in Photoshop and make sure that it is selected.
- Step 2: Navigate to Filter > Sharpen > Unsharp Mask. This will open up the Unsharp Mask dialog box, where you can adjust the settings for sharpening your image.
- Step 3: Adjust the Amount slider until the blurriness is reduced to a level that you are happy with.
- Step 4: You can also adjust the Radius slider, which allows you to set the strength of the blur effect.
- Step 5: Finally, click OK once you’ve adjusted all settings to your liking and voila – you have successfully deblurred your image!
Using Photoshop to deblur an image is a great way to bring back some of its original clarity and make it look like new again. With just a few simple steps, you can quickly get rid of any unwanted blurriness. Give it a try today and see what kind of results you can achieve! [6]
How to Deblur Images Without Photoshop
Photoshop isn’t the only program that you can use to deblur photos – there are a number of other software options available for those who don’t want to invest in Adobe’s editing suite. Here are some popular options:
- GIMP – GIMP is an open-source image editor that works on both Windows and Mac computers. It has many of the same features as Photoshop, including a tool specifically designed for deblurring images.
- Fotophire Focus – Fotophire Focus is an easy-to-use photo editing program that can quickly deblur your images with just a few clicks. Its intuitive interface makes it great for beginner editors, while still offering powerful features for more experienced users.
- Photo Stamp Remover – Photo Stamp Remover is a dedicated deblurring tool that can quickly and easily remove blur from your photos. It also has tools for removing other imperfections such as red-eye, glare, and text watermarks.
These are just a few of the photo editing software options out there that you can use to deblur images without having to use Photoshop. With so many great choices available, it’s easy to find one that works best for you!
Types of Blur
There are three main types of photo blur: Gaussian blurs (also known as “box” or “normal”), motion blurs, and radial blurs.
Gaussian Blur is the most common blur used to achieve a gentle softening effect on photos. With this type of blur, the edges of the image become gradually blurred and less focused. This helps reduce noise in areas where there is a lot of detail, such as trees and people’s faces.
Motion Blur is more intense than Gaussian Blur and creates a streaking effect on images. It works best when applied to objects that are in motion, like running water or moving cars. Motion Blur can be used to give an interesting and dynamic look to a photo.
Radial blur is great for creating special effects in photos. It is based on circles that rotate around the center of the image, resulting in an outward spiral effect. Radial blurring can be used to create a dreamy, surreal atmosphere or even to make an object look like it’s spinning.
FAQ
How can I blur a picture on my iPhone?
First, open the image you want to blur and tap “Edit” at the bottom of the screen. From there, select “Adjustments” and then choose “Gaussian Blur” from the list of options. You can use the slider to adjust how strong or weak you want the blur effect to be. Once you have achieved your desired results, tap “Done” to save your changes. Your photo is now blurred!
How can I blur out my iPhone for free?
Using your iPhone to blur a photo is easy and free. All you need is a basic editing app like Adobe Photoshop Express or Snapseed, both of which are available for free on the App Store. Once you have the app downloaded and opened, simply select the image you want to edit and then use the blur tool within the app to adjust how blurry you would like it to be. You can also choose other options such as brightness, contrast, saturation, etc., in order to customize your photo even more. When finished, save your edits and share your blurred masterpiece with friends!
How do you blur a picture in a gallery?
You can blur a picture in your gallery using any basic photo editing app. Open the picture you would like to edit and select the blur tool. If available, you can also adjust other options such as brightness, contrast, saturation etc., if desired. Once you have finished making your changes, save it and share with friends!
What is Gaussian Blur used for?
For example, it can be used to blur out backgrounds or create artistic effects by blurring certain areas of the photo while leaving others in focus. It’s also commonly used to remove red eye from photos by blurring away the red color. Gaussian blur can be used for a variety of purposes depending on your needs, and is available as an editing tool in many photo editing apps such as Adobe Photoshop or GIMP.
Does Picsart have a blur tool?
Yes, Picsart does have a blur tool. To access it, simply open the app and select the photo you want to edit. From there, select the “Tools” tab at the bottom right of the screen and then choose “Blur” from the list of editing tools available. You can use this tool to customize your blur effect with different strength settings, or adjust other options such as brightness, contrast, saturation etc., if desired.
Useful Video: Increase Blur to Sharpen Better? – Photoshop Trick
Conclusion
In conclusion, blurring a photo is an easy and effective way to enhance the artistic or creative value of your image. You can achieve this effect by using one of the tools mentioned above or through manual methods such as adjusting brightness, contrast, and saturation settings. Additionally, you can add blur filters to your photos for instant results. Ultimately, however you choose to apply blur effects to your images should be based upon your personal preference and desired outcome. Regardless of what technique you use, it’s possible to quickly create beautiful blurry photos with ease!
With the right photo editing software and knowledge of how to make a photo blurry, you can start creating stunning visuals that stand out from the crowd in no time at all! So go ahead and give it a try – you might be surprised at how easy it is to achieve amazing results. Good luck!
Happy editing!
References
- https://digital-photography-school.com/when-blur-is-good-in-photography/
- https://www.fotor.com/blog/how-to-blur-part-of-a-picture/
- https://expertphotography.com/blurred-background-portrait/
- https://raw.pics.io/blur-image
- https://www.businessinsider.com/guides/tech/how-to-blur-a-picture
- https://www.makeuseof.com/how-to-unblur-an-image/