

Every year, during the festive season, you are reminded of the joy and wonder of Christmas celebrations. Nothing captures this moment better than stunningly beautiful photos of sparkling lights, colorful decorations, and magical moments. But for those who are just getting started with photography, how can you capture these special memories? This guide discusses some essential tips to help you photograph the magic of Christmas and create lasting memories with your camera.
Types of Christmas Photography
Christmas photography can vary depending on the type of photographer you hire. Some popular types of Christmas photography include:
- Traditional Photography – This style focuses on classic Christmas images, featuring people in festive clothing and decorations. It is often shot in a studio or home environment, using props to create a holiday atmosphere.
- Creative Photography – This style involves more creative approaches to the holiday season. It could involve incorporating unique light effects, special effects, or adding festive touches to everyday scenes.
- Outdoor Photography– Nature has an abundance of beauty during this time of year that many photographers enjoy capturing with outdoor shoots. Snowy landscapes and glistening icicles make for perfect backdrops for these photographs!
- Lifestyle Photography – This style seeks to capture the essence of Christmas in everyday moments. It focuses more on people and the emotions associated with the holiday season than traditional Christmas images.
- Pet Photography– Don’t forget your furry friends! Capture your pet’s unique personality this year with some adorable holiday portraits.
No matter which type of photography you choose, make sure to find a photographer that specializes in that area, so that you get the best results for your Christmas photos [1]!
Essential Equipment for Christmas Light Photography
Manual Camera
A manual camera is the most important piece of equipment for Christmas light photography.
Tripod
A tripod is an essential tool for any photographer, especially when shooting in low-light conditions such as with Christmas lights. Tripods are far more stable than handheld cameras, allowing them to keep their position without shaking or blurring due to movement. They also enable you to get creative and take shots from different angles that would otherwise be impossible with a handheld device.
Macro and Wide-Angle Lenses
Macro and wide-angle lenses are perfect for capturing the festive lights of Christmas. Macro lenses allow you to get up close and personal with your subject, allowing you to capture detailed shots of every bulb in the display. Wide-angle lenses, on the other hand, allow you to capture a broader view of your scene so that all of the lights can be seen in one shot.
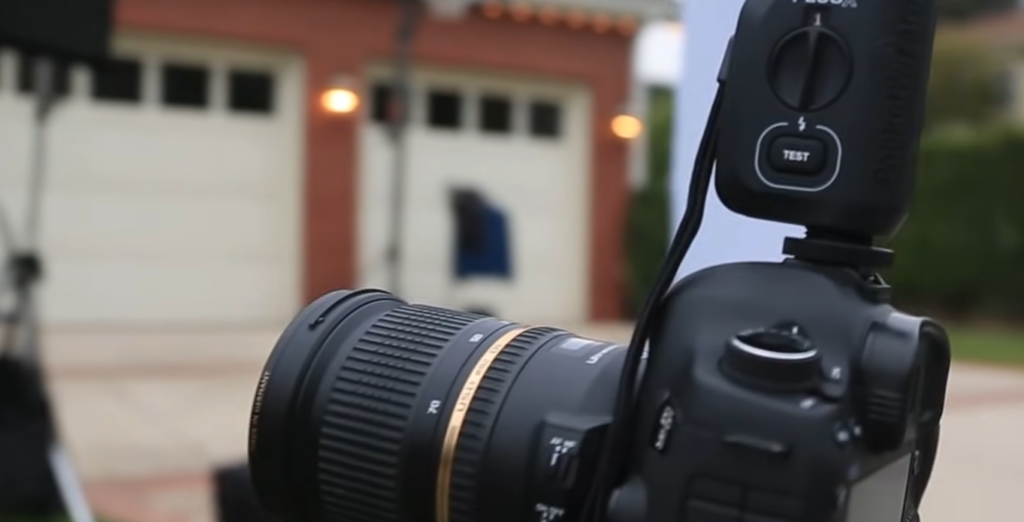
External Flash
An external flash is a great way to add extra light when photographing Christmas lights. External flashes allow you to fill in shadows and create more dynamic images by providing extra light where needed.
Cross Screen Star Filters
Cross-screen star filters are a great way to add a bit of sparkle and magic to your Christmas light photos. These filters create starbursts on the lights in your image, making them pop and creating an even more festive feel.
Remote Shutter Release
A remote shutter release is handy for capturing images with multiple exposures or long exposures without having to touch the camera or tripod. Remote shutter releases come in both wired and wireless varieties and can also be used with some external flashes to trigger the flash remotely.
Editing Software
The last essential piece of equipment for Christmas light photography is editing software such as Adobe Lightroom, Photoshop, or another photo editing program. Editing programs allow you to adjust color, saturation, exposure, and other settings to make your photos look their best. They also enable you to add filters and effects such as vignettes, textures, and more.
DIY Bokeh Card
DIY Bokeh cards are a great way to add even more sparkle to your Christmas light photos. Bokeh cards can be created from any type of paper or cardstock and are used to create out-of-focus bokeh shapes in the background of your images. These simple yet creative props will surely bring some extra magic to your holiday photographs [2].
Camera Settings for Photographing Christmas Lights
Use Slow Shutter Speeds for Christmas Lights
Using a slow shutter speed is one of the best ways to capture Christmas lights in all their glowing glory. The longer exposure allows you to capture each light and make them stand out. Generally, for most outdoor shots we recommend starting with a shutter speed of 1/15th or slower. If your camera has Bulb Mode, then you can keep the shutter open even longer to capture more light.
Adjust Aperture and ISO Settings
The aperture setting on your camera will determine just how much light enters through your lens when shooting Christmas lights. When using a slow shutter speed, it’s important to use an appropriate aperture setting so that the exposure isn’t too bright or too dark. You should start with an aperture of f/11 and then adjust as needed based on the lighting conditions.
The ISO setting is also an important factor to consider when shooting Christmas lights. You suggest starting with a low ISO of 100 or 200 and adjusting as necessary depending on the available light. Keep in mind that a higher ISO will result in more noise in your images, so try to keep it as low as possible.
Use a Tripod for Stable Shots
When using slower shutter speeds, it’s important to use a tripod to ensure that your shots remain stable and free from camera shake. This will help you capture sharper images with less blur or distortion. If you don’t have access to a tripod, you can always try using a nearby wall or table to set your camera on.
Experiment with Different Angles
When photographing Christmas lights, it’s important to experiment with different angles and perspectives. This will help you capture unique images that stand out from the crowd. Try shooting from up high for a birds-eye view of the lights or get down low for some more abstract shots. You can also try using zooming in or out to create interesting compositions.
Play with Color Temperature Settings
If you want to give your photos a unique look and feel, then consider playing with the color temperature settings on your camera. Warmer temperatures will make the lights appear orange while cooler temperatures will make them appear blue. You can also adjust these settings post-processing if you prefer.
Tweak the ISO for Brightness
If you want to make your images brighter, then you can try increasing the ISO setting. This will help you capture more light and make your shots appear brighter. Keep in mind that a higher ISO can add noise to your photos, so use it sparingly and only when necessary.
Switch to Tungsten White Balance
If you want to capture the glowing warmth of Christmas lights, then try switching your white balance setting to “Tungsten.” This will help keep the colors true and make your shots look more natural.
Use Small Apertures to Add Sparkle to Your Photos
If you want to add a bit of sparkle and shine to your photos, then consider using small apertures. This will create a starburst effect on the lights that will make them stand out even more. Generally, an aperture setting of f/16 or smaller should do the trick [3].
Tips for Photographing Christmas Lights
Find a Good Spot
The first step in photographing Christmas lights is to find a good spot to set up your camera. Look for areas that have lots of lights, such as near decorations or along walkways. Avoid places that are too brightly lit and try to keep your background simple so the lights stand out more clearly.
Check Your Camera Settings
Before clicking the shutter button, check your camera settings so you get the most beautiful images possible. Make sure your ISO setting is low enough for a clean image with minimal noise, and adjust the white balance so that the colors of the Christmas lights appear true to life in your photos.
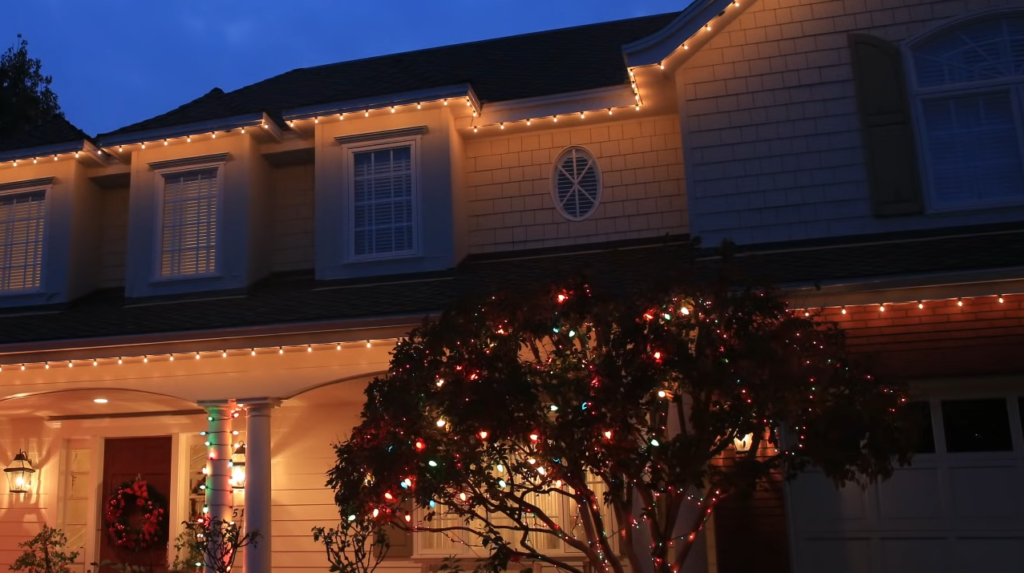
Shoot During Twilight or Dusk
The best time to take photos of Christmas lights is during twilight or dusk when the sky becomes dark enough to bring out the vivid colors of the lights. If you’re taking photos during the day, try using a neutral density filter to help darken the scene and make your photos pop.
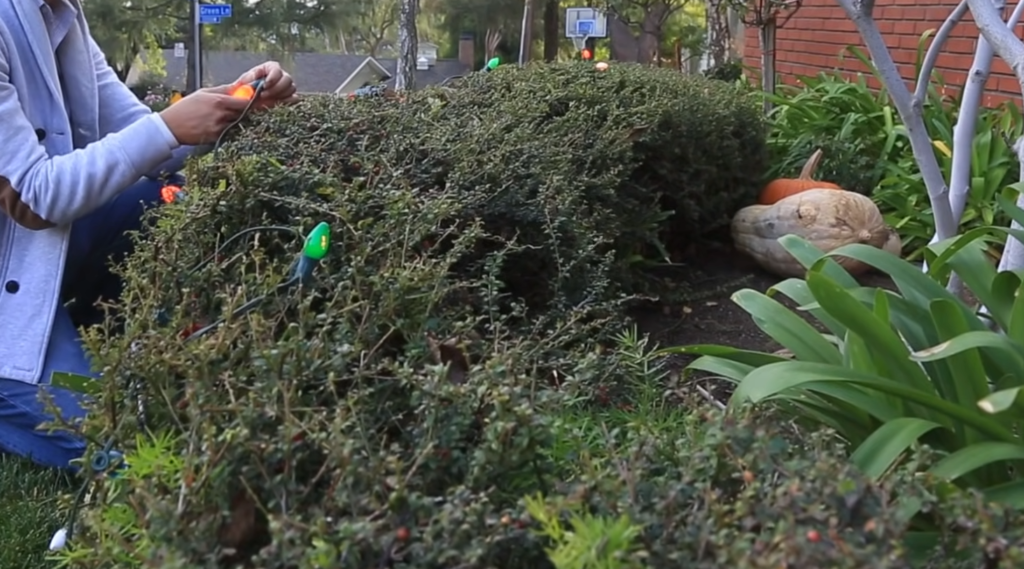
Include Foreground Interest
Adding a foreground subject in front of your Christmas light display can add interest and depth to your shots. This could be anything from people enjoying the decorations, children playing near them or even stationary objects like trees or benches.
Experiment with Long Exposures
Capturing colorful long exposure shots of holiday lights is one way to create unique images that stand out from traditional holiday photography. To do this, you will need to set your camera up on a tripod and use a slow shutter speed. This will capture the light trails of each individual bulb as they move around in the scene. Experiment with different exposure times until you find the one that works best for your shot.
Use Post-Processing to Enhance Your Images
Post-processing can be an effective way to bring out extra details and color in your photos of Christmas lights. With just a few simple edits in Lightroom or Photoshop, you can make any dull photo look vibrant and eye-catching. Just remember not to overdo it – keep your adjustments subtle so your images still look natural.
Skip the Flash
Using a flash for photographing Christmas lights is generally not recommended, as it will often wash out the details and colors of the decorations. Instead, opt for natural lighting or use an LED light panel to bring out extra texture and depth in your photos.
Rely on Metering Modes
Your camera’s metering modes can be a great help in getting the perfect exposure for photographing Christmas lights. Your camera’s evaluative mode is usually the best choice, as it will take into account light and dark areas as well as shadows and highlights to give you an accurate reading. You can also use spot or center-weighted metering if you want more control over specific parts of your scene.
Capture Custom-Shaped Bokeh Effects
If you want to add some extra sparkle and shimmer to your Christmas light photos, try using a custom-shaped bokeh filter. These filters are available for most lens sizes and come in all kinds of shapes – from snowflakes to stars – so you can create beautiful images with unique highlights in the background [4].
Editing Tips for Christmas Light Photography
Step 1: Edit the Exposure
When it comes to editing Christmas light photography, the most important step is adjusting the exposure. You want to make sure that the lights are bright and vibrant without being overexposed and washed out. Generally, you’ll want to increase your exposure slightly, but not too much as this can create a halo effect around the lights. You may also want to add a bit of contrast to make the colors stand out more.
Step 2: Adjust the Color Balance
Color balance is an important part of editing Christmas light photography. You don’t want the colors to be too cool or warm, as this can take away from the overall effect you’re trying for. The best way to adjust your color balance is to use the eyedropper tool in Lightroom or Photoshop and sample a mid-tone area of your image. This will ensure that all colors are properly balanced.
Step 3: Rely on BeFunky’s Smart Tools
With just one click, BeFunky can instantly adjust exposure, color balance, sharpness, and other photo settings – all with amazing accuracy. And the best part is that you can even select from multiple presets to customize your image exactly the way you want.
Step 4: Use Vignetting to Add Depth
Vignetting is a great way to add depth and draw attention to your subject in Christmas light photography. By darkening the edges, you can create a focus on the area where the lights are located. You can easily accomplish this by using the Vignette tool in Lightroom or Photoshop. Just make sure to not go overboard as you want to keep a natural look to your image.
Step 5: Add a Final Touch With Creative Effects
Once you’ve adjusted all of the essential settings, it’s time to add a final touch with creative effects. You can use the effects tools in BeFunky to add a vintage or dreamy look to your image. Or, you can go for something bold and more unique with one of BeFunky’s Graphic Design Effects, like halftones or comic Book Pop Art. Experimenting with these effects will help bring out the festive vibes of your Christmas light photography.
Step 6: Save Your Christmas Light Photo
Once you’ve finished editing your Christmas light photo, it’s time to save it. Be sure to choose the proper file type and resolution for the image, as this will ensure that your final result looks just as amazing onscreen as it does in print. And if you’re planning on printing your photo, don’t forget to use high-quality paper to ensure the best possible results.
Inspirational Christmas Lights Photo Ideas
Create Bokeh Lights On The Christmas Tree
Bokeh lights are a popular and fun way to spruce up your Christmas decorations, and they can be easily created with any camera. Simply set up a tripod or other stable surface, and then use the camera’s manual settings to create the effect. To do this, you’ll need to adjust the lens aperture for best results. Adjusting the shutter speed to capture light streaks is also key when it comes to creating beautiful bokeh images of your holiday decorations.
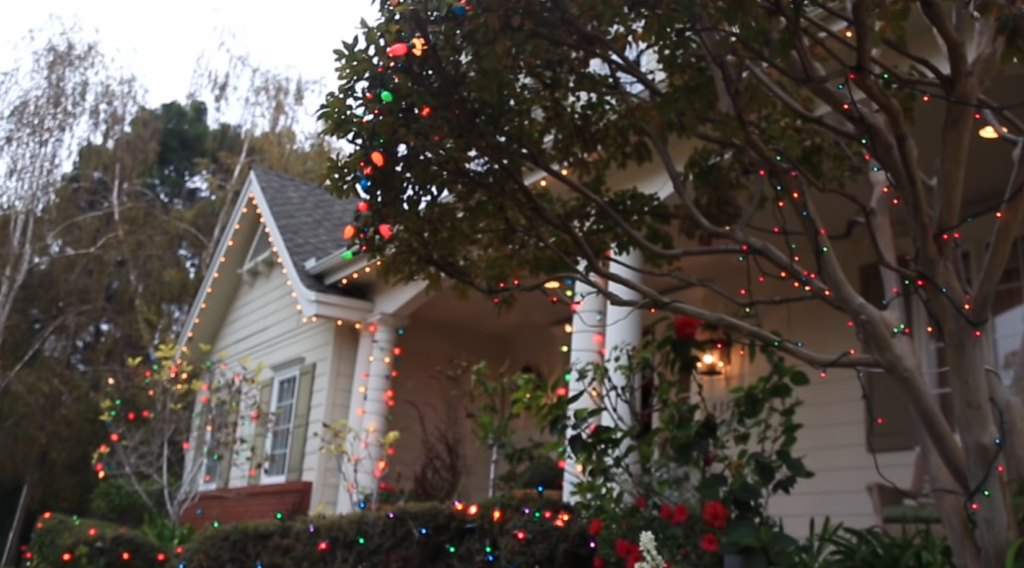
Capture The Beauty Of Outdoor Lights
If you go out into your yard or around town at night, you may find some stunning outdoor light displays that are perfect for capturing on your camera. Depending on how close you get, you may need to adjust your camera’s ISO and shutter speed settings in order to get the best possible shots. Lighting plays an important role in nighttime photography, so remember to adjust your focus points accordingly.
Zoom In On A Particular Display
Try zooming in on one particular display or decoration when capturing photos of Christmas lights. This is a great way to create a more intimate and interesting image with lots of detail. You can use this technique indoors as well, by focusing on one particular area of your home instead of trying to capture everything at once.
Create An Abstract Photo Of Christmas Lights
Abstract photography is becoming increasingly popular these days, and you can get creative with it during the holidays too! Look for interesting shapes within the lights and create interesting shapes with your camera. You can also try experimenting with color, light, and shadows to create truly unique images that will stand out from the crowd.
Combine Lights With Reflections
If you have access to a pond or other body of water, consider using it as a backdrop for your Christmas lights photos. Combine the reflections of the lights in the water with their actual placement in order to create some truly beautiful photographs that are guaranteed to be memorable. Just make sure you adjust your camera settings appropriately so that all of the elements come together perfectly!
Take a Closeup Photo of Christmas Ornaments
The beauty of Christmas ornaments can be easily enhanced when you take a closeup photo. You can use manual focus to get the exact area of the Photo that you want and capture all the details. Try using different angles to create interesting compositions and add your own creative touch to the shot.
Capture A Time-Lapse Of Holiday Lights
Time-lapse photography is a great way to preserve memories, and it works particularly well for capturing holiday light displays. Set up your camera on a tripod at a stationary location, then program it to take photos at regular intervals throughout the night as people come and go from viewing the decorations. You’ll end up with an amazing video of your beautiful holiday lights!
Light Portraits with Christmas Lights
Light portraits are a fun way to get creative with your holiday photography. Experiment with different types of Christmas lights and angles to capture unique looks that can be used as wall art or even printed out for family members. You’ll end up with some truly stunning photos that will be cherished for years to come!
Create Shaped Bokeh Lights
Shaped bokeh lights are a great way to add a creative touch to your Christmas light photography. You can use multiple colors and shapes to create stunning effects or go with a monochromatic look for something more subtle. Experiment with different distances between the lights and the camera lens to get different looks, then share your results online!
FAQ
What settings should I use for Christmas lights photography?
When photographing Christmas lights, you want to use settings that will capture the vibrant colors of the lights and make them sparkle. Generally, you should start with a low ISO such as 100 or 200, so that your camera is less sensitive to light and won’t overexpose your photos. Additionally, choose a wide aperture setting like f/2.8 or f/4 to let in more light and play up the bokeh effect of the Christmas lights. Finally, set a slow shutter speed of between 1-30 seconds to ensure that the lights have enough time to register on your camera’s sensor. With these simple steps, you’ll be able to create stunning photos of your holiday decorations!
What shutter speed to use for Christmas lights?
When taking pictures of Christmas lights, you should aim for a shutter speed between 1-30 seconds. This will give your camera enough time to capture the vibrant colors and sparkling effects of the lights. Additionally, using a tripod can help keep your shutter open longer while avoiding any unintentional blurriness caused by movement. With this combination of settings, you’ll be sure to get beautiful photos of your holiday decorations!
Are there any tips for photographing Christmas decorations?
Yes! When taking pictures of Christmas decorations, make sure you take advantage of natural light sources whenever possible – this will help bring out the colors of the decorations and make them stand out. Additionally, try to find interesting angles and perspectives – taking pictures from higher up or further away can help you capture a unique shot that shows off your holiday décor in a new light. Finally, use props like figurines or wrapping paper to add some extra character to your photos! With these simple tips, you’ll be able to take beautiful photographs of your Christmas decorations.
How do you make Christmas lights pop in pictures?
The best way to make Christmas lights stand out in your photos is by shooting with a wide aperture setting like f/2.8 or f/4. This will let in more light and give your photos a beautiful bokeh effect that will make the lights “pop” off the page. Additionally, using a slow shutter speed of between 1-30 seconds will give your camera enough time to capture all the vibrant colors of the lights. With these simple steps, you’ll be able to create stunning holiday photographs!
What type of lighting should I use for Christmas photography?
When shooting pictures of Christmas decorations, natural light is always preferable over flash or artificial lighting. Natural light will help bring out the vibrant colors of your decorations and make them stand out in your photos. However, if natural light isn’t available, you can also use a flash or LED light to provide extra illumination. Just be sure to adjust your settings accordingly so that the colors of the decorations don’t become washed out.
What are DSLR settings for Christmas trees?
When photographing a Christmas tree, you want to use settings that will capture the colors of the lights and the depth of the branches. Generally, you should start with a low ISO such as 100 or 200 to avoid any unnecessary noise. Additionally, choose a wide aperture setting like f/2.8 or f/4 to let in more light and create an attractive bokeh effect. Finally, use a slow shutter speed of between 1-30 seconds so that your camera has enough time to capture all of the details in the photo. With these simple steps, you’ll be sure to get beautiful photos of your holiday season decorations!
How to choose a lens for Christmas photography?
When choosing a lens for Christmas photography, you want something that can capture a wide range of colors and details in your photos. A wide-angle lens like an 18mm or 24mm is ideal for capturing large scenes like the full tree or a room decorated with lights and decorations. Alternatively, a telephoto lens like an 85mm or 90mm can be used to zoom in on specific areas and create interesting portraits with your festive decorations.
What to avoid when photographing Christmas lights?
When photographing Christmas lights, you want to avoid any motion blur or overexposure. Make sure that your shutter speed is set to 1/30 or less, and use a low ISO setting like 100 or 200 to make sure your photos aren’t too bright. Additionally, be aware of the reflections in glass tree decorations as these can cause unpleasant lens flare in your photos. With these simple tips, you’ll be able to create stunning photographs of your holiday decorations!
Useful Video: How to Photograph Christmas Lights – Photography Tutorial
Conclusion
Photographing Christmas lights is a great and creative way to capture the beauty of the season. It can be fun to experiment with different angles, lighting settings, and ways to showcase the colors and design of Christmas lights. With these tips in mind, you’ll be able to create beautiful images that capture all of the magic and beauty of this wonderful time of year. So, get out there, take some pictures, and have fun!
References
- https://shotkit.com/christmas-photography/
- https://www.adorama.com/alc/how-to-photograph-christmas-lights/
- https://learnandsupport.getolympus.com/learn-center/photography-tips/holidays/5-tips-for-capturing-christmas-lights
- https://www.bhphotovideo.com/explora/photography/tips-and-solutions/10-tips-and-tricks-for-photographing-holiday-lights-and-candles