Do you need to remove the date from a photo? Whether you’re trying to keep your personal photos private or want to submit a professional shot for publication without any identifying marks, removing the date stamp is a must. Fortunately, it’s not difficult to do with the right software. In this article, we’ll walk you through the process step by step.
Why should you remove dates from your photos?
If you’re a professional photographer, or even an amateur shutterbug, you probably don’t want the date stamped on your photos. The date can be unsightly and take away from the aesthetic of your images. Additionally, it can reveal how old a photo is and when it was taken — information that some people may not want to share publicly. Removing dates from photos is also necessary if you want to share them online without giving away personal details like when they were taken. For these reasons, learning how to remove dates from photos is a great skill for any photographer who wants more control over their images. [1]

Remove date stamp from photo
There are a few different ways you can remove the date stamp from your photos. The most common involve using either basic photo editors or more advanced software.
Both of these programs offer tools that will allow you to crop out the date stamp, as well as make other adjustments such as levels, color balance, cropping and resizing to enhance your photo further.
Step 1: Load the image to Photo Editors
To begin, you’ll need to open the image in your chosen photo editor. GIMP and Paint both offer free versions of their programs that you can download online. Once you have opened the image, zoom in on the area where the date stamp is located.
Movavi Picverse
If you’re looking for a more advanced solution, then Movavi Picverse might be a good option for you. This program offers an array of powerful tools that allow you to quickly and easily remove date stamps from your photos. All you need to do is upload the image into the software and select the “Clone Stamp Tool” to cover up any unwanted date stamp information.
Luminar AI
Another great option for those looking for more advanced tools is Luminar AI. This program offers an array of tools to help you remove the date stamp from your photos, as well as make other adjustments such as levels, color balance, and cropping.
Step 2: Select the date/time stamp
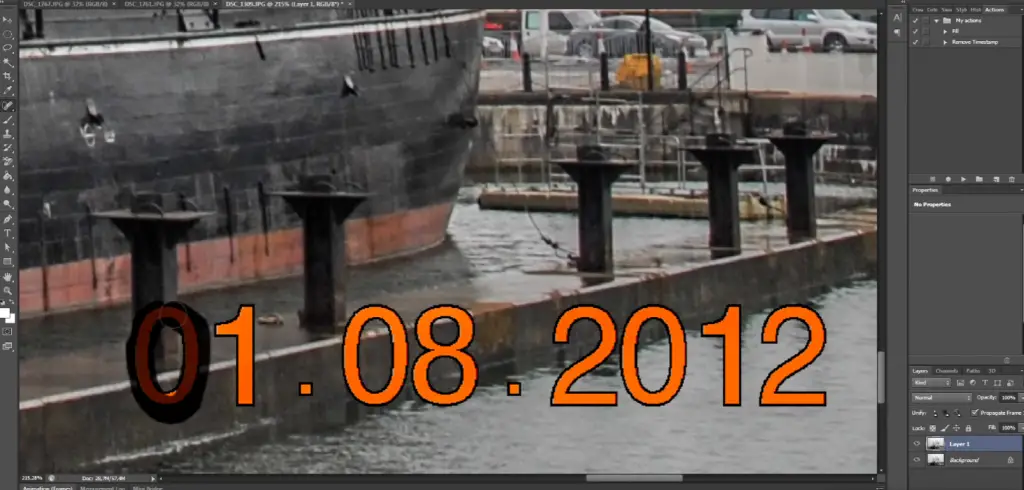
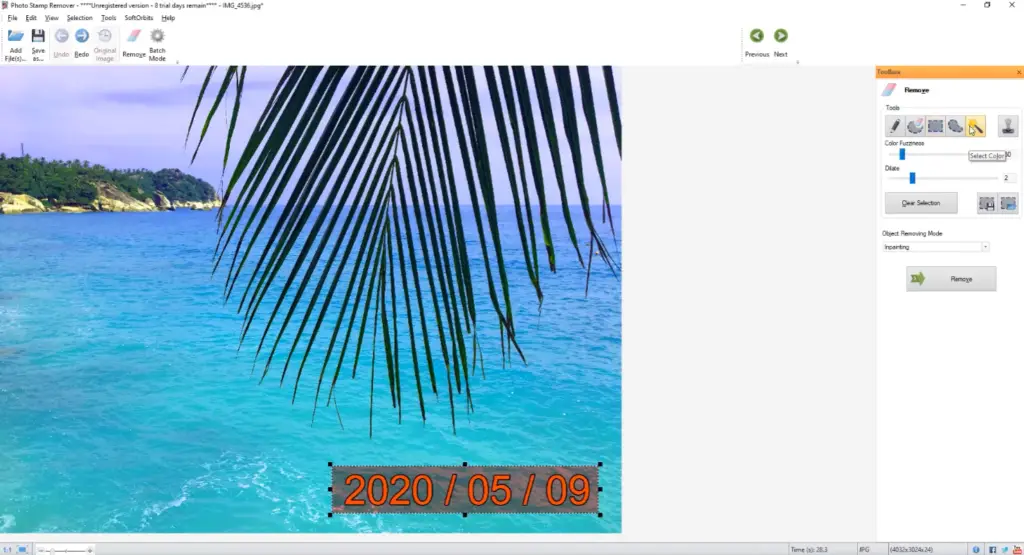
Once you have opened the photo in your editing software, use the cursor to select only the visible date/time stamp. This will allow you to delete or hide it without altering any other part of the photo.
If possible, zoom in on the photo and move around until you find all elements related to the date/time stamp to ensure no trace remains. To do this easily, most editing software will offer a lasso tool that allows you to quickly select the area surrounding the stamp.
If necessary, adjust or modify your selection by using an eraser tool afterwards.
Step 3: Run the restoration process
Once you’ve made all of your adjustments, it’s time to make the changes permanent. Depending on the program you’re using, this step may look a little different, but generally speaking, you need to select “Apply Changes” or something to that effect. Go through each option and confirm your choices. When you’re finished, click “Save” and give the file a new name if desired. That’s it! [2]
The techniques for changing photos are widely varied, so don’t be afraid to experiment with different tools and techniques until you find what works best for you. You can also research other tutorials online as well as search for specific questions like we covered in this guide.
How to Remove Time Stamp from Photo Online Free?
If you don’t have access to Adobe Photoshop or other editing software, removing time stamps from photos online is an easy and free option. There are several websites available that offer the ability to quickly and easily remove date stamps from photos and other images. Here’s how you can go about it:
Inpaint
Simply upload your photo, select the area of the time stamp that you want to remove, and then click ‘Erase’ – it’s as easy as that! Inpaint does an excellent job of automatically detecting the edges of the date stamp, making it much easier for you to erase without leaving any trace behind.
Pixlr
The process works much the same as with Inpaint – just upload your image, select the area of the date stamp that you want to remove, and click ‘Erase’. Pixlr also offers a few more advanced editing features such as cropping and resizing images, so it’s an ideal choice if you need a little bit more control over how your photo looks. [3]
Techniques For Removing Date Stamps Using Photoshop
Date Stamp Removal Using The Crop Tool
This works best if the stamp occupies a small portion of the image, since cropping it out may alter other parts of the composition. To use this method:
- Open your photo in Photoshop and select the Crop tool from the toolbar.
- Draw a square or rectangle around the area containing the date stamp with your mouse, then click and drag to adjust it until you’ve cropped away as much of it as possible without affecting other elements in your composition.
- Press enter to apply the crop changes, then save your file when finished!
Removing Date Stamp With The Brush Tool
- Select the Brush Tool and set your brush size to cover the stamp area.
- Pick a Soft Round brush for the edges to blend into the rest of the photo more naturally.
- Set your opacity to 100%. This will give you maximum coverage when brushing over areas that need to be removed from the photo.
- Start painting lightly until the date stamp can’t be seen on screen anymore.
Remove Date Stamp With The Healing Brush
- Use the Healing Brush Tool.
- Choose a Soft Round brush in order to get a smooth blend when healing over areas that need to be removed from the photo.
- Set your opacity to 50%.
- Begin painting gently until the date stamp is no longer visible on screen.
Eliminate Date Stamp With The Patch Option
This is a great option for those who want to eliminate the stamp from photos with more accuracy.
- Select the Patch Tool.
- Make your image less transparent by setting the opacity to 50%.
- Begin painting over the area of the stamp.
- If anything appears patchy, use a lower opacity and brush over the area again to blend it in.
- When finished, save your file!

Date Stamp Removal Using The Crop Tool
The Crop Tool is great if you’re just looking to get rid of the stamp without having to do any precise edits.
- Select the Crop Tool and set the crop size to cover the area of the stamp.
- Adjust the crop size as needed until it covers only the stamp area, then press enter to apply the changes.
- Save your file when finished!
Batch-Process Images To Remove The Watermarks
Here’s how to do it with Photoshop:
- Select the Images you want to batch process and open them in Adobe Bridge.
- Go to Tools > Photoshop > Batch and select the action you wish to perform on your images.
- Choose your destination folder for the processed image files and click OK. [4]
Now go forth and make some amazing images!
Change your camera settings
If you have a camera that has been set to stamp photos with the date and time, you can change this setting. Doing so will prevent any further photos taken from having a date stamp.
To begin, consult your camera’s user manual or look up the specific model online to find out how to disable the date and time stamp feature in your camera’s settings menu. This should be relatively quick and easy to do, but will vary depending on your specific model.
Once you have successfully disabled the feature, all future photos taken on the device will no longer have a date stamp. However, if you’ve already taken some pictures with a date stamp on them prior to disabling it, then those shots will still have the date stamp unless you follow the next steps.
FAQ
How do I remove the date from the photo?
There are a few different options available to you, depending on how advanced you want to get with your editing.
First, try using the clone tool option. Then ‘clone’ this section over top of the stamped area. This won’t always work perfectly, but it could be enough for you.
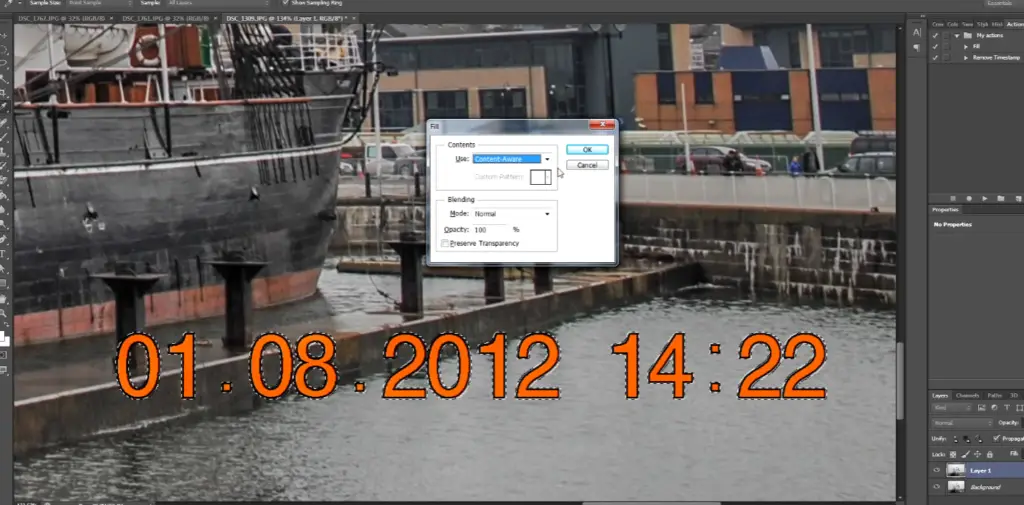
If you’re feeling more adventurous, most photo-editing software packages have advanced features that can help you eliminate the date from your image. Look for a tool called ‘Content Aware Fill’, which can be used to brush away small imperfections like dates and logos. [5]
If all else fails, you might want to consider using an online tool or app specifically designed to eliminate stamps from photos. These tools are usually pretty simple to use and often offer great results. Have a look around and see what’s available!
How do you remove a stamp from a picture?
Removing a stamp from a picture is easier than ever thanks to modern photo-editing software. In most cases, all you need to do is open the image in your editing program of choice and use the clone or rubber stamp tool to carefully cover up the stamp with surrounding colors and patterns. If you don’t have access to an editor, there are also online services that can help you remove stamps from pictures.
To use the clone or rubber stamp tool, select it in your editor’s toolbar. Once selected, hover over the area around where you want to remove the stamp; this will allow you to sample colors and patterns from the surrounding area so they can be accurately cloned onto your image. Carefully go over each part of the stamp, selecting different colors and patterns as needed until it is blended in. Once you have covered the stamp, save your image and you should be done!
Another method of removing stamps from pictures is to use a blur effect. You can access this feature in most editors by selecting the Blur tool from the toolbar. Apply it to the area around the stamp that needs to be removed with varying pressures to blend it into its surroundings. This may take some practice so feel free to experiment with different strength levels for the best results.
If all else fails, there are also online services that specialize in removing date stamps from photos. These services often cost a small fee but can often deliver faster and more accurate results than manual editing methods.
How do I remove the date stamp from my iPhone photos?
If you’ve taken a bunch of photos with your iPhone, you may have noticed that many of them come with a date stamp. This can be annoying if you don’t want the photo to show when it was taken, or if the date is wrong. Luckily, there are several ways to remove the stamp from your iPhone photos fairly easily.
The first option is to use an app designed specifically for this purpose. There are many apps available on both iOS and Android devices that allow you to edit and remove the date stamped from your photos. Look for one that offers features such as cropping, color adjustment, and more – all of which will help make sure the final product looks its best.
How do I remove the date stamp from photos in Windows 10?
The process is quite straightforward and will take just a few minutes of your time.
The first step is to open up the photo in the Photos app on your computer. Once it’s open, click the Edit & Create button located at the top-right corner of the screen. This will bring up several options that you can use to edit or enhance your photo. You should then choose “Edit” from the list of options available.
Once inside the editing window, look for an option labeled “Remove Date Stamp” on the left side menu. Click it and confirm any warnings that may popup. This will eliminate the stamp from your photo and you should now be able to save it as a new image file that doesn’t contain the original date stamp.
If you are using Adobe Photoshop, you can also try this alternative approach. Open up the photo in Photoshop and select the “Layers” option located at the top of the window. Next, select “New Fill Layer” from the menu that appears and then choose “Solid Color” from the list of options available. From here, click on any color swatch and fill in your entire layer with it – this will effectively cover up any white text or symbols that may have been included with your original photo (in this case, the date stamp).
Finally, save your photo as a JPEG file and you should now have an image free of any unwanted dates or stamps. With these simple steps, you can quickly remove any date stamp from photos in Windows 10 or Adobe Photoshop.
Useful Video: Adobe Photoshop CS6 Tutorial: Remove Timestamps from Photos (Content Aware Fill)
Conclusion
Removing the date stamp can be a great way to give your photos a professional look. Whether you’re using an editing app or using Photoshop, there are plenty of options to help you get rid of the pesky date stamps. Just remember to save backups of your original photos in case you need them later on. Thanks for reading our guide and good luck removing those date stamps!
References
- https://www.softorbits.net/how-to/remove-date-from-photo.html
- https://theinpaint.com/tutorials/pc/how-to-remove-date-stamp-from-photo
- https://itselectable.com/remove-date-stamp-from-photo/
- https://macsources.com/remove-date-stamp-from-photo/
- https://imagerestorationcenter.com/how-to-remove-timestamp-from-photo/





Leave a Reply