
Have you ever been outside in the evening and looked up at the night sky, marveling at its beauty? On a clear night, you can see stars, galaxies, planets – and of course the moon. Imagine what it would be like to be able to capture this majestic scenery with your iPhone! This blog post will show you how to take good pictures of the moon using nothing but your iPhone – creating beautiful memories of the starry night sky that will last forever.
How To Take A Picture Of The Moon With An iPhone?
Taking a picture of the moon with an iPhone is easier than you might think. With just a few simple steps, you can capture stunning shots of our celestial neighbor on your device. Here’s what you need to do:
- Find the Moon – Use your phone’s compass app for stargazing apps like Star Walk 2 or Night Sky to help locate the moon in the night sky. Once you’ve found it, make sure that your phone is pointing directly at it.
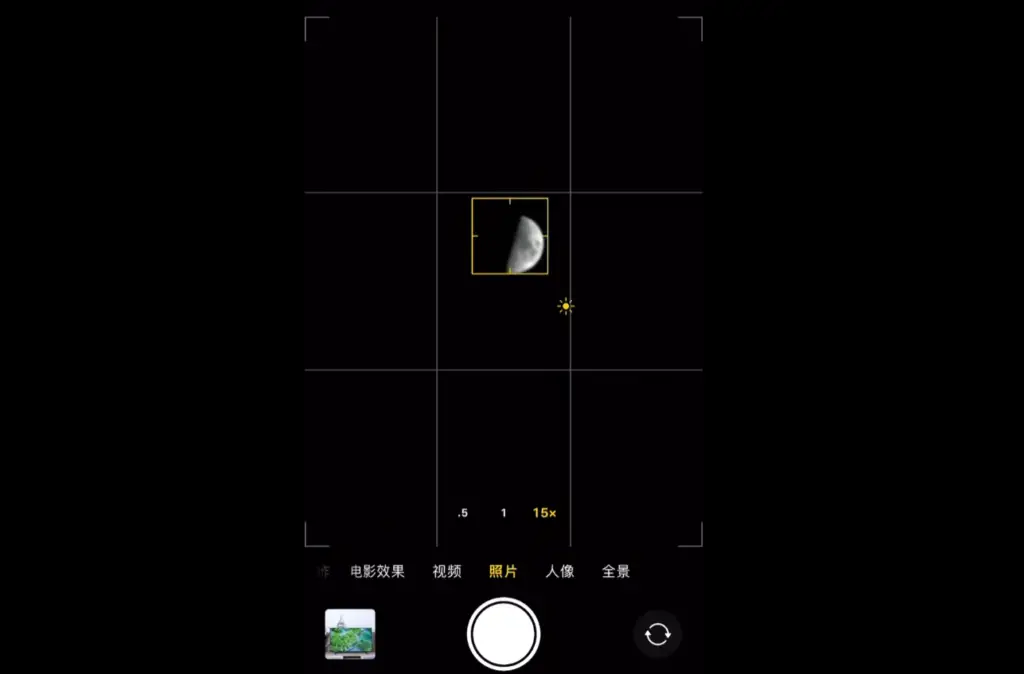
- Adjust Camera Settings – Open the camera and adjust the settings before taking any pictures. Make sure that HDR (high dynamic range) is turned off and select Photo mode for sharper images. If possible, switch the lens to the telephoto one, which will give you a closer and more detailed shot of the moon.
- Use A Tripod – If you don’t have a tripod, try balancing your phone on something steady like a wall or tree trunk. This will help reduce camera shakes and blurry photos.
- Take The Picture – Tap the shutter button to take your picture! You can experiment with different angles and exposures until you get the perfect shot. Once you’ve taken your photo, make sure to check out some editing apps like Snapseed or VSCO for further adjustments and enhancements!
With these tips, you’ll be able to capture impressive shots of the moon with just your iPhone. So, next time you’re out and about at night, don’t forget to snap a few photos of our beloved celestial neighbor [1]!
15 Expert Tips for Great Moon Photos With iPhone
Shoot the moon when it is low
A great way to get some great moon photos is to shoot the moon when it is low in the sky. This will provide a more dramatic and unique look as the light from the sun can create interesting shadows and highlights on the lunar surface. Additionally, shooting at a lower angle will make it easier to capture details such as craters and mountains.
Find out the phase and pick the right date
To get the best results, it is important to know the phase of the moon and pick a day when it is full. This will give you a clear view of the entire lunar surface and maximize your chances of getting some great photos. Additionally, if you want to capture an interesting crescent shape, then shooting during a waning or waxing gibbous phase can provide an interesting look.
Use an app to track programs
If you want to get perfect shots of the moon, you’ll need to pay attention to its location relative to other celestial bodies. An app like Star Walk can help with this by displaying a detailed map of what’s visible in your area at any given time. You can even set reminders so that you know when it’s time to get your camera ready.
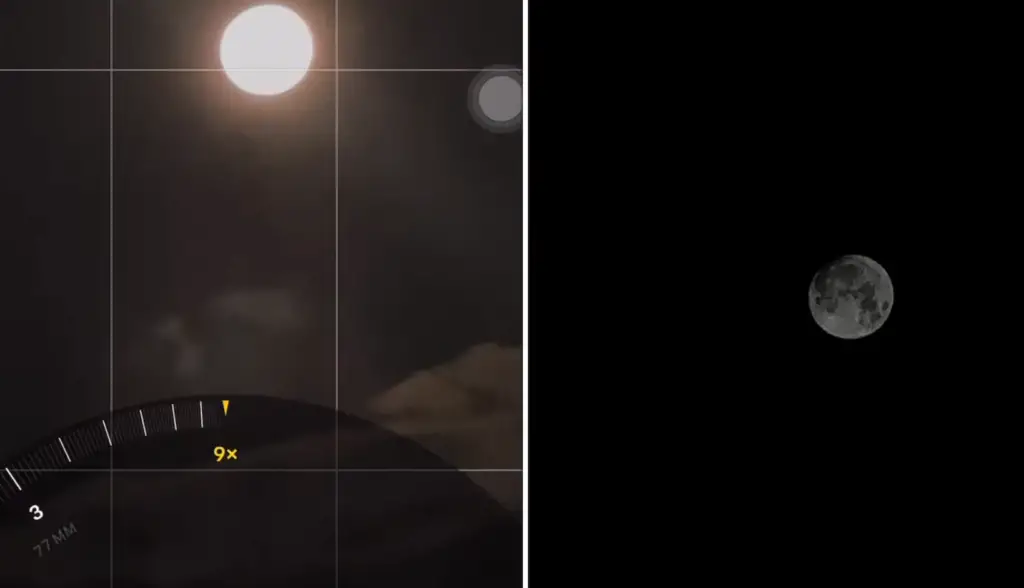
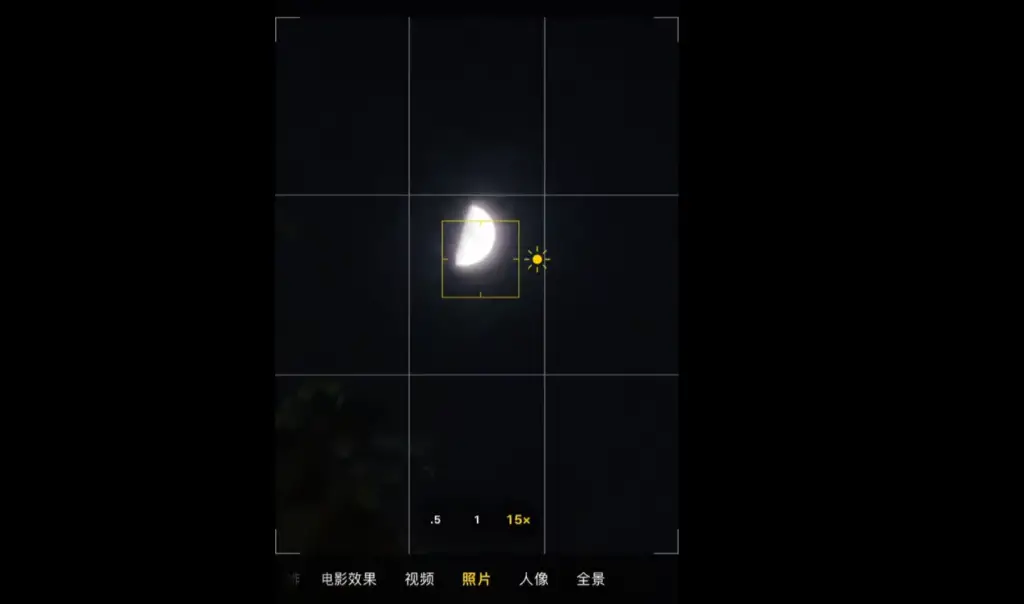
Try magnifying the moon.
The moon is actually quite a bit bigger than what you’ll see in the photos taken with your iPhone. You can use an attachment like an optional telescope lens or telephoto zoom lens to magnify the image and get more details of the moon’s surface.
Use airplane mode
Often when taking pictures with your phone, you may notice that it takes too long for images to be saved due to signal interference from nearby cell towers. To avoid this delay, turn on airplane mode while shooting and then turn it off once you’re done.
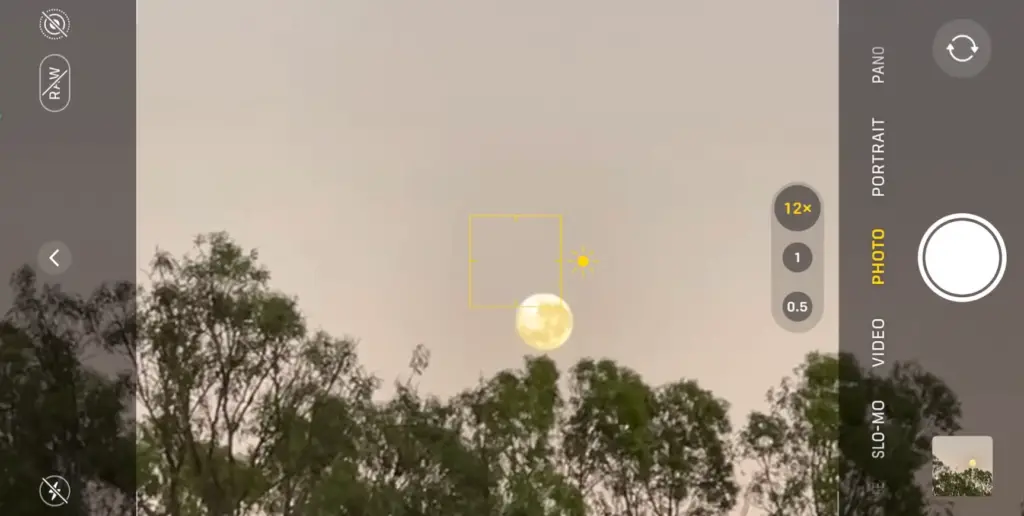
Choose the right lens
For best results, a telephoto lens is best for capturing moon photos. This type of lens will allow you to zoom in on the moon and capture details that would otherwise be impossible with a wide-angle or standard lens. If you don’t have access to this type of equipment, try using digital Zoom instead. This will help you get closer to the moon without having to purchase specialized optics.
Use manual mode
If your iPhone has a manual mode, use it when shooting the moon. This will give you more control over exposure settings such as shutter speed and ISO which can make all the difference in getting great shots of the moon. Experimenting with different settings can help you get the perfect shot.
Try longer exposures
The moon is actually quite bright, so try using a longer shutter speed when taking pictures of it. Longer exposures will allow more light to enter your camera and make for great photos of the moon’s craters and mountains.
Turn down the ISO feature.
The ISO feature on your camera determines how sensitive the sensor is to light. If it’s set too high, you’ll end up with grainy and noisy photos. To avoid this, turn down the ISO when shooting the moon as it will help reduce noise in your images.
Use the Night Mode
If your iPhone has a Night Mode, use it when taking pictures of the moon. This will help you capture more detail and reduce noise in your photos. Additionally, using a tripod can also help keep the camera steady which is especially important when shooting with longer exposures.
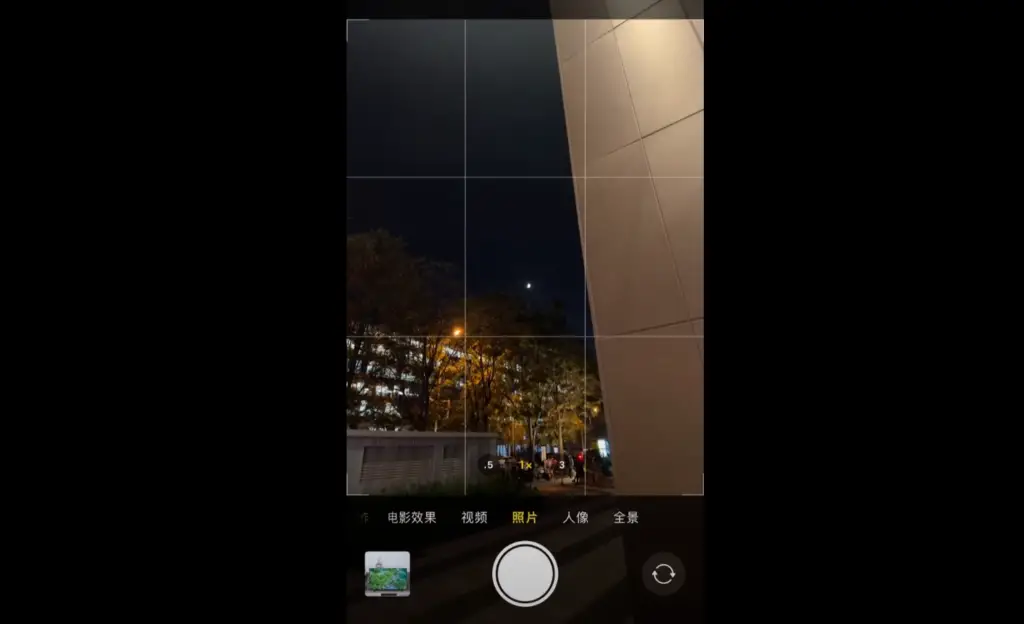
Keep your camera steady
Experiment with different angles and compositions
The moon is constantly changing in size and shape so don’t be afraid to experiment with different angles and compositions when taking pictures of it. Shoot from all sorts of perspectives such as directly overhead, from a low angle, or even through trees or other objects to get some interesting effects.
Turn off the flash
When taking pictures of the moon, turn off your iPhone’s flash as it won’t do anything to improve the image and can actually cause more harm than good. The light from the flash will interfere with natural light coming in and can result in photos with uneven exposure.
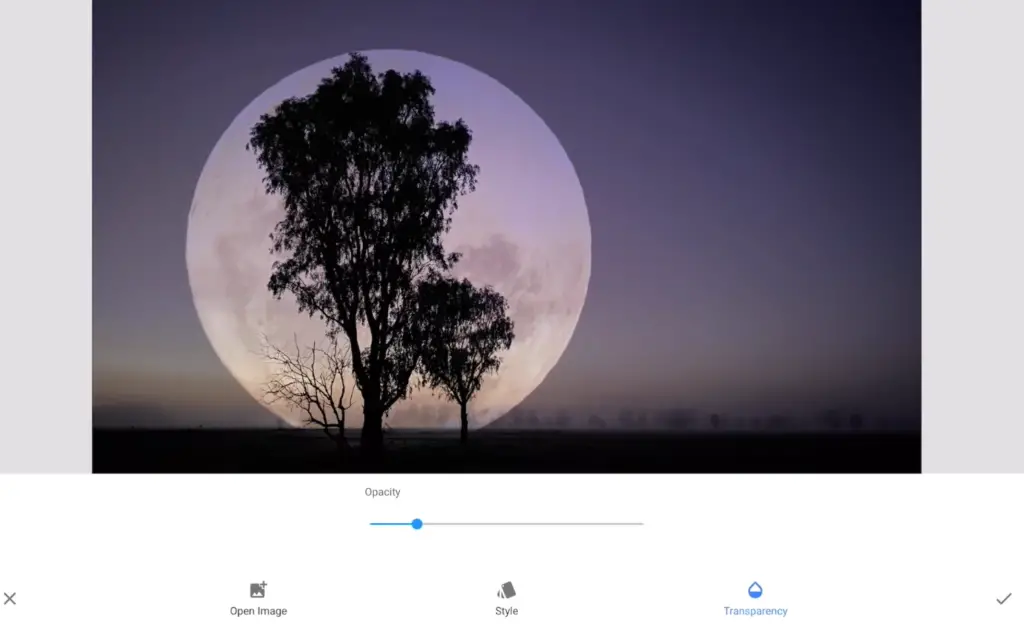
Edit your photos
In order to really get great shots of the moon, you may also need to edit your photos afterward. This could involve adjusting colors, brightness, contrast, or sharpness – all of which can help bring out details that weren’t visible before. Be careful when editing though as too much processing can make images look unnatural so keep things subtle if possible. You may even want to try using Instagram filters like Juno or Valencia to get a unique look.
Invest in some accessories
There are lots of accessories that can help you get even better shots when shooting the moon. For example, a telescope lens or filters can allow you to zoom further into the night sky or enhance colors in your photos. Additionally, using apps like ProCamera can give you more control over exposure settings as well as provide advanced editing options so that you can really get the most out of your images [2].
Why won’t your iPhone take a good picture of the moon?
Your iPhone camera may not be able to take a good picture of the moon due to several factors. First, your device’s camera sensor and lens will never reach the same level of quality as professional astronomical cameras used by astronomers and photographers. Secondly, the amount of light coming from the moon is very dim and it’s difficult for any digital camera to capture this much light in a single photo.
Thirdly, many iPhones don’t offer enough manual control over settings such as ISO, aperture, shutter speed, or white balance which are needed to take a good picture of the moon. Finally, most iPhone lenses do not have enough zoom capabilities which can make it harder to get close-up shots of the moon’s surface.
To get the best results for taking pictures of the moon, you may find it helpful to use a DSLR camera or telescope with a camera adapter. These types of cameras offer more control and better zoom capabilities which will help you take stunning photos of the moon. Additionally, you can experiment with different photography techniques such as long exposure or stacking multiple images to achieve better results. Keep practicing and experimenting with your iPhone camera and who knows — you might just get that perfect shot!
FAQ
How do you take a picture of the moon with an iPhone 11?
Taking a picture of the moon with an iPhone 11 is relatively simple. Start by downloading and opening a photo editing app, like Adobe Lightroom CC. Then adjust your phone’s exposure and focus on the moon. You may need to use burst mode or continuous shooting to ensure that you get enough light in the shot. Finally, make any edits necessary to bring out the colors and details, then save your image for future viewing! Assuming you have a tripod, it can help to stabilize your phone while taking photos of the moon or nighttime scenes in general. If you don’t have a tripod, look for solid objects around you — like rocks, stumps, or even trees — that can do just as good of a job at stabilizing your phone. Additionally, use the gridlines in your camera app to help you keep the horizon level and ensure a clear shot. With these tips in mind, you’ll be better equipped to take beautiful photos of the night sky — including shots of the moon!
What type of camera is recommended for astrophotography?
A DSLR or mirrorless camera with interchangeable lenses is most often recommended for astrophotography. It’s important to choose a camera that allows you to control settings such as shutter speed, ISO sensitivity, and aperture. You’ll also want to select a lens with good low-light capabilities so you can get sharp images when shooting in darker conditions. Finally, it helps to have additional accessories like a tripod, cable release, and an intervalometer. These items will help you keep your camera stable while capturing the best pictures of the night sky. With some practice and patience, you’ll be able to capture stunning astrophotography images with your camera!
Is a telescope necessary for astrophotography?
In short — no. But depending on what type of astrophotos you’re wanting to take, it can certainly help. For example, if you’re looking to photograph distant galaxies or nebulas, then a telescope would give you more magnification power than most standard lenses could provide. Of course, this comes at a cost — both in terms of money and time since setup can be quite complex. So, if taking close-up shots of stars is your goal, then a telescope might not be necessary. However, if you want to explore the depths of the night sky and capture its beauty in stunning detail, then using a telescope could definitely help!
What settings should I use when taking astrophotos?
When taking astrophotos, it’s important to know how to adjust your camera’s settings for optimal results. The exact settings will depend on what type of image you’re looking to take as well as available light conditions. Generally speaking, most photographers recommend using manual mode and setting a low ISO (100-400), slow shutter speed (2-30 seconds), and wide aperture (f/2.8 or wider). Additionally, consider turning off image stabilization features as they can cause issues with long exposure shots. Finally, make sure to use a high-quality tripod and cable release or intervalometer for best results. With the right settings and equipment, you’ll be able to capture stunning astrophotos of the night sky!
Can I take astrophotos without special equipment?
Yes, you can absolutely take astrophotos without any special equipment — all you need is your camera and a bit of creativity. Start by familiarizing yourself with the camera shake. Finally, using a high-quality tripod and cable release will help you take sharper photos at slower shutter speeds. With some experimentation, you’ll soon be able to find the right settings for any astrophotography project!
Can I use my smartphone to take pictures of the stars?
Yes! Smartphones have come a long way in terms of photography capabilities — even when it comes to astrophotography. Although they aren’t quite up to par with DSLRs or mirrorless cameras yet, they can still get pretty good results if used correctly. Start by downloading an app that allows manual control over your phone’s exposure settings, then adjust them accordingly based on what type of image you’re aiming for (e.g night sky landscapes, stars, Milky Way). Additionally, use a tripod or other stable surface to keep the phone still and reduce shaking. With some practice and patience, you’ll be able to capture stunning images of the night sky with your smartphone!
What is the best time to take astrophotos?
The best time to take astrophotos is during the new moon phase — when the moon isn’t visible in the night sky. This will allow you to get clear views of deep-space objects like galaxies and nebulas without any extra light from the moon. Additionally, if possible try taking photos on nights when there are minimal clouds and no light pollution. Doing so will help ensure that your photos turn out as sharp and clear as possible! Finally, if you’re able to plan your astrophotography in advance, try to take photos during the summer months when the nights are longer and clearer. With these tips and a bit of practice, you’ll soon be taking amazing photos of the night sky!
How do I take pictures of the night sky with my iPhone?
Taking pictures of the night sky with an iPhone can be done with a few simple steps. First, download and open a photo-editing app such as Adobe Lightroom CC that allows you to adjust your phone’s exposure settings. Then, turn off auto exposure and select the manual mode for more control over your settings. Next, use burst mode or continuous shooting to ensure that you get enough light in the shot. Finally, make any necessary edits before saving your image for viewing later on.
How do I take good pictures of the moon with my iPhone 14?
Taking pictures of the moon with an iPhone 14 requires a few important steps.
Then, set your aperture to its lowest setting (f/1.8) and use a long shutter speed (2–30 seconds). Next, turn on the timer option in your camera app so that your shots won’t shake when taking them. Finally, consider using a tripod or other stabilizer to keep your phone steady while shooting and reduce blurriness.
Can iPhone 13 take good pictures of the moon?
Yes, the iPhone 13 can take good pictures of the moon. First, it is important to make sure that you are using an app like ProCamera to adjust your phone’s exposure settings manually. Then, set your aperture to its lowest setting (f/1.8) and use a long shutter speed (2–30 seconds). Additionally, turn on the timer option in your camera app so that your shots won’t shake when taking them, and consider using a tripod or other stabilizer to keep your phone steady while shooting and reduce blurriness. With these tips, you should be able to capture stunning images of the moon with your iPhone 13!
Why use a telescope for astrophotography?
Using a telescope for astrophotography can be beneficial in many ways. Telescopes offer a much higher level of magnification than most lenses, allowing you to capture stunning views of distant galaxies and nebulas that wouldn’t be possible otherwise. Additionally, telescopes are well suited for long-exposure shots since they reduce the risk of camera shake or blurriness due to wind gusts. Finally, using a telescope makes it easier to track celestial objects as they move across the night sky — perfect for capturing unique shots like lunar eclipses or comet tails!
What to avoid when taking astrophotos?
When taking astrophotos, there are a few things to avoid in order to get the best results. First, try to avoid light pollution as much as possible — bright city lights can drown out stars and other celestial objects in your photos. Additionally, be careful not to overexpose your shots — choose the lowest ISO setting you can and adjust shutter speed and aperture accordingly for optimal results. Finally, make sure that your camera is secure on its tripod or other stabilizer before shooting so that it doesn’t shake while taking pictures!
How to use a tracking mount for astrophotography?
Using a tracking mount is essential for astrophotography, as it allows your camera to keep up with celestial objects as they move across the sky. First, make sure that your mounting system is compatible with your telescope or camera and set it up correctly. Then, attach the motorized unit and calibrate it using a star chart. Once you have everything set up, use the app on your device to adjust settings like speed, duration, and direction of movement to track an object accurately. Following these steps will help ensure that you get beautiful shots of the night sky each time!
Useful Video: [iOS] Apple iPhone 7 Plus Camera – Screen Recorder – Full Moon in London night sky (UK)
Conclusion
Taking a good picture of the moon with an iPhone is a great way to get started with astrophotography. It doesn’t require any special equipment or knowledge of photography and can be done easily and quickly with any iPhone model. By following the tips discussed in this article, anyone can capture stunning images of the moon that will last them a lifetime. With some practice and effort, even novice photographers may find themselves taking pictures that could be mistaken for professional work! So, don’t hesitate – take your next photo excursion out under the stars and start shooting the moon!
References
- https://www.forbes.com/sites/jamiecartereurope/2022/02/15/expert-reveals-how-even-your-iphone-can-capture-this-weeks-jaw-dropping-snow-moon/?sh=1c5fb5e95414
- https://photovideolounge.com/971/iphone-pictures-of-the-moon-10-expert-tips-for-great-photos/