
Have you ever tried to capture the beauty of a starry night sky or the sparkling city lights on your iPhone? If so, you’ve probably found that taking amazing photos in low-light conditions can be tricky. But with a few simple tips and tricks, you can learn how to take incredible nighttime photos with your iPhone that will captivate and inspire! This blog post will share essential tips for taking stunning night photography with your iPhone – so you can capture the magic of the nighttime like a pro.
How to use Night mode on your iPhone?
Night mode is a great way to reduce the amount of blue light emitted from your device to make it easier on your eyes at night.
You can also manually enable or disable Night Shift by tapping the toggle switch next to its name. When enabled, Night Shift will reduce the amount of blue light emitted from your iPhone during nighttime hours. This will make it easier on your eyes and help your body prepare for restful sleep. Enjoy all of the benefits that come with using this helpful feature [1]!
13 Essential Tips For Amazing iPhone Night Photography
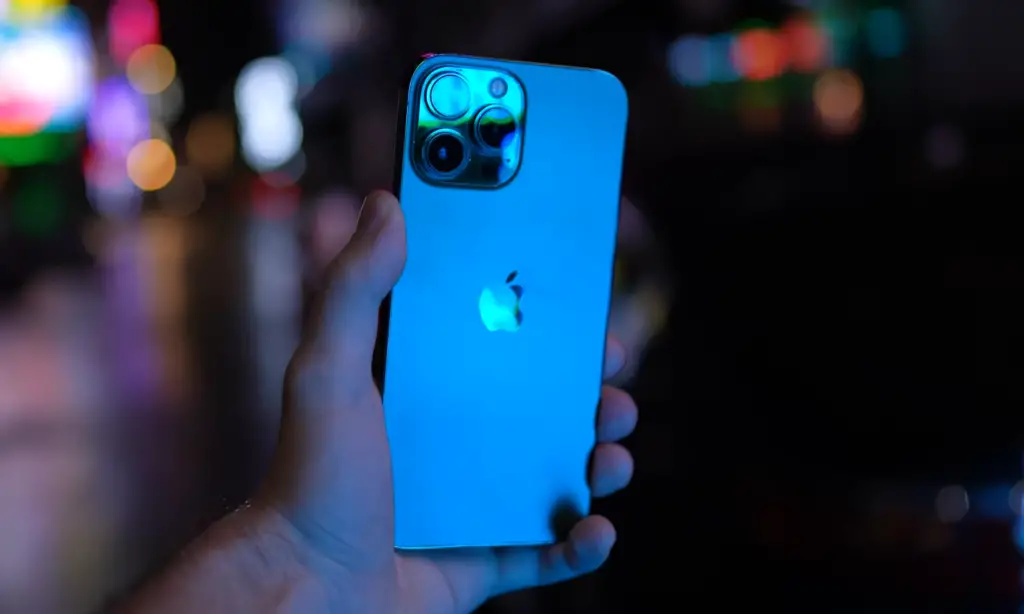
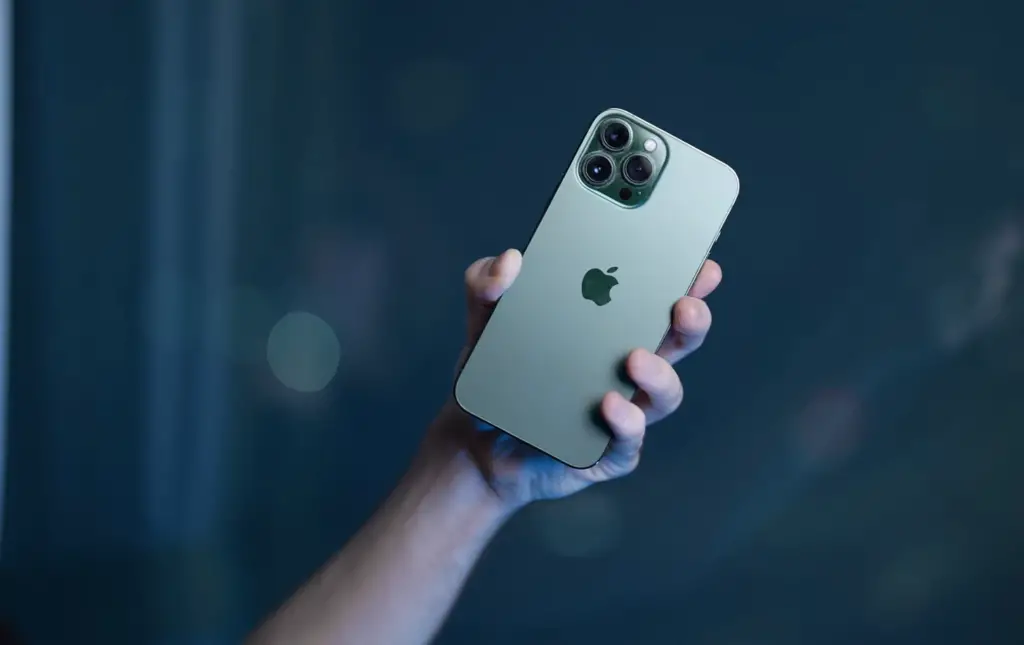
Use iPhone 11 Night Mode To Capture Incredible Color & Detail
The iPhone 11 Night Mode feature is an absolute game-changer for night photography. With this feature, you can capture stunningly detailed images in low-light situations without having to rely on a traditional digital camera or processor. The sensor and image processing system work together to maximize the amount of detail captured by using long exposures and advanced noise reduction algorithms. With Night Mode, you can capture amazing color and contrast even when shooting in dark environments.
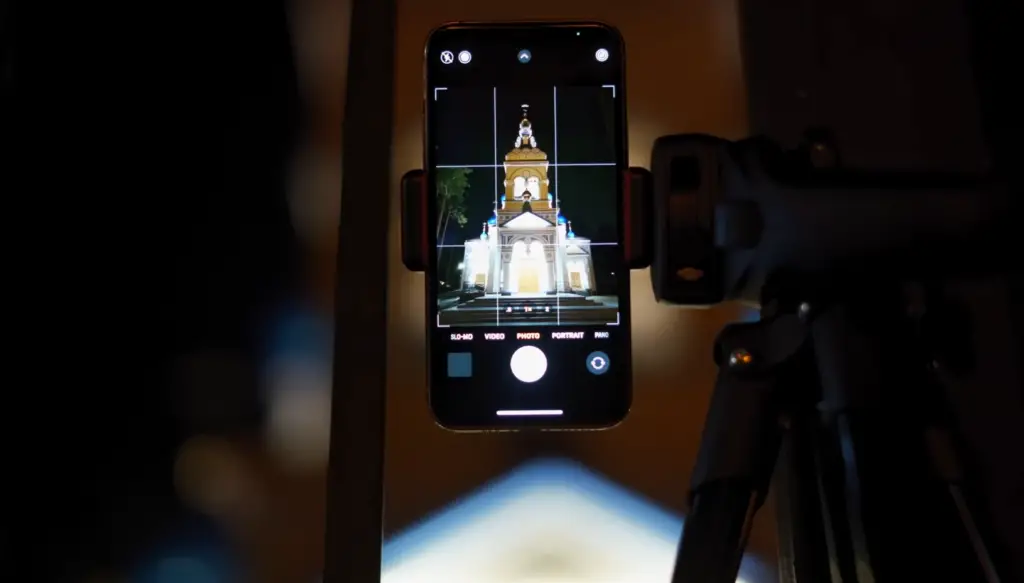
Keep Your iPhone Camera Steady For Sharp, Shake-Free Shots
When shooting at night, it is essential to keep your iPhone camera steady in order to get the sharpest photos possible. The best way to do this is by using a tripod or some other form of stabilization, such as a beanbag. This will help to ensure that you don’t get any motion blur or shake in your images. If you don’t have access to a tripod, try resting your phone on something stable (e.g., a wall) and make sure you hold it very still when pressing the shutter button.
Turn Off Flash To Bring Out Natural Colors & Textures
Using the flash on your iPhone can sometimes cause harsh lighting and washed-out colors, which can be unappealing in night photography. Turning off the flash is a great way to bring out natural colors and textures in your photos while also allowing more light into the scene. You can experiment with different shutter speeds and ISO settings to control the amount of light entering the sensor.
Bring A Portable Light Source For Added Dimension
Adding an external light source to your night photography setup can help create dynamic images with added dimension and depth. Flashlights, headlamps, or even LED lights are all excellent tools for adding subtle lighting effects to your night shots. If you don’t have access to any of these items, try using a long exposure (which will blur moving objects) and increase the brightness of your iPhone screen for some extra illumination during longer exposures.
Experiment With Long Exposures To Capture Movement & Light Trails
Long exposures are a great way to capture movement and light trails in your night photos. You can experiment with different shutter speeds to get the effect you’re looking for. Be sure to use a tripod if you’re shooting longer exposures so that your images will remain sharp and shake-free. You can also use an editing app, such as Adobe Lightroom or Snapseed, to adjust the exposure time of your images after they have been taken.
Look For Interesting Foreground Elements To Add Depth & Dimension
Including interesting foreground elements in your night, photographs can add depth and dimension to an otherwise flat image. Try incorporating street lamps, trees, buildings, or other interesting objects in the foreground of your photos for a more dynamic composition.
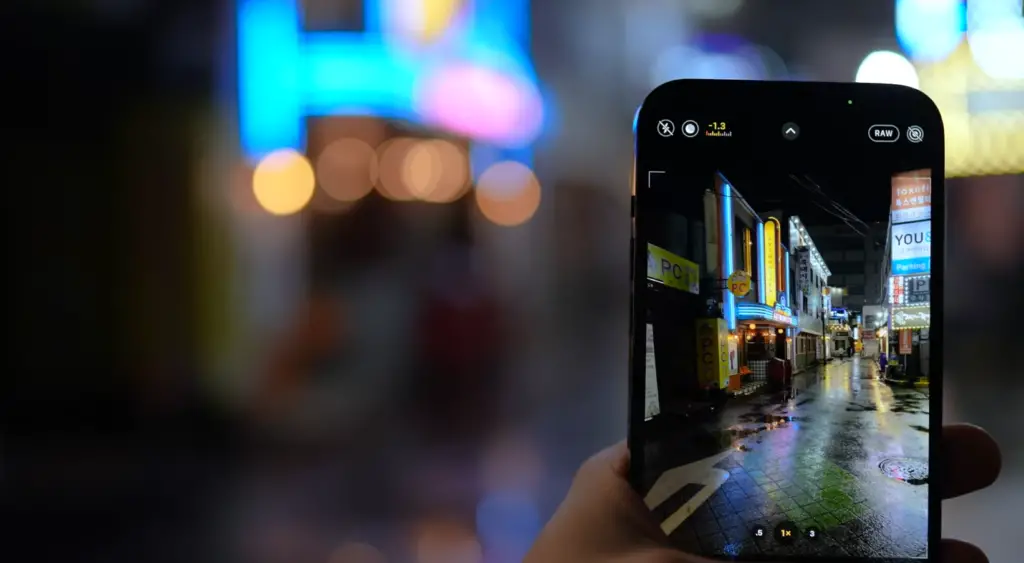
Shoot In RAW To Preserve As Much Image Detail As Possible
When shooting in low light conditions, it’s important to capture as much detail as possible. Shooting in RAW format will preserve all of the data captured by your iPhone’s sensor, allowing you to make adjustments and edits with greater accuracy. You can use an editing app (such as Adobe Lightroom or Snapseed) to make further adjustments to your RAW images after they have been taken.
Try Different Framing Techniques To Capture Unique Shots
Sometimes the most compelling images are those that feature unique framing techniques. Try shooting from different angles and perspectives to create interesting and creative compositions. You can also use your iPhone’s zoom feature to capture isolated details or close-up shots in low light settings.
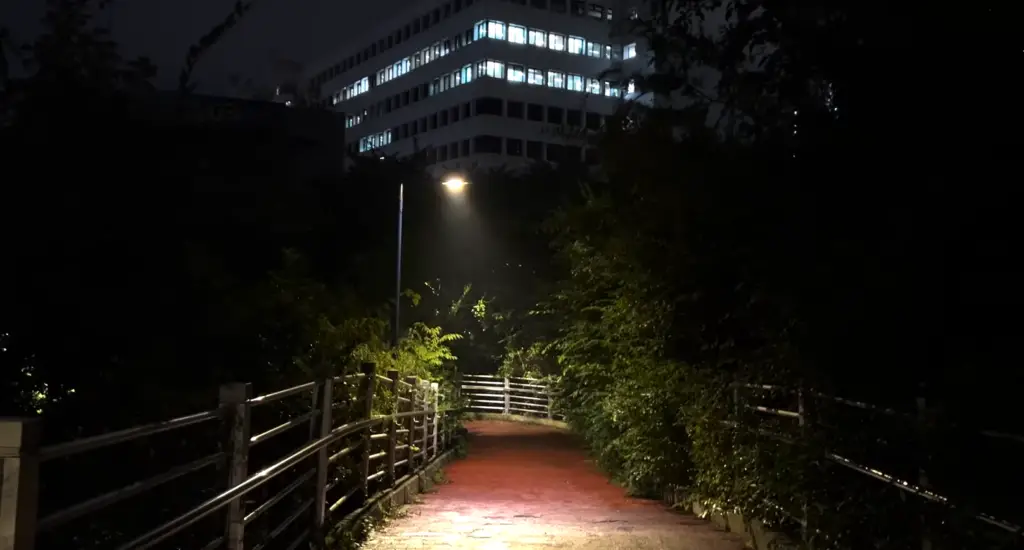
Shoot Around Sunrise & Sunset For The Best Color & Lighting
Shooting around sunrise and sunset is the best time to capture amazing colors and lighting in your night photography. During this time, the light is soft and diffused, which can create stunningly beautiful photos with warm tones and vibrant colors.
Shoot In The Rain For More Creative Night Photos
Shooting in the rain can add an interesting element to your night photography. When shooting in wet environments, be sure to use a waterproof case and keep your iPhone protected from water damage. The rain can create surreal reflections and textures that are perfect for creative night shots.
Convert Your Night Photos To Black & White For Dramatic Results
Converting your night photographs to black and white can give them a classic, timeless look. You can use an editing app (such as Adobe Lightroom or Snapseed) to convert your images to black and white after they have been taken. Monochromatic photos are perfect for emphasizing texture, contrast, and form in night shots.
Edit Your Photos To Enhance Light & Color
Editing your night photos can be an excellent way to bring out the best in them. Try using an editing app such as Adobe Lightroom or Snapseed to adjust the exposure, contrast, saturation, and sharpness of your images. This will help you enhance the color and light in your photos for a more dynamic look.
Review Your Images On A Bigger Screen For Optimal Quality
Finally, it’s important to review your night photos on a larger screen (such as a laptop or tablet) to ensure that you’re getting the best possible image quality. This will allow you to check for any noise or undesirable artifacts that may have been present in your photos [2].
How To Take The Ultimate iPhone Night Photos, According To Photographers
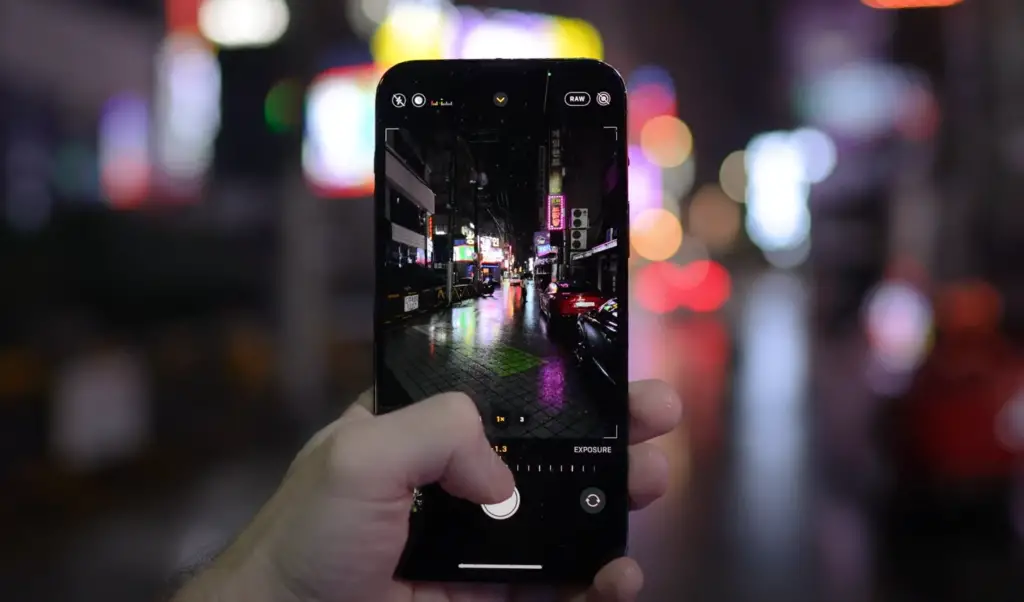
Turn on Night mode and adjust your settings
Using the iPhone’s Night mode is a great way to get stunning night photos. To enable this, simply swipe up on your phone’s screen and tap the moon icon. You will then be able to adjust various settings, such as exposure length and ISO, which can help you capture better-looking images in low-light conditions. Try experimenting with different settings until you find what works best for you.
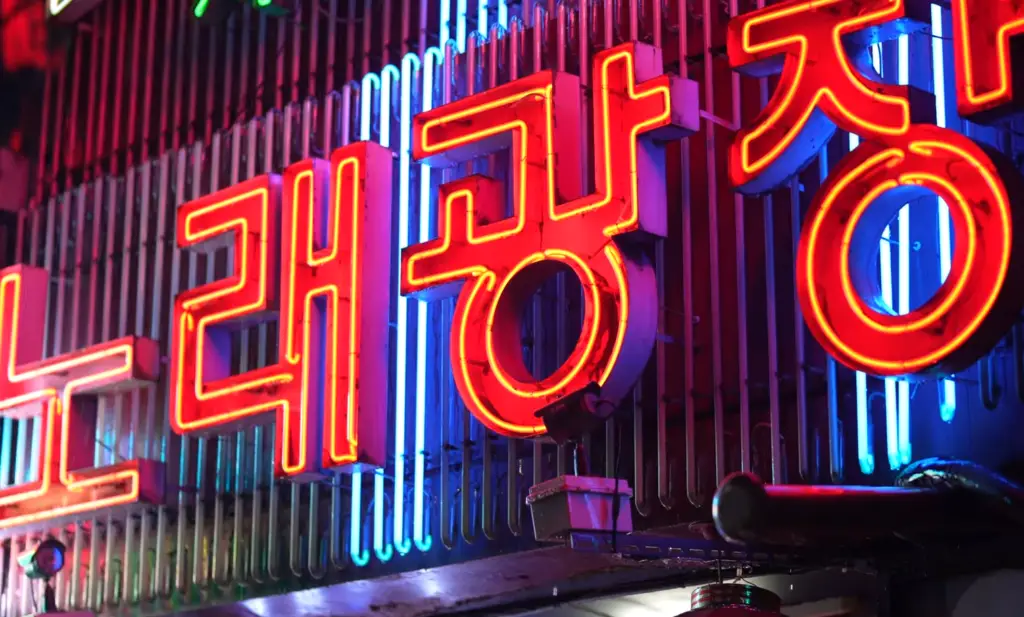
Choose the right subjects
Choosing interesting subjects that stand out in low-light environments can help create beautiful results. That could mean capturing breathtaking cityscapes or close-up shots of illuminated monuments like bridges and buildings. Alternatively, you can try photographing well-lit objects from unusual angles or take advantage of the vibrant colors of the night.
Stabilize your camera
Using a tripod or other stabilizing device is essential for creating clear, sharp night images. This will also help you adjust settings and experiment with different compositions without worrying about shaking your phone.
Find an interesting point-of-view
If you want to take truly unique and captivating night photos, consider looking for interesting points of view that others tend to overlook. For instance, instead of shooting from a distance, try getting closer to the subject and using foreground elements to lend more depth to your shots.
Avoid using the flash
When taking night photos, avoid using the flash as it will typically produce harsh lighting and washed-out colors. Instead, try experimenting with long exposure techniques such as light painting or capturing star trails. With these techniques, you can create incredible images using only natural light sources.
Use the Live Photo feature
The Live Photo feature is great for capturing night scenes. It allows you to create stunning images that are infused with movement and life. To use this option, simply hold down the shutter button until the timer runs out and the image will be automatically saved as a live photo.
Edit your photos
Editing your photos can help bring out more detail in low-light conditions or add extra drama to your shots. There are plenty of editing apps available that can help you achieve professional results without much effort. Try experimenting with different filters and effects until you find what works best for you!
6 Apps to take night photos with iPhone
- NightCap Camera: NightCap Camera is an app designed specifically for taking stunning night photos with your iPhone. It takes advantage of the powerful cameras in newer iPhones to capture photos that look like they were taken with a DSLR camera. The app allows you to adjust exposure, shutter speed, ISO, and focus settings so that you can achieve perfect night photography results every time. You can also add cool special effects such as light trails and starburst mode to make your shots even more impressive. NightCap Camera is available for free on the App Store.
- Night Sky: If you’re looking for a more artistic approach to night photography, then Night Sky may be just the app for you. This unique app lets you create stunning time-lapse videos of the night sky. You can adjust settings such as exposure, ISO, and shutter speed to get the perfect shot every time. It’s also possible to add music and voice-overs to your videos for an even more impressive effect. Night Sky is available for free on the App Store.
- Long Exposure Camera: Long Exposure Camera is a great way to capture beautiful night scenes with your iPhone. The app allows you to take long exposures of up to 30 seconds using the iPhone’s built-in camera, creating amazing shots that look like they were taken with a high-end DSLR camera. You can also adjust settings such as focus, white balance, and exposure compensation so that you can achieve perfect results. Long Exposure Camera is available for free on the App Store.
- ProCamera App: Low Light Mode: The ProCamera App Low Light Mode is perfect for taking night photos with your iPhone. The app uses advanced algorithms to combine multiple images into one, resulting in stunning photos that look like they were taken with a DSLR camera. It also features adjustable exposure settings and a wide range of creative filters that can help you take even more stunning shots in the dark. ProCamera App Low Light Mode is available for free on the App Store.
- Night Camera Pro: Night Camera Pro is an amazing app for taking professional-quality night photography with your iPhone. It has several different modes such as Long Exposure and High ISO which are designed specifically for shooting in low-light conditions. You can also adjust numerous settings such as shutter speed, white balance, and focus so that you can get the perfect shot every time. Night Camera Pro is available for free on the App Store.
- Slow Shutter Cam App: Slow Shutter Cam is a great app for capturing amazing night photos with your iPhone. The app allows you to take long exposures of up to 30 seconds, allowing you to capture light trails and starbursts in the night sky. You can also adjust settings such as focus, exposure compensation, white balance, and ISO so that you can achieve perfect results every time. Slow Shutter Cam App is available for free on the App Store.
These are just some of the many apps available for taking stunning night photos with your iPhone. Whether you’re looking for an artistic approach or just want to get perfect shots in low-light conditions, these apps will help you take amazing photos every time [3]!
FAQ
How do I take good pictures at night with my iPhone?
Taking good pictures at night with your iPhone requires a bit of practice. Here are some tips to get you started:
- Make sure the camera is stable. Use a tripod if possible.
- Avoid digital noise by using slower shutter speeds and higher ISO settings.
- Use the self-timer to reduce motion blur from pressing the shutter button.
- Try taking a few shots at different exposures, then use an editing app to adjust light and color balance for each shot.
- Experiment with exposure compensation on portrait photos to maximize details in shadows and highlights.
- Consider using an external flash or LED light panel to add more illumination, depending on your subject matter.
- Check out other apps like NightCap that can help you take even better shots in low-light conditions.
- Take advantage of HDR mode to capture photos with plenty of contrast and detail.
How do I turn my iPhone into Night mode?
Night mode is a feature available in newer models of the iPhone that allows you to take better pictures in low light. To enable Night mode, open your Camera app and go to the Options menu. Then select “Night Mode” and adjust the slider to adjust exposure time (longer for brighter shots). You can also select manual focus if desired. When finished, press the shutter button to capture your shot.
What are some other tips for taking good photos with my iPhone?
- Clean your lens before taking any photos.
- Utilize natural light when possible.
- Choose interesting angles and perspectives to make your photo stand out from others.
- Use burst mode for action shots or candid moments that you don’t want to miss.
- Find creative ways to frame your shots for added impact.
- Experiment with different apps and filters to make your photos look unique.
- Use the grid lines in the viewfinder to help you compose balanced, balanced images.
How do you take pictures of the stars with an iPhone?
To take photos of the stars with an iPhone, you’ll need to use a long shutter speed and low ISO. Start by opening your Camera and tapping the Options menu. Select “Night Mode” and adjust the slider so that it is set to its longest exposure time (this will be dependent on the lighting conditions). Next, tap the “+” icon at the top left of your screen and select “Manual”. Adjust the ISO setting to its lowest level (usually around 64) and press the shutter button to capture your shot.
Where can you take pictures of the stars with an iPhone?
The best places to take pictures of the stars with your iPhone are in dark areas away from light pollution. Look for local parks, deserts, or other remote locations where you can capture a clear view of the night sky. You can also try taking photos of star trails by pointing your camera toward the north celestial pole and keeping the shutter open for several minutes. This will capture an image of the stars as they rotate around this point due to Earth’s rotation.
What to avoid when taking pictures with an iPhone?
When taking photos with your iPhone, it’s important to be aware of the potential issues that can arise. Avoid using digital zoom and low aperture settings as these will result in poor image quality. Additionally, try not to leave your camera exposed to direct sunlight for too long as this can cause the lens to overheat and potentially damage the device. Lastly, make sure to keep your lens clean at all times and avoid touching it directly as oils from your fingers can create smudges or fog up the glass.
Why do you need to use a tripod when taking pictures with an iPhone?
Using a tripod when taking photos with your iPhone is important for reducing motion blur and ensuring sharp images. A tripod will also allow you to keep the camera steady while shooting in lower light conditions, allowing you to capture clear shots without needing to take multiple attempts. Additionally, using a tripod can help reduce camera shake which can cause your photos to appear blurry or out of focus. Finally, a tripod can give you more flexibility in how you compose your shot as it will free up one hand for adjustment.
Why is it important to experiment with different settings when taking pictures with an iPhone?
Experimenting with different settings on your iPhone is important for ensuring the best possible image quality. Different lighting conditions, subjects, and composition styles will all require you to adjust your exposure and focus settings accordingly in order to capture the clearest shot possible. Additionally, trying out new apps and filters can help you add interesting effects or color corrections to your photos. By experimenting with different options, you’ll be able to get the most out of your iPhone camera.
How to choose the right focus when taking pictures with an iPhone?
Choosing the right focus when taking photos with your iPhone is all about understanding what you want to emphasize in your shot. If you’re shooting a portrait photo, for example, then you may want to use a shallow depth of field (by adjusting your aperture setting) to blur out distracting elements and bring attention to the main subject. On the other hand, if you’re shooting landscapes or architecture shots, then it’s best to use a larger aperture so that more of the scene is in focus. You can also choose between manual and autofocus depending on how much control you need over your final image.
Is night photography possible with an iPhone 13?
Yes, night photography is definitely possible with an iPhone 13. The device comes equipped with Night Mode which will help you capture photos in low-light conditions. This feature works by extending the shutter speed and adjusting exposure to allow more light to hit the sensor. Additionally, newer models of the iPhone also offer HDR mode which can help reduce shadow clipping and bring out subtle details in your images. With these features combined, you should be able to get great results when shooting at night.
What shouldn’t you photograph at night?
When taking night photographs, you should avoid shooting scenes that contain artificial lighting or intense reflections. These can cause glare or a distracting “halo” effect in your photos. Additionally, avoid photographing people at night as the exposure settings may not be ideal and could result in blurry subjects. Finally, try to avoid shooting during times of heavy light pollution as this can affect your image quality and visibility of stars or other celestial objects.
Why is it important to take multiple shots when taking pictures with an iPhone?
Taking multiple shots when using your iPhone camera is important for ensuring you get the best possible image. By shooting multiple frames, you can compare them in order to select the sharpest and most well-exposed shot. Additionally, if you’re experimenting with a particular lighting or composition technique, then taking multiple shots can help you refine your approach and find the perfect look for your photo. Finally, having extra photos from a scene gives you more options to work with during post-processing which can help add that final creative touch to make your images stand out.
Where can you find tutorials on taking pictures with an iPhone?
There are plenty of online tutorials available to help you learn how to take the best photos with your iPhone. Websites such as YouTube and Skillshare offer step-by-step lessons on how to use specific features of your device’s camera, and more general photography blogs provide helpful tips and tricks for all levels of experience. Additionally, Apple itself offers a range of resources that can help you get the most out of your iPhone’s camera, including detailed video guides and user manuals.
Useful Video: How to take Night Photos with an iPhone (Like a Pro)
Conclusion
Taking night photos with an iPhone can be a fun and rewarding activity. It requires patience, practice, and experimentation to get the best results. With the right technique, anyone can take amazing night photos using their iPhone. Taking time to learn about the different exposure settings — ISO, shutter speed, focus mode — can help you create beautiful images that capture the beauty of nighttime scenes. By experimenting with these settings and understanding how they affect your final image, you can create stunning photographs that commemorate special occasions or unforgettable everyday moments. So, grab your phone and give it a try! You’ll be amazed at what you can achieve with just an iPhone camera when shooting night photography.
References
- https://9to5mac.com/2023/01/14/night-mode-on-iphone/
- https://iphonephotographyschool.com/shoot-at-night/
- https://www.imore.com/best-apps-taking-night-mode-photos-iphone