
Do you want to create a panorama with Google Photos? It’s actually a lot easier than you might think! In this blog post, a few photography experts will show you how to do it.
The Google Photos app will guide you through the process of taking multiple photos and stitching them together into one beautiful panorama!
Reasons to Make Panoramic Photos via the Google Photos App:
- To show off a beautiful landscape;
- To capture a large group of people;
- To get creative with your photography;
Where Can You Use Google Photos?
- On your Android phone;
- On your computer;
The experts will also provide some tips on how to make your panoramas look their best. So, let’s get started!
How to Make A Panorama in Google Photos:
1) How to get Google Photos to pan and stitch photos together into a panorama
Open the app and go to Assistant. In the CREATE NEW menu, select Photo Sphere. This will automatically start taking pictures in a 360-degree view as you pan around. When you’re done, tap Stop & Save [1].
You can also find this option by selecting the “+” sign in the bottom left corner of the screen and then choosing Photo Sphere from your list of options.
2) How to check if the metadata is there
When you open up the app, go to Assistant and select the photosphere that you just created. If it’s a normal panorama, you’ll see a message that reads “This isn’t a photosphere” at the bottom of your screen. However, if the metadata is there, you’ll see information about your camera’s position and orientation for each frame [2].
It’s simple to check whether your metadata is still connected to your photo if you’re using Windows 10.
Simply follow these steps:
- Find out where the picture is stored on your PC;
- C:\Windows directory -> Right-click it, and then choose Properties;
- Select the Details tab;
- To find out where you’re going, scroll all the way to the bottom of the page and look for GPS;
You can also check for this metadata by looking at the file information for your image. On a Windows computer, right-click on the image and select Properties.
Then go to the Details tab and scroll down until you see “Pose Heading Degrees”.
If that field is populated with data, then your image has 360-degree metadata.
3) How to reinsert the metadata
If you accidentally remove the metadata from your image, you can always add it back in with the help of special software. Some experts recommend using ExifTool or 360PhotoMetadata [3].
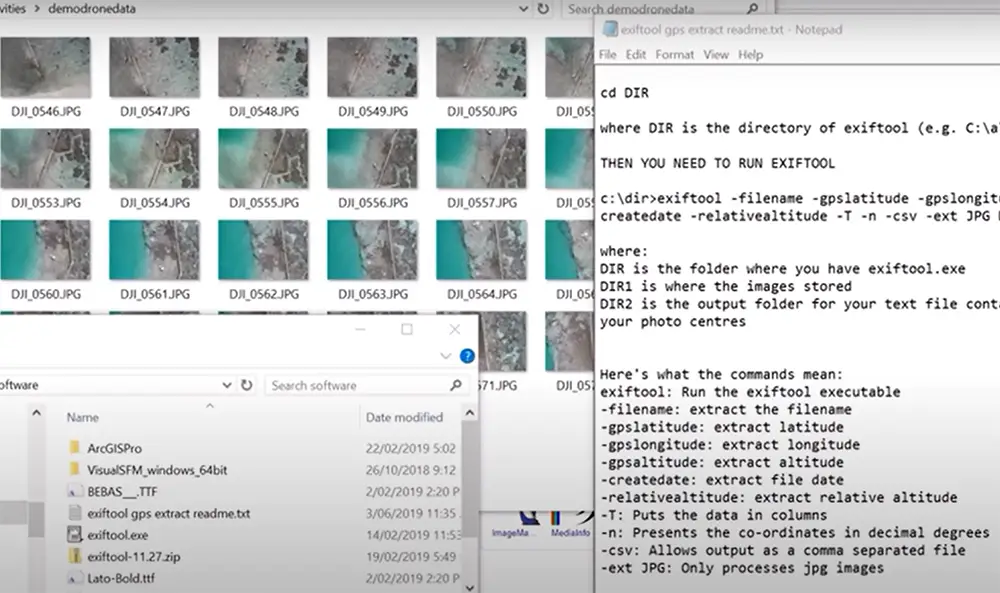
With these programs, you can simply open up your image file and then click on the “Edit” button to add back the GPS data. Once you’ve added this information, save your changes and then check to see if the metadata is now visible in Windows Explorer or other file browsers.
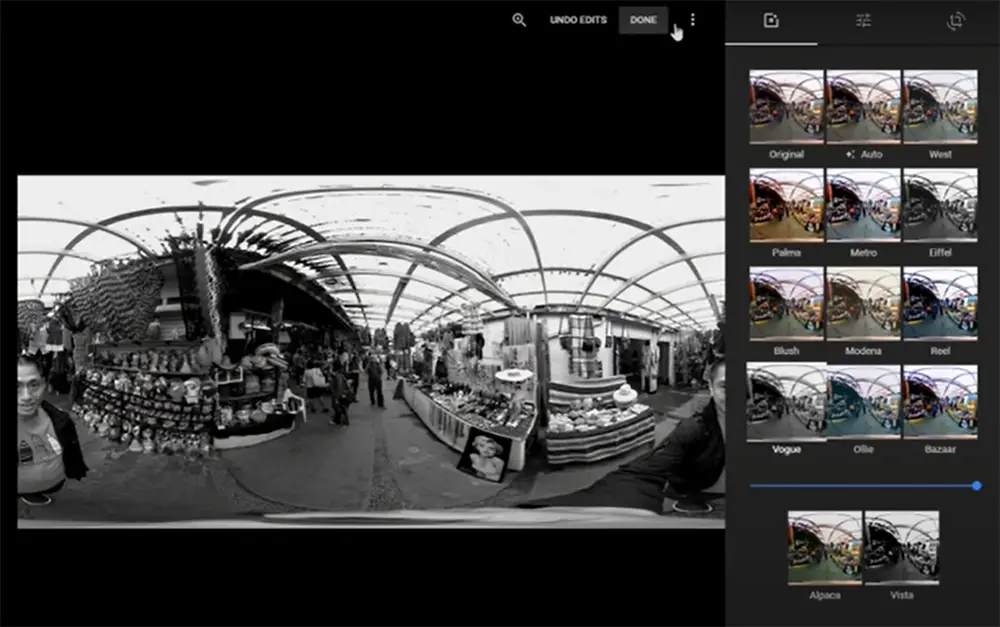
4) Add panoramic labels
After you’ve taken your panorama, you might want to add a label or description. This helps people know what they’re looking at when they see your photo.
To do this, open up the Google Photos app and go to Assistant. Select the photosphere that you just created and then tap on the pencil icon in the top right corner.
From here, you can add a title and description for your image. You can also choose to share your panorama with others or keep it private.
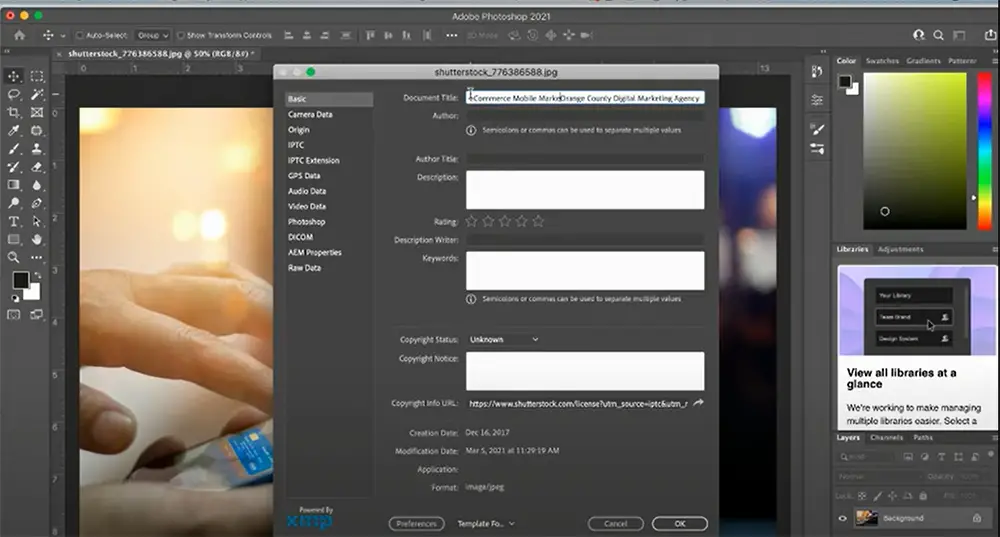
5) Add camera make and model
If you want to add the make and model of your camera to the image, you can do so by editing the EXIF data. To do this, open up your image in a photo editor like Adobe Photoshop.
Then, go to File > File Info. In the “Camera” section, type in the make and model of your camera. Save your changes and then check to see if the information is now visible when you view your file’s properties.
Adding this data can be helpful if you plan on sharing your panorama with others online. It helps people know what type of camera was used to take the photo, which can be important for things like licensing or attribution.
6) The image with reinserted metadata [4]:
- Scroll down to the bottom of the screen menu;
- Click on the blue Go.eXifing button to start processing your photo. The uploaded picture will be updated with the supplied information once you click on this button;
- If the confirmation box appears at the top, click on the X in the upper right corner of the menu, or leave it;
- Check the green Download me button beneath your picture. It’s unlikely you’ll want to save it under the same name as the original, so be sure to rename it before saving;
- Once you’ve done this for all of the photos you wish to turn into a panorama, upload them to Google Photos and wait for Google to process them;
7) Look around
From here, you can use your mouse or trackpad to click and drag around the image. You can also zoom in and out by scrolling with your mouse or trackpad.
Looking around a 360-degree photo can be a fun way to explore all the different details that you might have missed while taking the picture.
How to Make a Panorama in Google Photos: A Comparison of Key Indicators
Creating stunning panoramas can be a fascinating way to capture and relive breathtaking landscapes and cityscapes. Google Photos offers panorama-making features that allow users to merge multiple images seamlessly. In this table, we compare various indicators of panorama creation in Google Photos to help you understand its capabilities better.
| Indicator | Auto Panorama | Manual Panorama |
|---|---|---|
| Level of Effort | Low | Medium |
| Image Quality | Good | High |
| Stitching Accuracy | Decent | Excellent |
| Control over Composition | Limited | High |
| Time Required | Quick | Longer |
| Supported Devices | Most | Selective |
| Image Resolution | Standard | High |
| Processing Speed | Fast | Slower |
| Editing Options | Basic | Advanced |
Explanation:
- Level of Effort: Auto panorama feature requires minimal effort as it automatically stitches images together. Manual panorama creation demands more effort from the user to align and merge images accurately.
- Image Quality: Auto panorama delivers good image quality, while manual panorama allows for higher image quality due to precise alignment.
- Stitching Accuracy: Auto panorama produces decent stitching results, whereas manual panorama provides excellent accuracy, resulting in seamless panoramas.
- Control over Composition: Auto panorama offers limited control over composition as it automatically determines the alignment. Manual panorama grants users higher control for precise composition adjustments.
- Time Required: Auto panorama is quick to create, while manual panorama takes longer due to manual adjustments.
- Supported Devices: Auto panorama is supported on most devices, but manual panorama might be available on only certain high-end devices or through third-party apps.
- Image Resolution: Auto panorama typically produces standard resolution panoramas, while manual panorama can result in higher resolution panoramas due to advanced techniques.
- Processing Speed: Auto panorama processing is fast, while manual panorama processing might take more time, especially with large or complex panoramas.
- Editing Options: Auto panorama provides basic editing options like cropping and filters, while manual panorama offers more advanced editing features for further enhancements.
FAQ
Does Google Photos still make panorama?
Many smartphones and cameras come with the capacity to shoot panoramic photographs.
If your photos have all of their data, Google Photos can generate a panorama automatically:
- To do so, first select the “Albums” tab from the bottom menu;
- Then, tap on the “+” sign in the upper left-hand corner and select “Create”;
- From there, choose “Panorama”;
You’ll then be able to choose whether you want to use a pre-existing panoramic photo or create a new one using your camera. If you choose to create a new one, Google will provide helpful instructions on how to do so. After you’ve taken your panorama, it will automatically be saved in your album.
How do I stitch photos together in Google Photos?
If your photos are not all in the same place, you can still stitch them together into a panorama using the “Stitch Photos” tool:
- To do so, select the “Albums” tab from the bottom menu;
- Then, tap on the “+” sign in the upper left-hand corner and select “Create”;
- From there, choose “Stitch Photos”;
You’ll then be able to select up to nine photos from your camera roll that you’d like to stitch together. Once you’ve selected your photos, tap on the “Create” button and Google will do the rest. Your new panorama will automatically be saved in your album.
Can you turn a regular picture into a panoramic?
Creating panoramic photographs used to necessitate special equipment that ordinary photographers didn’t have, but Adobe’s introduction of Photomerge in Photoshop has made it possible for anybody with access to Photoshop to produce their own stunning panoramic photos.
How can you create a panorama photo from multiple images?
A few different ways that you can go about creating a panorama photo from multiple images. One way is to use Adobe Photoshop, which has a built-in tool called “Photomerge” that will automatically stitch together multiple images into a single panoramic image.
Another way is to use an online panorama stitching service like Hugin Online, which will take your multiple images and stitch them together into a single panorama that you can then download and share.
Finally, there are some standalone apps like Panorama 360 that you can use to create panoramas from multiple images on your mobile device.
How do you make a spherical panorama?
If you have a smartphone, chances are you’ve taken a panorama at some point. But what if I told you that you can make a spherical panorama?
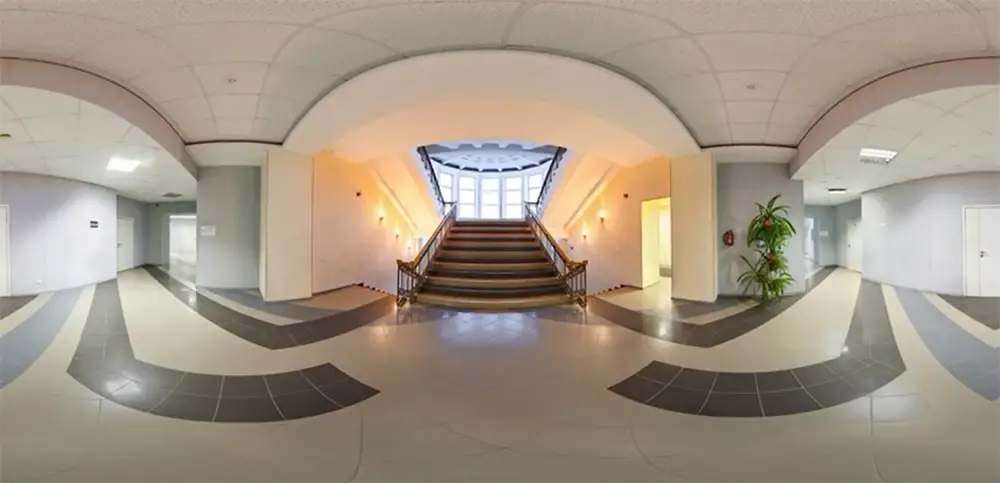
The spherical panorama is a 360-degree image that shows an entire scene. It’s like looking at the world through a giant sphere.
To make a spherical panorama, you’ll need to use an app or website that supports this type of image. Google Photos is one such app.
How do you make a 360 picture of an object?
To make a 360-degree photo of an object, you’ll need to use an app or website that supports this type of image. Google Photos is one such app:
- Open the Google Photos app and tap on the “+” sign;
- Select “Create a new album”;
- Name your album and add a description (optional);
- Tap on the “Add photos” button and select the images you want to include in your panorama;
- Tap on the “Create” button when you’re done;
How many photos do you need for a panorama?
The number of photos you need for a panorama will depend on the field of view that you want to capture. For example, if you want to capture a wide landscape, you’ll need more photos than if you’re just trying to capture a single building. In general, though, you’ll need at least 6 photos for a basic panorama [6].
What size is a panorama photo?
Panoramic pictures are a beautiful and creative way to spruce up your home or workplace. Starting at 6 inches tall and going up to 30 inches (2.5 feet). Panoramic photos can be as long as 13 feet in length. Your photograph will not be cropped or distorted when it is printed in a panoramic frame.
Most digital cameras have a panoramic setting that will automatically stitch your photos together. If your camera does not have this feature, or if you want more creative control over your image, you can use photo-editing software to create a panorama [7].
If you’re using an iPhone, iPad, or iPod touch, you can make a panorama with the built-in Panorama mode in the Camera app.
To take a panorama photo:
- Open the Camera app and swipe to Panorama;
- Position your device vertically. Tap the shutter button to start taking the picture. Slowly move your device from one side to the other while keeping it level. The arrow on the screen should remain centered on the line;
- When you reach the end of the scene, tap the shutter button again;
- You can also take a panorama photo with FaceTime HD Camera. Just follow the same steps as above;
What is the process of creating a panorama in Google Photos?
To create a panorama in Google Photos, you can use the built-in Photos app on your smartphone. Simply open the app, select the photos you want to stitch together, tap on the “+” icon, and choose “Panorama.” The app will automatically merge the selected photos into a seamless panorama.
Can I create a panorama from a single wide-angle photo in Google Photos?
No, Google Photos requires multiple photos taken in succession to create a panorama. You need to take several overlapping photos while panning the camera to capture the full panoramic view.
What devices support the panorama feature in Google Photos?
The panorama feature in Google Photos is generally available on most modern smartphones and tablets. Ensure that you have the latest version of the Google Photos app installed on your device to access this functionality.
Can I edit the panorama after creating it in Google Photos?
Yes, you can edit the panorama in Google Photos. Once you’ve created the panorama, you can apply various editing options like cropping, rotating, adjusting brightness, and more to enhance the final image.
How can I save or share the panorama after creating it in Google Photos?
After creating the panorama, you can save it to your Google Photos library or share it directly with others. Google Photos offers various sharing options, such as sharing via email, messaging apps, social media platforms, or by generating a shareable link.
Does Google Photos provide any automatic panorama stitching feature?
Yes, Google Photos uses its intelligent algorithms to automatically stitch together the selected photos and create a panorama without any manual intervention. This automated process ensures a seamless and effortless panorama creation experience.
Can I create 360-degree panoramas in Google Photos?
Google Photos primarily supports traditional horizontal panoramas. If you’re looking to create a 360-degree panorama, you may need to use specialized 360-degree camera apps or external equipment.
Is there a limit to the size or resolution of panoramas in Google Photos?
Google Photos allows you to create panoramas of varying sizes and resolutions, depending on the quality and number of photos used. However, extremely large panoramas might result in larger file sizes, so consider your device’s storage capacity while creating them.
Useful Video: 7 features of Google Photos for your 360 photo workflow
References:
- https://www.bollyinside.com/articles/how-to-make-a-panorama-in-google-photos/
- https://www.techjunkie.com/google-photos-panorama/
- https://www.bollyinside.com/articles/how-to-make-a-panorama-in-google-photos/
- https://www.techjunkie.com/google-photos-panorama/
- https://www.techwalla.com/articles/how-to-convert-photos-to-panoramic
- https://www.panoramic-photo-guide.com/virtual-tour-360-photography/how-many-photos-what-focal-to-make-a-virtual-tour.html
- https://www.targetphoto.com/prints-panos/panoramic-prints.html