
Have you ever gazed up at a star-filled night sky and wished you could capture its beauty for posterity? Well, now you can with your iPhone! Taking astounding pictures of the stars is easier than you might think. All it takes is some patience, a clear night sky, and the right knowledge to get the perfect shot. This blog post will explore how to take breathtaking photos of the stars with your iPhone, so strap in and come along for the ride!
Why take pictures of stars?
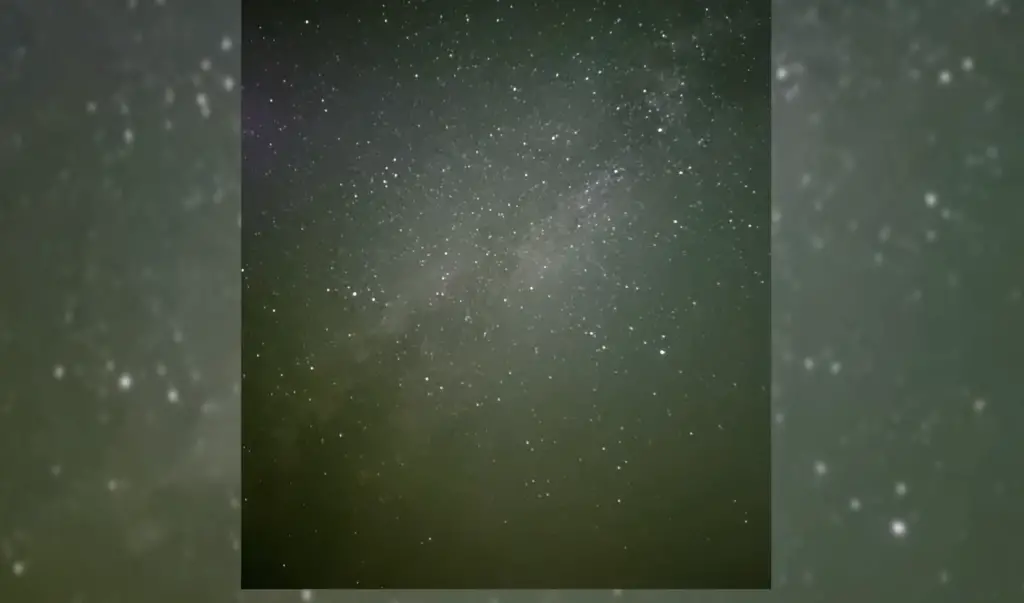
Taking pictures of stars is a great way to explore the night sky and appreciate its beauty. It can be an inspiring and rewarding activity that allows you to capture the vastness of space in a single image. Capturing starlight also allows us to see distant galaxies, nebulae, clusters, and other celestial phenomena that we wouldn’t be able to observe with our own eyes.
By taking pictures of the stars, we are also able to document changes in the night sky over time. Amateur astronomers use these photos as part of their research projects or simply as a means of showing off their astrophotography skills.
So, if you’re interested in exploring the night sky and learning more about astronomy, why not give star photography a try? It’s an incredibly rewarding activity that will open up a whole new universe of sights and discoveries! With a little bit of practice and guidance, anyone can take amazing pictures of stars. Plus, it’s also a great way to relax and get away from modern life for a while. So grab your camera and start shooting! You won’t regret it.
How to take pictures of stars with an iPhone?
Why do you need a special iPhone app for taking pictures of the stars?
Taking pictures of the stars requires a special camera app because many other apps don’t have the advanced features needed to take good photos of stars. These features include long exposure times, manual settings for shutter speed and aperture, adjustable ISO levels, and often built-in filters to reduce light pollution from street lights or nearby cities.
The best way to take pictures of stars with your iPhone is by using a third-party astronomy app like SkyView or Star Walk. These apps are specifically designed for capturing stunning night sky photography with an iPhone’s built-in camera. They offer user-friendly controls that allow you to adjust exposure time, focus on specific objects in the sky like planets and constellations, add labels and descriptions to your pictures, and even plan shooting sessions.
Once you have the right app for night sky photography, it’s time to get out there and start taking amazing shots of the stars! Here are a few tips to help you get started:
- Make sure you’re away from any light pollution – The best photos of stars are taken far away from cities or street lights so try to find a place with minimal light interference.
- Utilize your phone’s manual settings – Many apps provide access to your iPhone’s manual camera settings which will give you more control over exposure times and other variables.
- Experiment with different angles and compositions – When attempting star photography, don’t just point your camera towards the sky. Experiment with different angles to create interesting compositions and make sure to include recognizable scenery in the shot for context.
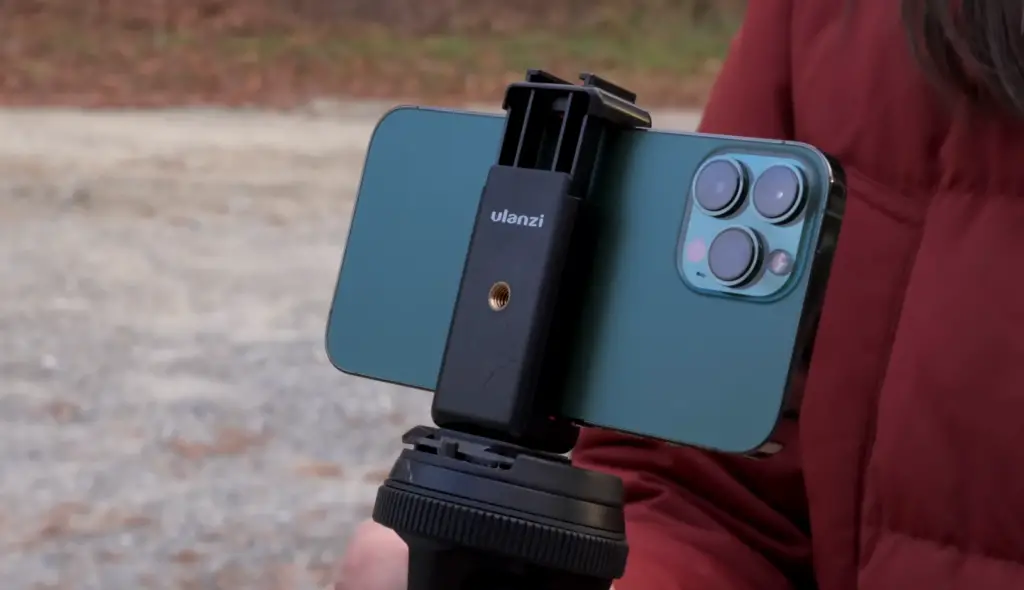
- Use a tripod or lens mount – While it’s possible to take star photos without any extra equipment, using a tripod or lens mount will get you better results since you can keep the camera still for longer exposures.
How to take iPhone pictures of stars with Slow Shutter Cam?
Slow Shutter Cam is a great app for taking pictures of stars with your iPhone because it offers a range of manual settings and filters specifically designed for night sky photography.
Once you’ve downloaded the app, open it up and tap on the “Night Mode” icon in the lower right corner. This will open up a menu where you can adjust various manual settings like shutter speed, ISO level, white balance temperature, focus mode, and more.
When you’re ready to take some star photos, point your phone towards the night sky and use the app’s built-in filters to reduce light pollution from nearby cities or street lights. Then adjust the shutter speed as needed to capture enough light without overexposing the image.
Settings for taking night sky photos with Slow Shutter Cam
When it comes to taking night sky photos with your iPhone, the most important settings you need to adjust are shutter speed and ISO level.
For shutter speed, you should start out at a low setting and gradually increase it until the stars appear as bright points of light rather than faint streaks of color. The exact shutter speed will depend on how dark the sky is where you’re shooting, so don’t be afraid to experiment!
In terms of ISO level, it’s best to keep it relatively low (100-200) to avoid grainy images. You can always adjust this later if needed but starting with a lower ISO is usually the best way to go.
How to take iPhone pictures of stars with NightCap?
NightCap is another great app for taking pictures of stars with your iPhone. It offers a range of manual settings that allow you to adjust shutter speed, ISO level, white balance temperature, and focus mode. When you’re ready to start shooting, open up NightCap and tap on the “Night Mode” icon in the lower right corner. This will bring up a menu where you can adjust the various settings mentioned above [1].
5 Best Astrophotography Apps for iPhone
NightCap Camera
NightCap Camera is one of the best astrophotography apps available for iPhone. This app has several features specifically tailored to make shooting astrophotos as easy and enjoyable as possible, from providing detailed information on the current astronomical conditions in your location to giving you access to two different modes for capturing stars. The Night View mode allows you to capture stunning photos of the night sky with long exposure times, while the Sky Survey mode takes multiple photos and stitches them together into one high-resolution image. NightCap Camera also works great with both wide-angle lenses and telephoto lenses making it a great tool for all levels of astrophotographers.
SkySafari 6 Plus
SkySafari 6 Plus is another powerful astrophotography app for iPhone. Unlike NightCap Camera, SkySafari 6 Plus is designed with the amateur astronomer in mind. This app includes a comprehensive and up-to-date database of over 200 million stars, galaxies, and other celestial objects that you can easily find with its built-in search engine. In addition to helping you locate and identify astronomical objects, SkySafari 6 Plus also comes packed with features such as a time-lapse option, star trail tracking, and an extensive library of animations illustrating the night sky’s motion throughout the year.
AstroPanel
AstroPanel is another great astrophotography app for iPhone users. This app focuses more on post-processing your photos than capturing them. With AstroPanel, you can quickly and easily adjust the white balance, contrast, saturation, and exposure of your photos to get the best possible image quality. You can also add special effects such as starburst or light trail effects which help make your astrophotos look even more stunning. The app also has a built-in library of presets so you can quickly apply pre-made settings to your photos with just one tap.
ProCam 8
ProCam 8 is the newest astrophotography app on this list. It’s designed to give you a professional level of control over your photos, with features such as manual exposure settings and RAW capture support. Additionally, the ProCam 8 has an impressive range of shooting modes that allow you to easily capture stunning nightscape shots, star trails, and more. This app also includes several helpful tutorials that will help guide you through capturing beautiful astrophotos with ease.
Halide
Halide is a powerful yet easy-to-use app that’s designed to simplify the process of capturing stunning astrophotos. This app has an intuitive and user-friendly interface, with features such as focus peaking and manual exposure settings making it easy to quickly capture great shots. Additionally, Halide also includes several helpful tutorials that will help you get the most out of your photos [2].
Photographing the stars on iPhone: a step-by-step tutorial
Step 1: Staying still is the key to success
When photographing the stars, it’s important to make sure that your iPhone stays as still as possible. It helps to have a tripod or some other stable surface to place your phone on so that you can ensure maximum stability. Even the slightest movement can ruin your shot, so be sure to take any necessary steps to keep your phone from shaking or moving.
Step 2: Check the weather conditions
Ideally, you’ll want to find a night with clear skies and minimal light pollution. This will help ensure that you get the clearest photos of the stars possible. If it’s raining or cloudy, then you won’t be able to capture any stars at all. Make sure to keep an eye on the weather forecast if you’re planning on photographing stars shortly.
Step 3: Adjust your camera settings
When setting up for a star photo, make sure to adjust your iPhone’s camera settings accordingly. For optimal results, set your exposure time as long as possible (usually 30 seconds is enough), reduce ISO sensitivity as much as possible (100-200 works great), and boost your f/number high (like f/2.8 or higher). Additionally, you may also want to adjust the white balance and focus for better results.
Step 4: Checking image quality
After you’ve taken your photos, make sure to check the image quality and see if there were any issues. If you notice that the stars are blurry or overexposed, then adjust your camera settings accordingly and try again. Be patient – it may take some trial and error before you get a photo that you’re happy with.
Step 5: Use Noise Reduction
Noise reduction can be a great way to reduce the noise in your photos and make them look even better. When using noise reduction, try to only adjust it slightly so that you don’t lose any important details.
Step 6: Editing & Final Touches
Once you’re done shooting, you can start editing your photos for an extra boost of quality. Adjusting the contrast, white balance, and exposure levels can help bring out more details in your shot. Additionally, playing around with other settings like saturation and sharpness will also help refine your photo further. Don’t forget to save your edits and then you’re all set [3]!
Editing photos of the stars with Luminar Neo
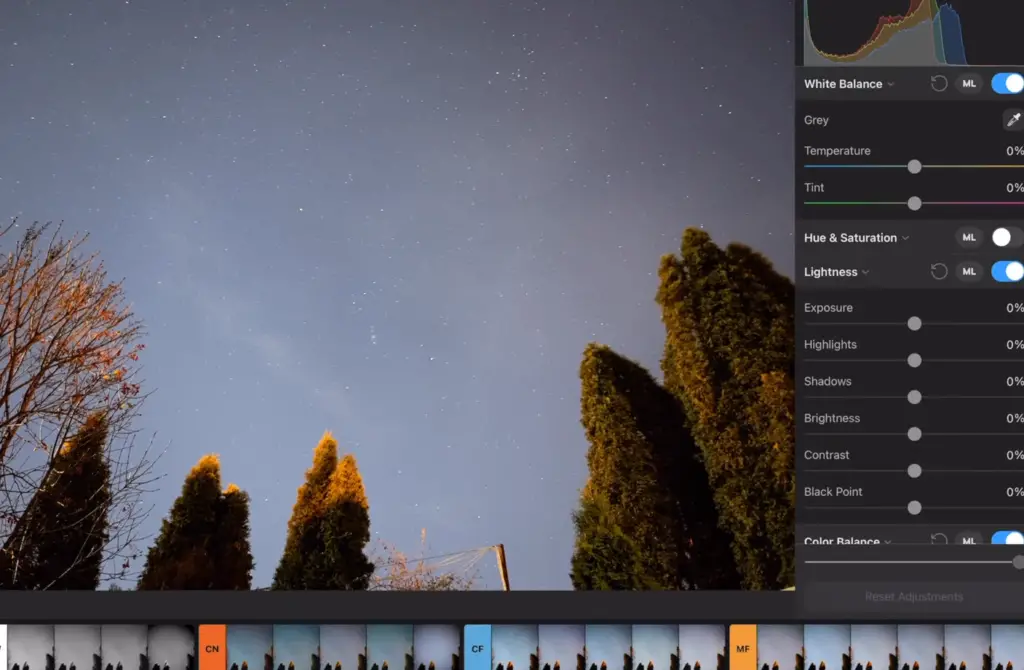
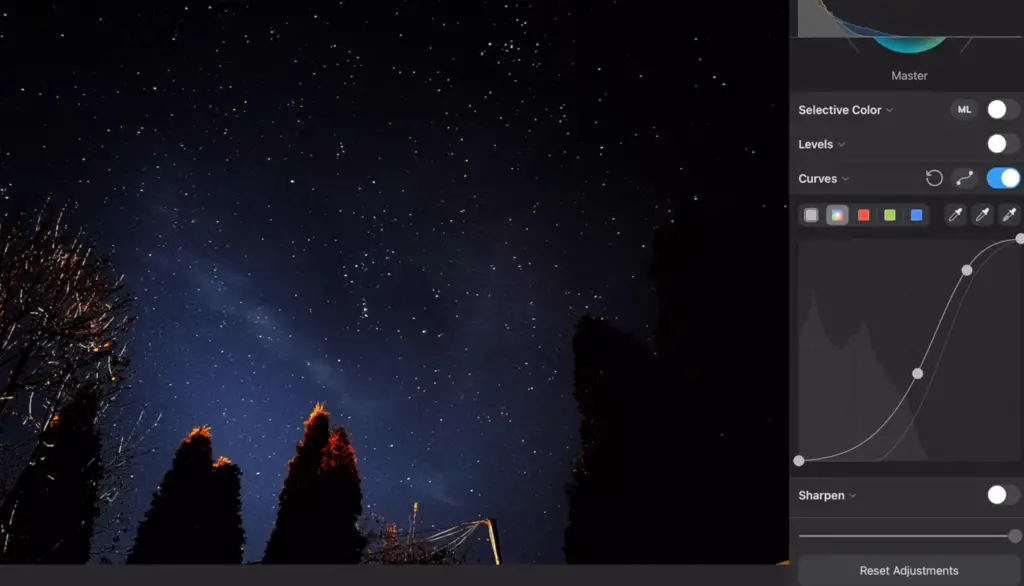
With its advanced features, you can make subtle adjustments to light and color tones or even apply creative filters to your shots. Whether you are a beginner taking your first photos of the night sky or an experienced astrophotographer, Luminar Neo offers you the tools needed to take your star photography to new heights.
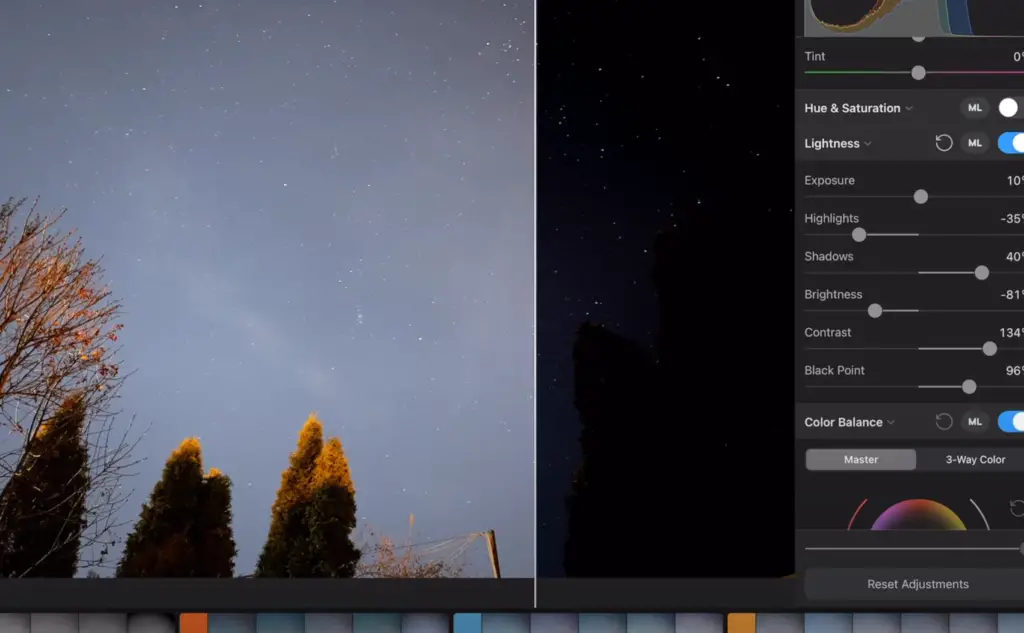
To get started with editing photos of the stars with Luminar Neo, begin by selecting the image from your library. You’ll then be presented with several options for adjusting and enhancing the shot. From here, you can tweak brightness and contrast levels to create a more dramatic look, apply special effects to highlight the stars or add color to create a dreamy effect.
Once you’ve achieved the desired look for your image, you can save it and share it with friends. As a bonus, Luminar Neo also allows you to make batch edits— meaning that you can quickly apply the same effects and adjustments to multiple photos at once. With this ability, editing photos of the stars becomes even easier!
By taking advantage of the features offered by Luminar Neo, you can create stunning images of the night sky. Whether you are just starting out in astrophotography or already have experience shooting starry skies, this powerful photo editor is sure to help take your shots to a new level of beauty. So, don’t wait — start creating spectacular star photos today with Luminar Neo [4]!
How to take pictures of stars creatively?
Taking pictures of stars can be a tricky and challenging task. However, with some patience, practice, and the right techniques and gear you can capture stunning photographs of the night sky. Here are some tips to help take your star photography to the next level:
- Use a sturdy tripod – A sturdy tripod is essential for taking sharp photos of stars. It will also allow you to take longer exposures without blurring the image due to camera shake or motion blur from hand-holding the camera.
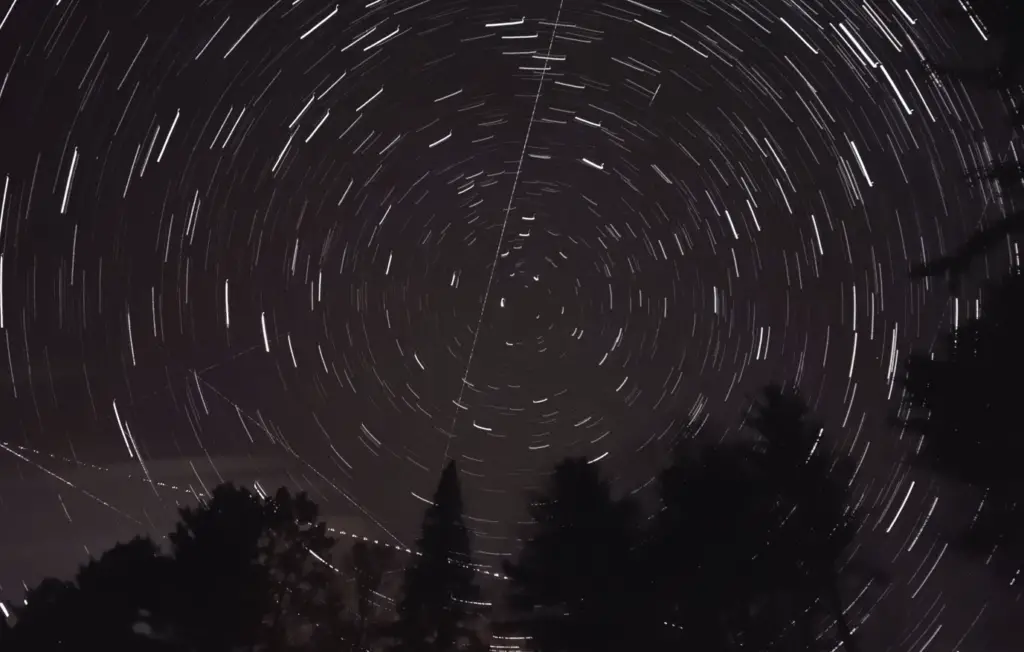
- Set your shutter speed appropriately – Aim for an exposure time between 15 seconds and 4 minutes depending on how bright your stars are in the night sky. The longer exposure time will create more star trails while shorter exposure times will reveal more stars and details in the night sky.
- Use a wide-angle lens – A wide-angle lens is ideal for star photography as it captures more of the night sky and allows you to include foreground elements that can help anchor your composition. A focal length between 14mm-35mm will work best for most star photography scenarios.
- Use manual focus – Manual focus will allow you to precisely set the right focus point so that your stars are sharp and clear in your photos.
- Utilize long exposure noise reduction (LENR) – LENR works by taking a second exposure while canceling out any digital noise that may have been introduced during the first exposure, resulting in cleaner and sharper images.
- Avoid light pollution – Light pollution can ruin a night sky photograph so try to find a spot away from city lights and street lamps.
- Take multiple exposures – Taking multiple exposures is the best way to ensure that your photos are properly exposed and to capture all of the details in the night sky. Try taking different exposure lengths and then blending them together in post-processing for stunning results.
- Experiment with creative techniques – Don’t be afraid to get creative with star photography! By experimenting with various shutter speeds you can create beautiful star trails or motion blur effects, and by using light painting techniques you can add color and dimension to your photographs of the night sky.
- Edit your photos – Post-processing can help you bring out the beauty of your star photos and make them shine. Experiment with various adjustments to achieve the desired look in your photos, such as increasing clarity and saturation, or playing around with colors and contrast.
Following these tips will help you create stunning photographs of stars that capture the beauty and mystery of the night sky. With some patience, practice, and creativity you can take amazing pictures that will be admired by everyone!
Where to use photos of the stars?
Photos of stars can be used in a variety of ways, from adding visual interest to websites and social media posts to designing marketing materials or creating art projects. Photos of celebrities can be used on websites to attract more visitors, create engaging content, and communicate messages quickly. They are also great for advertising campaigns and promotional materials, as they help generate positive attention from potential customers.
Additionally, photos of stars can be used in magazine layouts or book covers to give them an extra touch of glamor. Finally, they can also be used as inspiration for artwork, such as paintings or illustrations that feature realistic depictions of famous people. Ultimately, the possibilities for using photos of stars are nearly endless!
FAQ
Can an iPhone see stars?
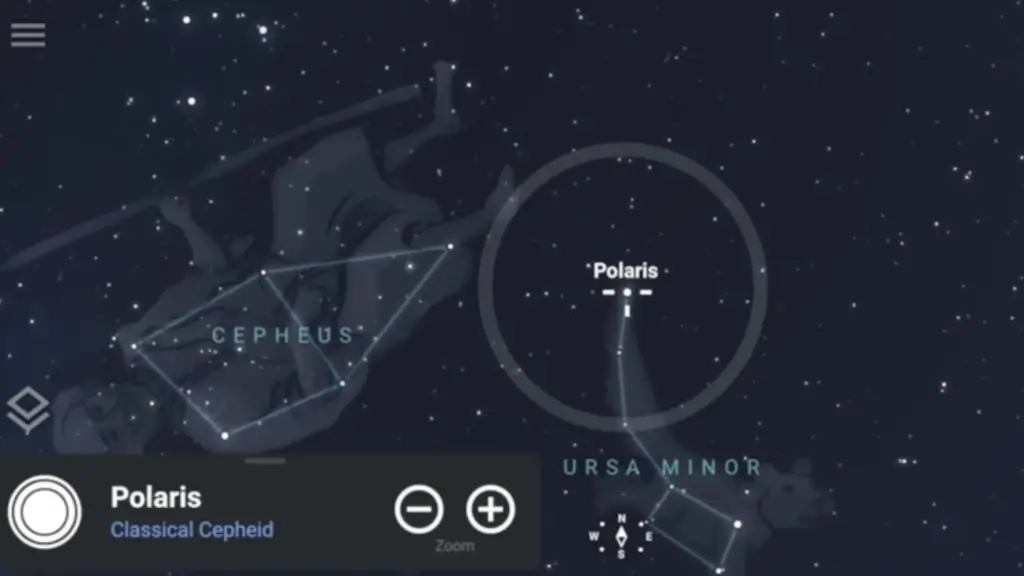
Yes, an iPhone can see stars. With the right app, you can use your phone to identify constellations, planets, and even galaxies. The Night Sky app is a perfect example of an app that allows people to explore the night sky in detail using their iPhones. It also has features such as augmented reality which makes it possible for users to point their phone at the sky and have real-time information about objects they’re looking at appear on their phones. Other apps like SkyView and Star Walk offer similar experiences as well. So, if you want to make use of your phone to observe and learn about the night sky, there are plenty of options available for you!
Can I use my iPhone as a telescope?
Yes, you can use your iPhone as a telescope. However, it won’t be as powerful or have the same capabilities as a real telescope. There are apps like Telescope X that allow users to connect their iPhones to telescopes and use the phone’s camera to magnify objects in the sky. But just keep in mind that this won’t give you the same level of detail or quality images that an actual telescope would give you.
What is the best app for stargazing with my iPhone?
The Night Sky app is often seen as one of the best apps available for stargazing with iPhones due to its intuitive interface and useful features like augmented reality. Other popular options include Sky View, Star Walk, and Telescope X. Each has its own unique features that may appeal to different people, so it’s best to try out a few before deciding on the one you like best.
Can I use my iPhone for astrology?
Yes, there are plenty of apps available that allow users to explore astrology and learn more about their zodiac signs using their iPhones. Astrology Zone is one such app that allows users to receive daily horoscopes and read in-depth articles about each of the 12 zodiac signs. Other popular choices include Co-Star, The Pattern, and Seek Your Stars. Whatever your interests in astrology may be, there is an app out there to fulfill them!
What camera settings are best for stargazing?
When it comes to taking pictures of the night sky using your iPhone, it’s important to make sure that the camera settings are optimized for stargazing. This includes setting the ISO speed low (around 100-400), having the exposure time at 15 seconds or lower, and increasing the shutter speed to reduce noise in the image. Additionally, you may want to use a tripod or some other type of stabilization device if you’re planning on taking long exposures. By making sure that your camera settings are properly adjusted, you can get better-quality images when stargazing with your iPhone!
How do you take a star picture on an iPhone 14?
Taking a star picture with an iPhone 14 is very similar to taking a star picture with other iPhones. First, make sure that you have the right app installed, and then adjust your camera settings based on the tips provided in the previous answer. Once you’ve done this, point your lens toward the stars and press the shutter button to take your shot. If you’re having trouble getting clear images of the night sky, try increasing the exposure time or using a tripod for better stabilization. With some practice and patience, you should be able to get great results when taking pictures of stars with an iPhone 14!
Can I use my iPhone to track satellites?
Yes, there are apps available that allow users to track satellites with their iPhones. The ISS Detector app is one of the most popular choices, as it allows users to track the International Space Station and other satellites in real time. Apps such as StarWalk and GoSatWatch also let people watch live satellite passes over their location. So, if you’re interested in keeping tabs on what’s going on up in space, there are plenty of apps available that will help you do just that!
Can I use my iPhone to measure distances between stars?
Yes, there are apps available that allow you to measure distances between stars using your iPhone’s camera. SkyView Lite is a great example of an app that can accurately calculate the distance from one star to another by using the phone’s camera and GPS. Other apps such as Star Tracker and GoSkyWatch Planetarium use similar technology to offer the same functionality. So, if you’re curious about the distances between stars, there are tools available that can help you out!
Can I use my iPhone to view planets?
Yes, there are apps available that allow users to view planets from their iPhones. Sky Guide is one such example that gives people the ability to view planets in real time and explore their features. Other popular choices include Star Walk, Solar Walk, and SkySafari. So, if you’d like to get a closer look at our solar system, these apps can help you do just that!
Can I use my iPhone to find comets?
Yes, there are apps available that allow users to find comets with their iPhones. Comet Hunter is one such app that lets people search for comets within their vicinity by using the phone’s GPS capabilities. Other options include Night Sky and GoSkyWatch Planetarium, both of which have features that make it easy for people to spot comets in the night sky. So, if you want to hunt for comets using your iPhone, there are plenty of apps that will help you do just that!
Which iPhone has stars mode?
Currently, the iPhone 11 Pro Max is the only model that has a “stars mode” feature. This mode allows users to take pictures of stars and other celestial bodies with ease by automatically adjusting the camera settings for optimal results. Other models like the iPhone 12 and 12 Pro also have a night mode, which allows you to capture stunning shots of the night sky as well.
How to do stars on an iPhone?
To take pictures of stars on an iPhone, you’ll need to have a special app installed. Star Walk is one such example that gives people the ability to take stunning shots of stars and other celestial bodies with ease. Once installed, simply point your lens toward the night sky and press the shutter button to snap your shot.
With some patience and practice, you should be able to capture beautiful photos of the starry night sky!
Why do you need the star mode on your iPhone?
The stars mode on an iPhone helps make it easier to take pictures of the night sky. This mode automatically adjusts the camera settings for optimal results, resulting in stunning shots of stars and other celestial bodies. Additionally, this feature is especially useful when taking long exposure or time-lapse photos as it ensures that your image will come out clear and free from noise. So, if you’re looking for a way to capture amazing shots of the night sky with your iPhone, the Stars mode is worth having!
How to choose a star app for iPhone?
When it comes to choosing a star app for your iPhone, there are several factors to consider. First, you’ll want to make sure that the app offers features such as real-time tracking of celestial bodies and detailed information about them. You’ll also want to look for apps with intuitive interfaces and user-friendly designs so that the experience is enjoyable. Finally, it’s important to choose an app that is regularly updated with new features and bug fixes. Some of the most popular star apps for iPhone include Sky Guide, Star Walk, Solar Walk, and GoSkyWatch Planetarium. With so many options available, you should be able to find the perfect app to help you get started on your stargazing journey!
Useful Video: How To Shoot The Stars With Your iPhone 13 Pro (Mobile Astrophotography) !
Conclusion Paragraph
Taking a picture of the stars with an iPhone is a great way to capture the beauty of the night sky. With the right settings, iPhone cameras can be used to capture stunning images with remarkable detail. By using different techniques such as long exposure and stacking multiple exposures, even more advanced photos can be created. Furthermore, by downloading astrophotography apps and making use of external lenses, users can create even more beautiful images of stars and galaxies. Although taking pictures of starry skies with iPhones may not produce professional-grade results, it still offers an amazing opportunity for amateur photographers to explore the night sky and capture its beauty in creative ways.
References
- https://iphonephotographyschool.com/night-sky/
- https://expertphotography.com/astrophotography-apps/
- https://skylum.com/uk/blog/tips-for-taking-awesome-night-sky-photos-on-iphone
- https://www.makeuseof.com/how-to-use-luminar-neo-more-effectively/